

Citizen Science: A Pathway to Gardening Success and Biodiversity Conservation
In recent years, the realm of science has experienced a remarkable transformation, one that invites people from all walks of life to participate actively in the pursuit of knowledge. This movement, known as citizen science, empowers individuals to contribute valuable data and insights to scientific research, often through simple yet meaningful tasks.

While citizen science has deep historical roots, modern platforms like iNaturalist have revolutionized the accessibility and impact of this approach.
In its essence, citizen science in the garden is an approach that harnesses the passion and knowledge of everyday individuals to observe and record nature to help gardeners make informed gardening decisions that foster ecological harmony.
Gardening is about more than just planting seeds and tending to crops; it's about cultivating a deeper connection with the natural world. By engaging in citizen science initiatives, gardeners can take this connection to new heights, contributing to scientific research while learning about the intricacies of and building their own biodiverse and resilient garden ecosystem.
One of the most exciting aspects of citizen science in the garden is its potential to shed light on the relationships between plants, insects, and other organisms. Through projects such as monitoring pollinator activity or tracking bird populations, gardeners can gather valuable data that helps scientists better understand local ecosystems and inform conservation efforts.
The strength of collective wisdom is undeniable. Being intricately connected to their local outdoors, gardeners involvement in building this wisdom and contributing to citizen science is significant. A notable citizen science initiative here in Australia is causing a stir within the gardening community. Enthusiasts intrigued by frogs and their potential presence in gardens are eagerly joining the "FrogID Australian Museum," app. This is an engaging citizen science project dedicated to monitoring frog populations in people's backyards and local communities. Participants contribute valuable data to aid researchers in better understanding frog habitats, behaviours, and population trends. FrogID also plays a crucial role in tracking the locations of Cane Toads and identifying areas where frogs thrive or face challenges. By correlating frog calls with weather patterns and habitat conditions, researchers gain insights into how different frog species adapt to a changing environment. Hop on board and be a part of this important research effort!
Citizen science apps are a great way to engage younger people in understanding and connecting to the natural world. The upcoming City Nature Challenge on April 26 presents an exciting opportunity for urban gardeners to engage in citizen science. This global event encourages people to explore and document the biodiversity in their cities using the iNaturalist app. By participating, gardeners can contribute valuable data about urban biodiversity whilst discovering the natural wonders hidden in their own neighbourhoods.
These projects not only benefit scientific research but also provide valuable insights for home gardeners. By learning about the flora and fauna in their area, gardeners can make informed decisions about plant selection and garden design, creating habitats that support local biodiversity and promote ecosystem resilience.
Furthermore, citizen science initiatives often provide opportunities for collaboration and community building. By connecting with fellow gardeners and scientists through online platforms or local events, participants can share knowledge, exchange ideas, and inspire one another to take their gardening efforts to new heights.
Citizen science holds tremendous potential to revolutionise the way we approach gardening and biodiversity conservation. By engaging in simple yet impactful activities, gardeners can contribute to scientific research, deepen their connection with nature, and foster a sense of community among fellow enthusiasts (citizen scientists). It's worth noting that citizen science activities are great for the whole family, offering a fantastic learning opportunity for kids as they explore and discover the wonders of the natural world alongside their parents, so don't forget to get the little people in your life involved, too!!
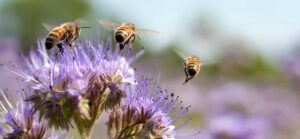
Discover how you can actively contribute to conservation efforts and organise your own bioblitz in our upcoming masterclass, Introduction to Citizen Science and Organising Your Own Bioblitz, hosted by Friends with Honey founder Helen Charles.


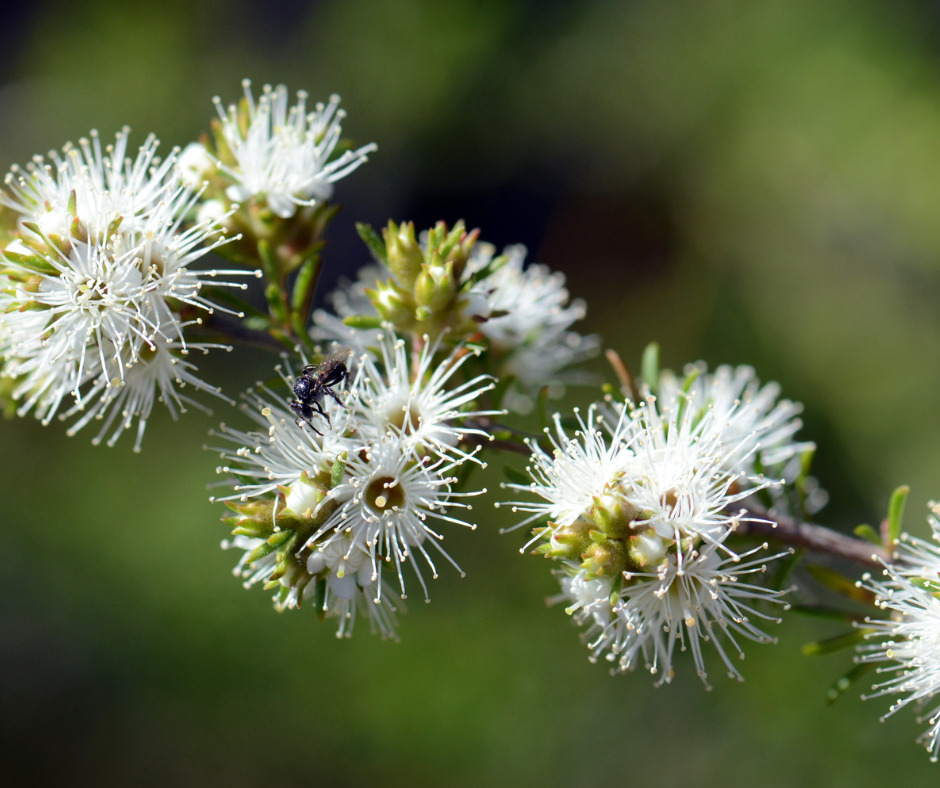
Wildflower gardens – What’s the buzz about?
In the quest for sustainable and environmentally conscious practices, gardening enthusiasts and nature lovers alike are turning to a time-tested technique: wildflower gardening. In this article, Dr Lena Alice Schmidt, pollination biologist and director at Buzz Ecology, delves into the intricate world of cultivating biodiversity through wildflower gardens in Australia.
Key points
- Vibrant wildflower gardens comprising native plant species with a variety of flower colours, flower shapes and flowering times attract a wide range of native insects, which rely on the floral resources provided (i.e. nectar and pollen) for their development and health.
- The total number of bee species in Australia is estimated to be 2000, while other insects, such as flies, hoverflies, moths, butterflies, wasps and ants, also provide important pollination services to both wild plants and food crops.
- Local plant species that are long-lived and flower at different times of the year are well adapted to the local environment and provide native fauna with resources year-round, making them low-maintenance choices for your garden while supporting biodiversity.
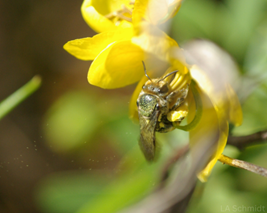
Pollination by insects is a critical ecosystem service for many Australian native plants and contributes to crop production; however, many populations of wild bees and other insects are in decline. There is a sheer diversity of insects – including native bees, flies, hoverflies, moths, ants and wasps – which deliver pollination services. While they move pollen between flowers, insects visit flowers primarily to forage for nectar or pollen. Nectar contains carbohydrates which are important for insect flight, while pollen provides protein and other minerals which promote growth and development.
Different insect groups have different nutritional requirements.
While bees forage for both nectar and pollen, pure nectar feeders include butterflies and moths, which consequently prefer flowers with higher quantities of nectar. Nectar and pollen vary in quantity and composition across plant species, so do flower colour, shape and scent. These are all traits that have evolved to entice insects (and other fauna) to visit flowers and pollinate them for the plant to be able to reproduce.
Locally-adapted plant species are more likely to provide suitable flowers
and resources to the local insects.
From the insect perspective, many of our native pollinators have co-evolved with certain plant species and as such have innate preferences for flowers with specific colours, shapes or smells. The shape of the flower can restrict access to pollen and nectar; tubular flowers, for example, only offer resources to long-tongued insects like blue-banded bees (Amegilla spp.). If your wildflower garden consists of a variety of local plant species you are providing dietary diversity to the local insect community.
Native insects need a varied diet continuously throughout the year to keep buzzing.
Particularly in landscapes lacking in numbers and varieties of plant species due to landscape simplification and loss of natural habitats, insects can struggle to find adequate floral resources year-round. Additionally, more frequent bushfires combined with widespread drought can further reduce floral resource availability in native habitats. Planting a range of locally sourced, native plant species that are predominantly perennial and thus long-lived and flower at different times of the year can fill resource gaps. Plants that are normally found in the area are also better adapted to survive and thrive under the climate conditions experienced in our local landscapes and can persist for longer without needing to be re-established.
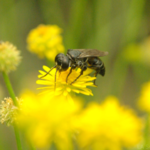
Wildflower gardens consisting of different vegetation layers (i.e. herbs, bushes, trees) can not only offer diverse floral resources, but also provide insects and other native fauna with sites for nesting and resting, supporting biodiversity and your local ecosystem.
If you are keen to create a wildflower garden for native bees and other insects, read more here:
https://www.researchgate.net/publication/347561274_Keeping_our_wild_pollinators_buzzing
Article and photographs copyright to Lena Alice Schmidt.
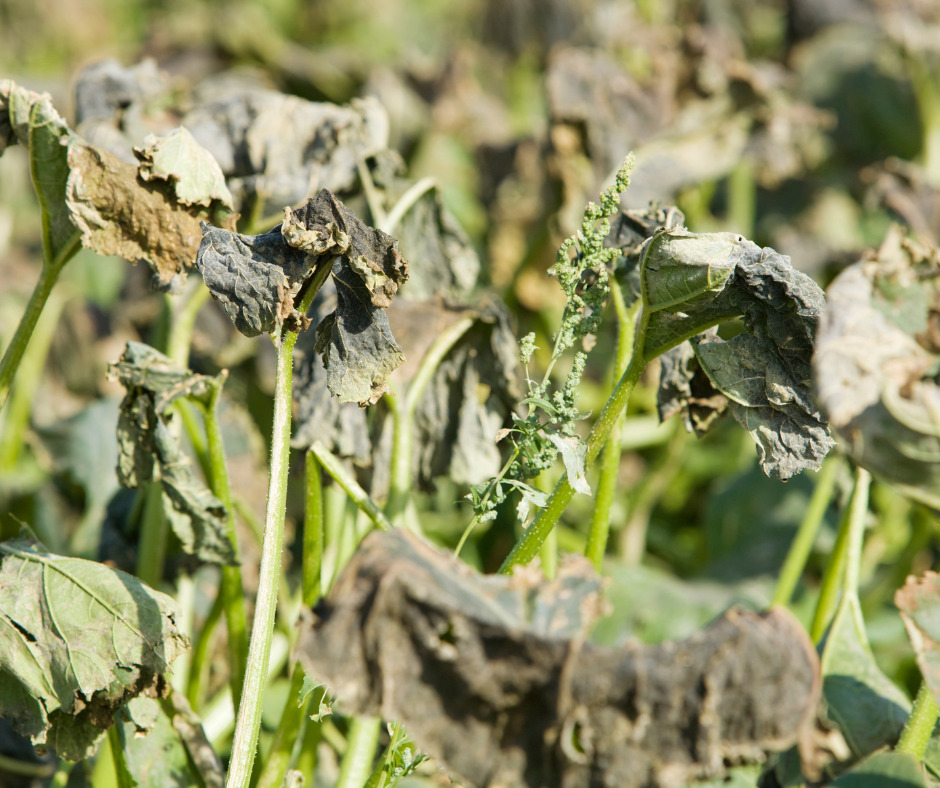
Thriving in the Heat: Managing Plant Heat Stress
As the mercury rises, your garden confronts the challenge of heat stress. Understanding how various plants respond to heat and employing appropriate strategies to shield them from excessive temperatures are essential for ensuring their well-being. Heat stress often leads to wilting, particularly in leafy greens like lettuce and spinach. To counter this, provide shade during the hottest parts of the day and ensure consistent watering. For fruits like tomatoes, excessive heat can affect fruit setting, so consider mulching to regulate soil temperature. Embrace heat-tolerant varieties, and prep your garden by adding organic matter to the soil to improve water retention.
Signs of heat stress include:
- Leaf Curling: Look for wilting or curling leaves, especially on the edges, which is a common indicator of heat stress.
- Discoloration: Changes in leaf colour, such as browning or yellowing, may signal that the plants are struggling with excessive heat.
- Stunted Growth: If your plants are not reaching their expected height or appear smaller than usual, it could be a response to heat stress.
Mitigating Heat Stress:
- Mulching: Apply a layer of organic mulch around plants to retain soil moisture, regulate temperature, and suppress weeds.
- Proper Watering: Water deeply and consistently, preferably in the early morning or late evening, to minimise water loss and support plant hydration. Introducing wicking beds can be instrumental in maintaining a readily available water supply.
- Shade Structures: Install shade cloth or create natural shading with taller plants to protect vulnerable crops from direct sunlight during peak hours.
- Soil Moisture Management: Use soil moisture meters to monitor moisture levels and avoid overwatering or underwatering.
- Incorporating perennials: Consider incorporating perennials into your summer garden for a resilient and thriving landscape. Unlike annuals, perennials boast more established root systems, offering increased resilience during the heat. These well-rooted plants can better withstand water stress, making them ideal for maintaining garden vibrancy through the hottest months.
By recognising the signs of heat stress and implementing effective solutions like mulching and shade provision, you can keep your summer garden looking lush. Experiment with diverse heat-resistant crops, such as capsicum, sweet potatoes, okra, and zucchini, to create a productive garden that withstands the challenges of summer.

The Importance of building soil health for a biodeverse, productive garden
Creating a thriving garden that not only sustains itself but also contributes to the broader ecosystem requires more than just sunlight and water. The secret to a successful, biodiverse, and highly productive garden lies beneath the surface – in the health of your soil. In this article, we'll explore the crucial role of soil health in fostering biodiversity and ensuring the productivity of your garden.
Nutrient-rich soil nurtures healthy plants

Soil serves as the primary source of nutrients for plants. A well-balanced, nutrient-rich soil provides plants with the essential elements they need to grow and produce. Adequate levels of nitrogen, phosphorus, potassium, and other micronutrients are vital for plant health. When soil health is optimised, plants are better equipped to resist pests and diseases, resulting in a more robust and productive garden.
Microbial activity enhances soil fertility
Healthy soil is teeming with microbial life, including bacteria, fungi, and other microorganisms. These tiny organisms play a crucial role in breaking down organic matter, releasing nutrients, and improving soil structure. Beneficial microbes form symbiotic relationships with plant roots, aiding in nutrient absorption and disease prevention. By fostering microbial activity, gardeners create a self-sustaining ecosystem where plants and soil organisms work together harmoniously.
Soil structure affects water retention and drainage
A well-structured soil with a good balance of sand, silt, and clay particles allows for optimal water retention and drainage. This is essential for preventing waterlogged or overly dry conditions, both of which can be detrimental to plant health. Building soil organic matter through the addition of compost and other organic materials enhances soil structure, promoting aeration and creating an environment where plant roots can thrive.
Biodiversity in the soil supports plant diversity
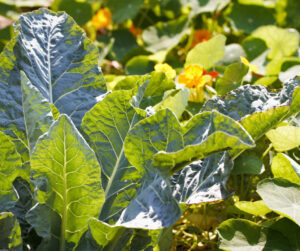
The health of your garden extends beyond what meets the eye. A diverse community of soil-dwelling organisms contributes to a balanced ecosystem. Earthworms, insects, and other invertebrates aerate the soil, break down organic matter, and contribute to nutrient cycling. The presence of these organisms is a sign of a healthy and biodiverse soil, which, in turn, supports a wide range of plant species in your garden.
Reducing the need for chemical inputs
A robust soil ecosystem can naturally suppress pests and diseases, reducing the reliance on synthetic pesticides and fertilisers. When soil health is prioritissed, the garden becomes more resilient, and the need for chemical interventions decreases. This not only benefits the environment but also promotes the long-term sustainability of your garden.
In the world of gardening, healthy soil is the unsung. By prioritising soil health, gardeners can create a self-sustaining ecosystem that fosters biodiversity, supports plant growth, and yields abundant harvests. Building soil health is an investment in the long-term vitality of your garden, offering benefits that extend far beyond the surface. So, dig in, nurture your soil, and watch as your garden flourishes.
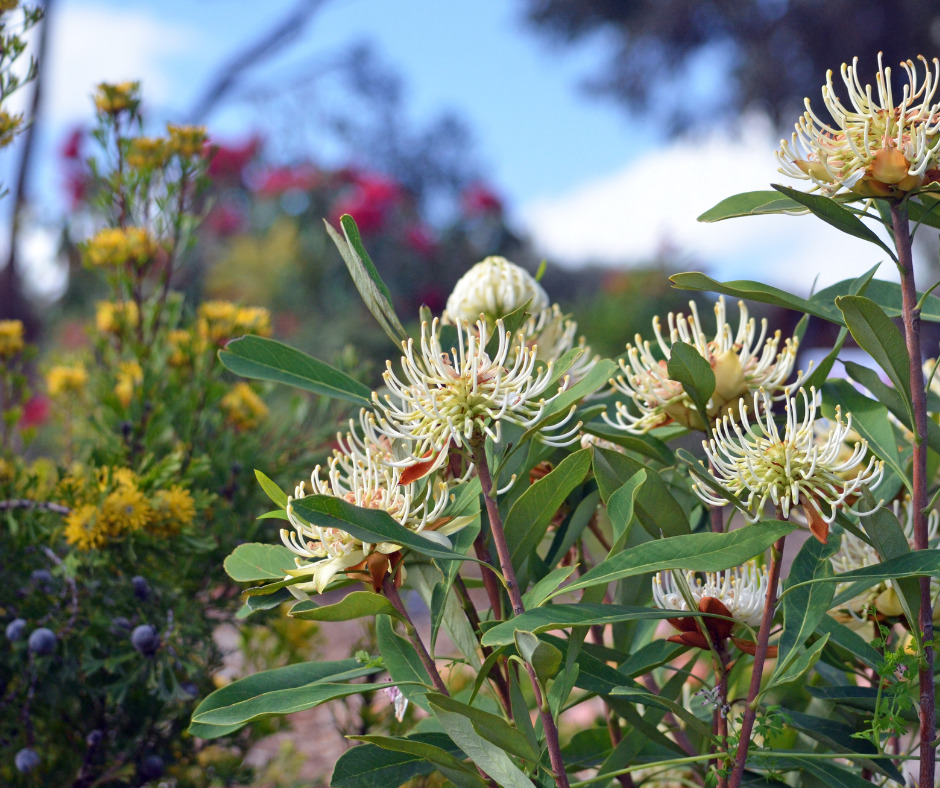
Cultivating Biodiversity: Wildflower Gardening
As we become increasingly aware of the importance of preserving our natural ecosystems, one simple and powerful way to make a positive impact is by planting native flowers in your garden. Australia, with its unique and diverse range of flora and fauna, offers an ideal setting for wildflower gardening. This article explores the numerous benefits of wildflower gardening and how it can support native insects to create a thriving and sustainable local ecosystem.
The Case for Wildflower Gardens
Australia's rich flora and fauna make it an ideal canvas for wildflower gardening. Here are a few reasons why you should consider planting native Australian wildflowers.
Fostering Biodiversity
Native flowers are a potent tool to nurture biodiversity in your vicinity. A mix of flowering plants accommodates a diverse range of native insects, ensuring a year-round haven for them.
Essential Pollinators
Native insects, including bees, flies, wasps, and even ants, play a critical role in pollination. By creating a thriving habitat for these crucial species, you enable the reproduction of countless plant species. At the same time, it increases the yields of your home-grown produce. From the delicious fruits and vegetables in your garden to the beautiful flowers adorning your landscape, insect pollinators are the unsung heroes behind a bountiful harvest.
Natural Pest Control
In addition to pollination, native insects also offer valuable pest control services. They prey on harmful insects that might otherwise damage your garden and crops. This natural form of pest control reduces the need for chemical pesticides.
Low-Maintenance Choices
Native flowering species are well-adapted to the local climate and soil conditions, making them low-maintenance choices for your garden. They have evolved to thrive in Australia's specific environmental conditions, reducing the need for excessive watering and fertiliser. This helps save time, effort, and money.
Enjoying the Beauty of Native Flora
In addition to their ecological benefits, native flowers offer a stunning array of colours and shapes that can transform your garden into a vibrant and beautiful space.
Growing Your Wildflower Garden: A Short Planting Guide
Kickstart a wildflower garden with this list of native Australian wildflowers that you can use to attract native insects to your garden, along with the insects they can attract and their benefits:
Billy Buttons (Craspedia spp.)
- Attracts: Native bees and butterflies.
- Benefits: Billy Buttons produce vibrant yellow spherical flowers that provide nectar for native bees and are a food source for butterflies.
Kangaroo Grass (Themeda triandra)
- Attracts: Native grasshoppers and caterpillars.
- Benefits: Kangaroo Grass serves as a host plant for various native insects, making it an essential component of a balanced ecosystem.
Common Everlasting (Chrysocephalum apiculatum)
- Attracts: Native bees, butterflies, and moths.
- Benefits: The yellow flowers of this perennial attract a range of pollinators, while the foliage provides habitat for small insects.
Bush Pea (Pultenaea spp.)
- Attracts: Native bees, beetles, flies, and hoverflies.
- Benefits: Bush Pea plants have bright yellow or red flowers that are a nectar and pollen source for native bees and other pollinators, supporting biodiversity in your garden.
Mulla Mulla (Ptilotus spp.)
- Attracts: Native bees, butterflies, wasps, moths, and bee flies.
- Benefits: The unique cylindrical flowers of Mulla Mulla are an excellent nectar source for native bees and a striking addition to your garden.
Geraldton Wax (Chamelaucium uncinatum)
- Attracts: Native bees, flies, beetles, and honeyeaters.
- Benefits: The fragrant flowers of Geraldton Wax attract native bees and nectar-feeding birds like honeyeaters, contributing to pollination and local bird diversity.
Hakea (Hakea spp.)
- Attracts: Native bees, moths, ants, wasps, beetles, small marsupials, and honeyeaters.
- Benefits: Hakea plants produce nectar- and pollen-rich flowers, making them a valuable resource for native bees and butterflies in your garden.
Dampiera (Dampiera spp.)
- Attracts: Native bees, hoverflies, and small native wasps.
- Benefits: Dampiera's vibrant blue or purple flowers provide nectar for native bees and offer nesting sites for small wasps.
Emu Bush (Eremophila spp.)
- Attracts: Native bees and honeyeaters.
- Benefits: Emu Bush is well-known for its tubular flowers, attracting various pollinators, particularly native bees and nectar-feeding birds.
Daisy Bush (Olearia spp.)
- Attracts: Native bees, hoverflies, beetles, flies, moths, and butterflies.
- BeDiscover Wildflower Gardening: Attract native insects and reap the rewards: Daisy Bush, with its white or pink daisy-like flowers, provides nectar and pollen for native bees and a food source for butterflies.
These native wildflowers offer a diverse range of colours, shapes, and sizes to enhance the beauty of your garden while supporting local ecosystems. By planting these species, you will provide food and habitat for a wide array of native insects, contributing to the health of your garden and the broader Australian environment. Win-win.
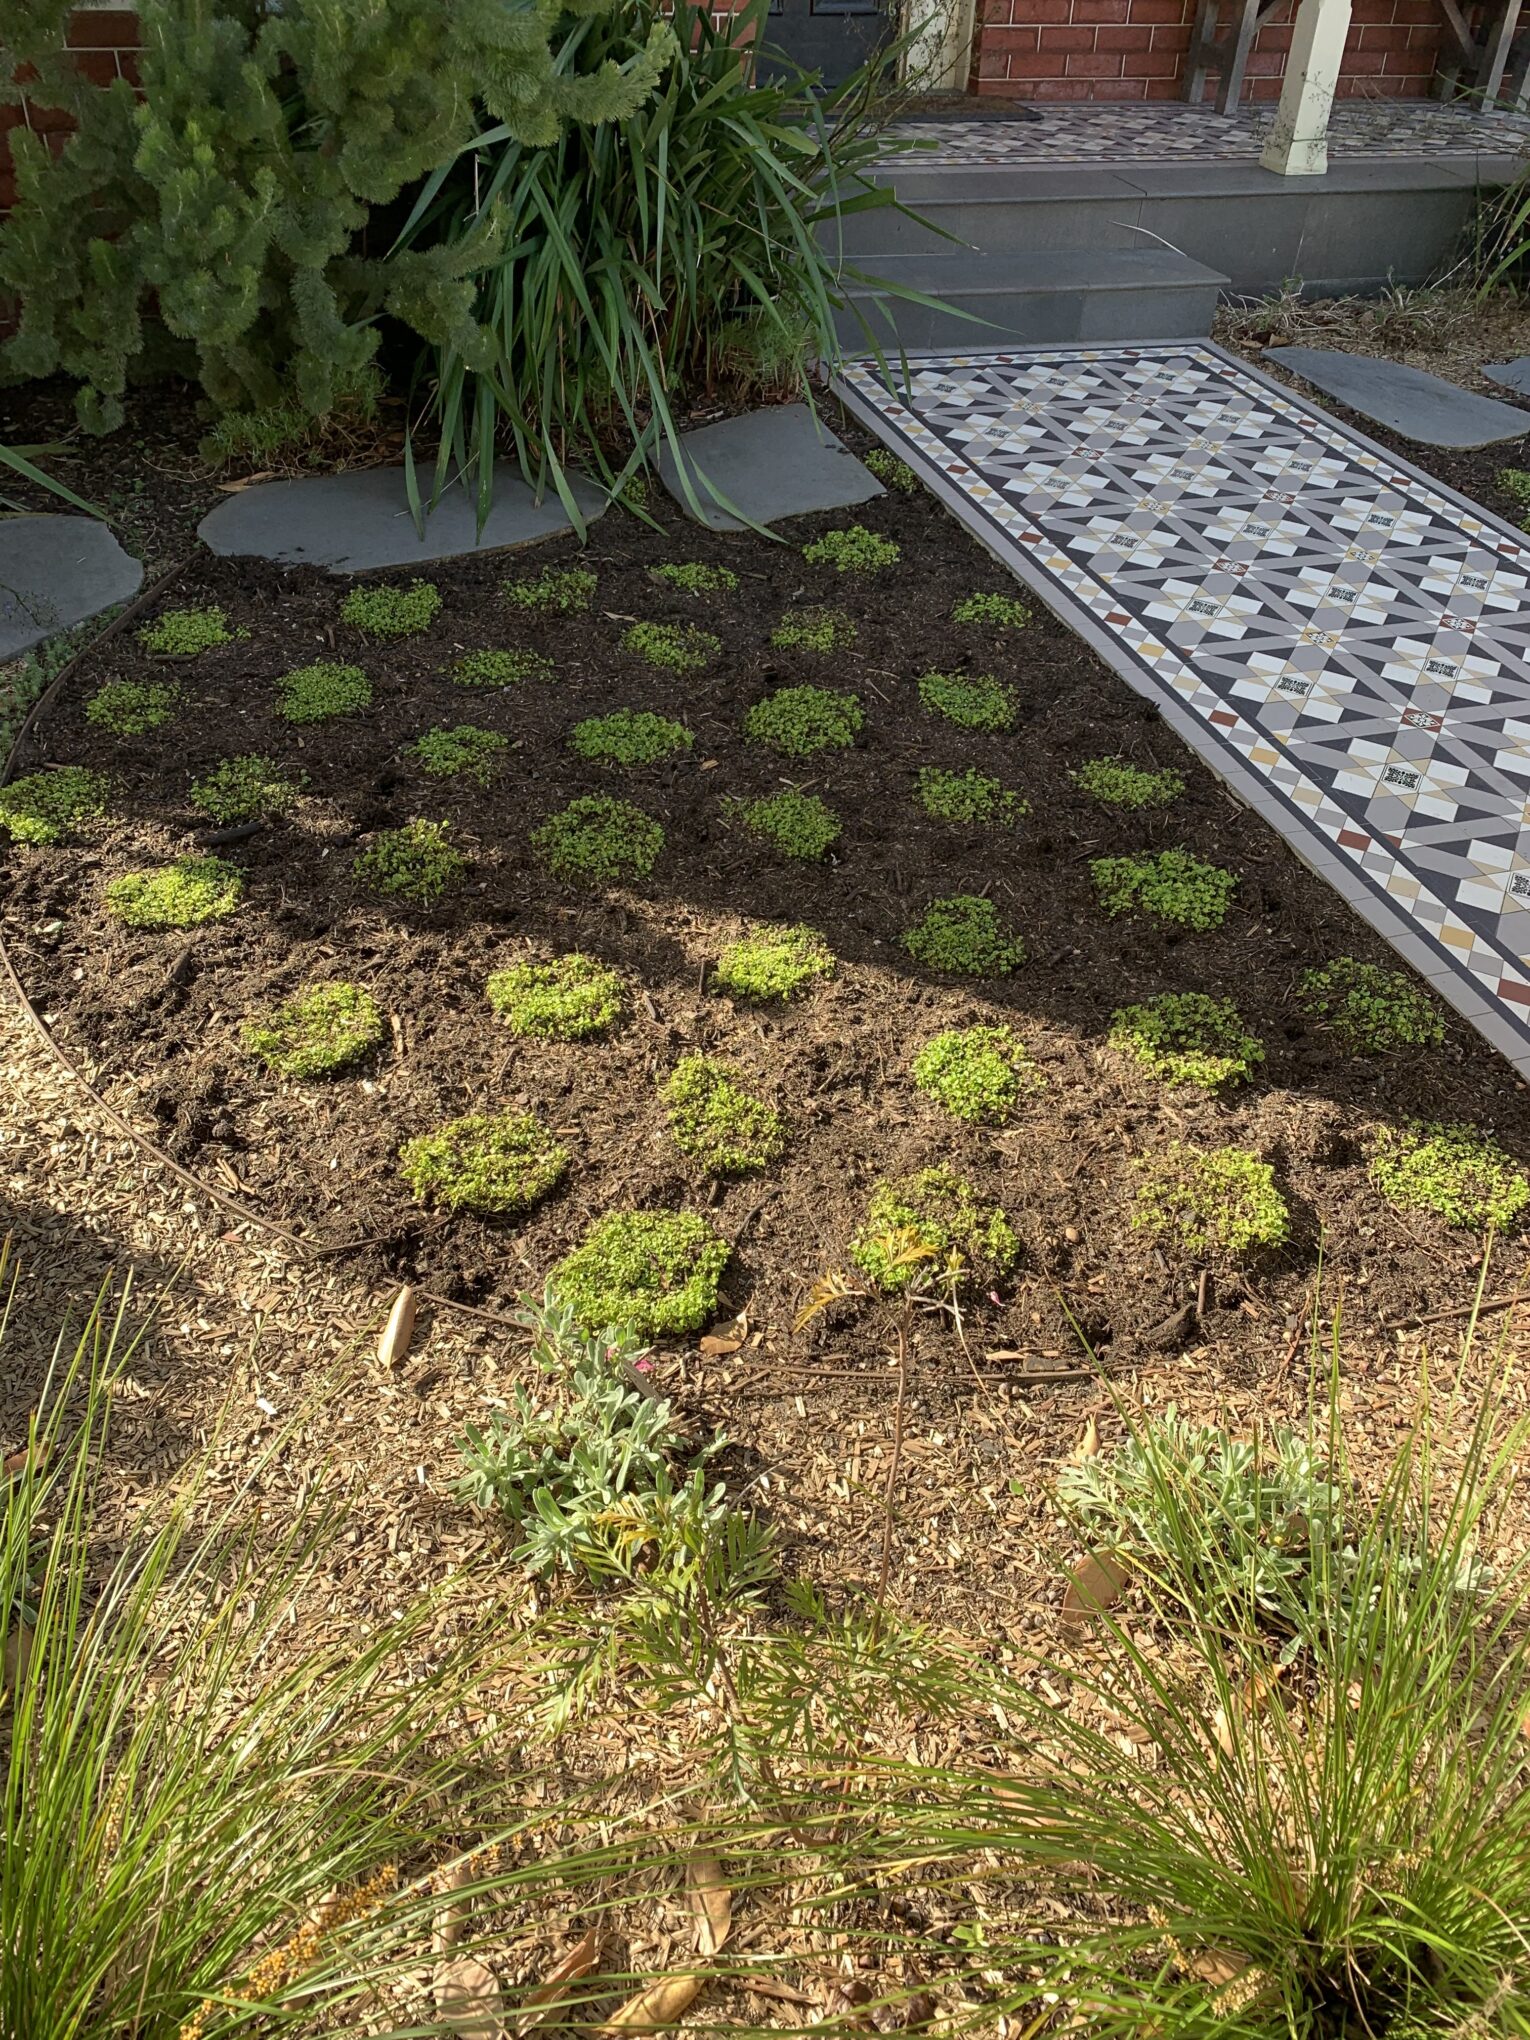
No Mow Lawn
Traditional lawns, often characterised by their lush, manicured appearance, have long been the norm in Australian landscaping. However, an exciting and eco-conscious alternative is gaining traction across the country – the no mow lawn. These natural, wilder landscapes have numerous benefits that go far beyond aesthetics, making them a compelling choice for environmentally conscious homeowners. In this article, we explore the advantages of embracing a no mow lawn in Australia.
Biodiversity Boost
One 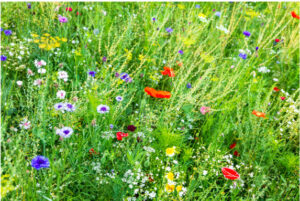 of the most compelling benefits of a no mow lawn is the promotion of biodiversity. Traditional lawns, with their uniform grass species, offer limited habitat and forage opportunities for local wildlife. In contrast, no mow lawns feature a diverse mix of native grasses, wildflowers, and other plants that attract pollinators, birds, and insects. This thriving ecosystem can help support local wildlife populations and even contribute to the protection of endangered species.
Water Conservation
Australia's climate is often characterised by periods of drought and water scarcity. Maintaining a traditional lawn can be water-intensive, as it requires frequent irrigation to stay green and lush. No mow lawns, once established, are generally more drought-resistant and can thrive with minimal watering, reducing the strain on precious water resources.
Low Maintenance
 No mow lawns are aptly named for their minimal maintenance requirements. Unlike traditional lawns that necessitate regular mowing, fertilising, and herbicide use, these natural landscapes thrive with little intervention. This not only saves homeowners time and effort but also reduces the need for harmful chemicals and emissions associated with lawn maintenance equipment.
Soil Health
The continuous mowing of traditional lawns can lead to soil compaction and degradation. In contrast, no mow lawns encourage healthy soil ecosystems. The presence of native plants and deep-rooted grasses in no mow lawns can improve soil structure, increase nutrient cycling, and enhance water infiltration. This, in turn, helps combat erosion and fosters a more resilient landscape.
Aesthetic Appeal
No mow lawns have a unique and natural beauty that can enhance the overall aesthetics of your property. The varied colours, textures, and heights of the plants provide year-round visual interest, with seasonal blooms adding bursts of color. Moreover, these landscapes can offer a tranquil and calming environment, perfect for relaxation and contemplation.
Conclusion
Embracing a no mow lawn in Australia is not just a landscaping choice; it's a commitment to environmental stewardship. These wilder, more natural landscapes offer a multitude of benefits, from promoting biodiversity and conserving water to reducing maintenance and enhancing soil health. As climate change and environmental concerns continue to rise, choosing a no mow lawn becomes a meaningful and sustainable way to contribute to a greener, healthier future for both your property and the planet. So, why not consider joining the green revolution and letting your lawn go wild?
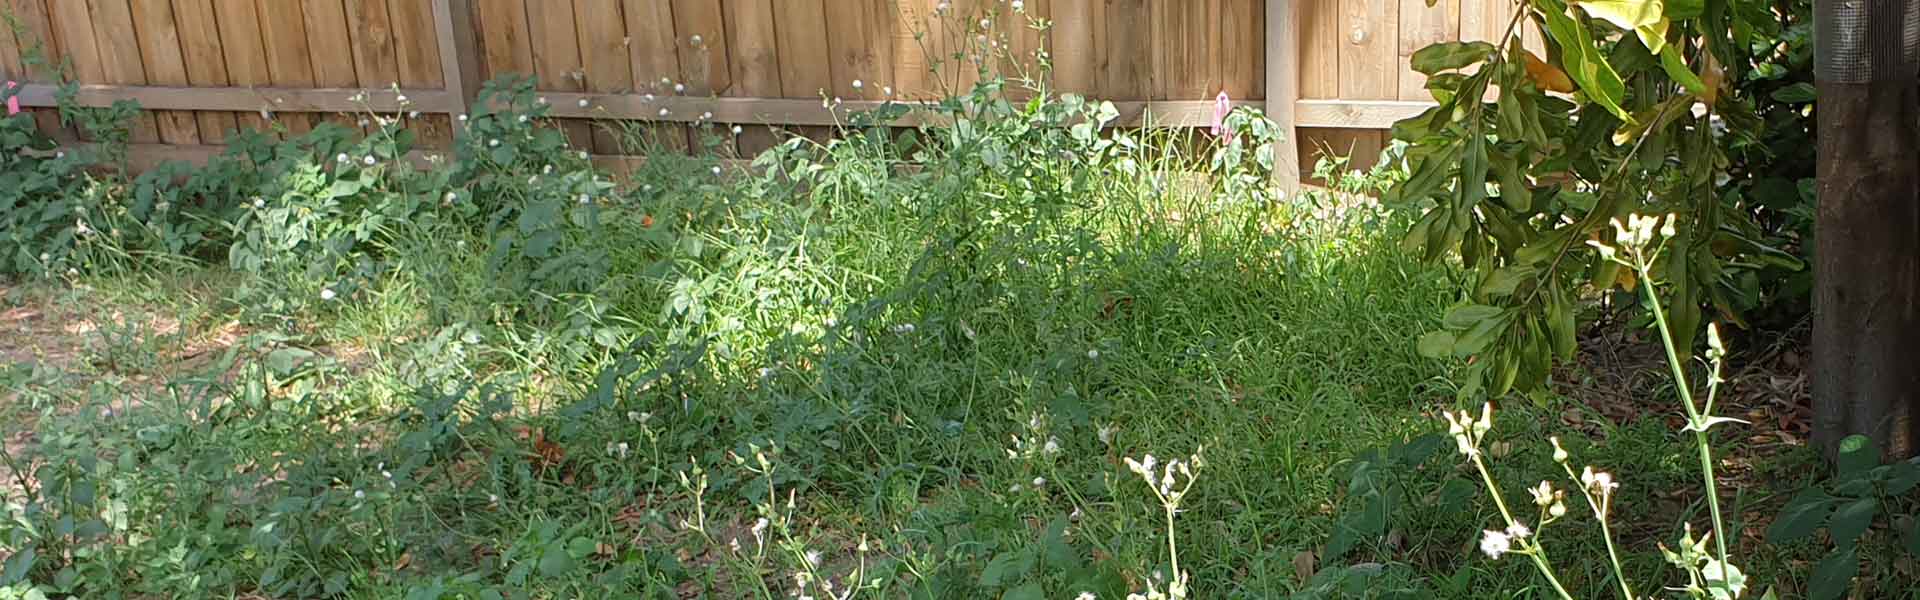
Weed Control
Several different approaches are needed for weed control since eradication is difficult and can be expensive. Preventing weeds from establishing and early intervention is much easier and much cheaper. Let’s look at approaches to weed management which begins with prevention.
It is best to identify the target weeds. By doing this the method for control can be more specific and potentially much more effective. Know whether the weeds are annual or perennial and how they spread, such as by seed or by underground plant parts.
While there are plants that are formally classified as weeds, there are others that are common garden plants that we may regard as weeds because of their invasive nature e.g. violets and the Australian native plant Dichondra. In some circumstances they are lovely, but not so in others.
Prevention
- Check through the plants you already have in your garden and make sure they are not weedy
- Remove any weedy plants from your garden
- Be careful about disposal of plant material/green waste - if removing weedy material it can be left in a plastic bag in the sun - effectively cooking (solarising) them before disposal.
- Minimise disturbance of soil to decrease the opportunities for weed seed to reach the surface and germinate (e.g. No Dig gardening)
- Choose plants that are not likely to become weedy in your area
- Always work from areas of low infestation of weeds to more infested areas because:
- It is quicker and easier to start with and should be able to achieve canopy cover more quickly to reduce further weed growth.
- this minimises disturbance in the least disturbed areas and avoids taking more weeds/seed from the worse areas into areas with lesser weed growth.
- Avoid unnecessary fertilising which can favour weeds. Often weed species grow quickly utilising available resources better than chosen landscape species so they can out-compete them in some circumstances
- Prevent weeds from being imported to your site/garden by choosing weed-free plants from the nursery. Remove any weeds that might germinate in the top layer of the planting medium.
- Seeds can persist in soil for a very long time. Minimise disturbance of soil to decrease the opportunities for weed seed to reach the surface and germinate (eg. No-dig gardening)
Suppression
- Competition - Select vigorous plant species to cover open ground. This shades/prevents light from reaching soil and allowing germination of weed seed.
- Mulch - Suppress weeds by preventing light from reaching seeds. This prevents germination or causes the seed to use up reserves trying to reach surface. Mulch has additional benefits of reducing evaporation from soil and captures rainfall, as well as its potential aesthetic value.
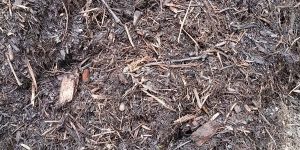 Sheet mulches: They must be kept in good condition. However, this can reduce the ability for water and oxygen to reach the soil dependent on mulch used.
- Granular mulches: Should be 75-100mm deep and coarse in texture. Thicker than 100mm reduces the ability of oxygen and water to get into the soil. Mulch can potentially increase frost damage to plants by preventing soil from warming. Carbon-rich mulches can cause a temporary reduction in soil nitrogen as soil microbes use it to break down the mulch.
| Organic | Inorganic | |
| Sheet Mulch | Paper, cardboard, jute | Old carpet, plastic film, weed mat, woven plastic |
| Granular Mulch | Bark, wood chips, straw, recycled Timber, hay, leaves, grass clippings, compost | pebbles, rocks, crushed bricks, |
Eradication/removal
Control existing weeds around the garden regularly to reduce weed seed build up i.e. cut down or pull weeds before they flower and can produce seed.
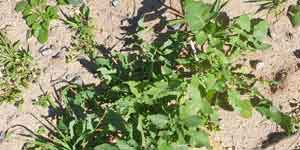 Manual
This involves removal by hand or hand-held tools such as a hoe, fork or spade.
It is a highly selective method and very useful on small scale or in very high value landscapes. It is most effective on annual weeds but not as effective on perennial weeds that regrow from fragments left behind. It is a labour-intensive strategy.
- Weed Pulling Technique - This method is partly dependent on root systems of weeds. Initial pulling of the weed must be gentle and tentative to establish how firmly the plant is rooted, being careful not to break the roots.
- Use a gentle steady movement and pull in the direction of the root growth (which is the line of least resistance).
- Wedge a weed knife or trowel into the soil under a weed at an angle of approximately 45deg. Hold the top section of the weed taut and then use the tool to lever the weed out.
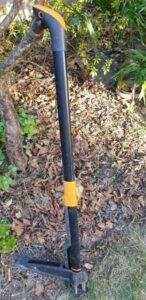 Tools for Hand Weeding
- Short handled such as trowel, hand fork, hand hoes, hori-hori Japanese garden knife or hand weeder tools which come in a variety of shapes, sizes and weights for either cutting or levering out weeds.
- Long handled such as a Dutch hoe and a range of push-pull hoes for slicing weeds off just under the surface of the soil. This works best for annual weeds or weeds that do not regrow from underground parts.
- Tree Poppers - for removal of woody weeds with stem diameters of up to 60mm.
Girdling or Ringbarking
This is suitable for large woody weeds or weedy trees and involves cutting several centimetres of bark from the entire circumference of the weed or tree. This prevents the upwards flow of water and nutrients from the roots of a plant to the canopy. It also stops the flow of sugars, the products of photosynthesis, from reaching the roots effectively starving the weed and causing it to die.
Mechanical Cultivation (tillage)
This method uses powered devices (eg. rotary hoe or tractor) and can chop up and bury weeds. It is of most use for site preparation and pre-planting. Can cause structural damage to the soil and may damage roots of non-target plants.
Thermal Treatment
All such approaches require repeated treatments at varying intervals in order to keep weed density at an acceptable level. The frequency of treatment depends on weed species, initial weed cover/density, climate, type of soil surface. It may involve up to 11-12 treatments per year to control weeds to an acceptable level.
Solarisation
This uses a plastic film to cover soil and trap enough heat to kill weeds, weed seeds and other soil-borne pests or pathogens. It relies on high levels of heat and solar radiation to be successful.
Plastic film must be thin and can be either clear film or black. It must be left in place for a number of weeks in the summer/hottest months. This technique has been shown to kill weeds, reduce soil-borne pathogens, seed germination and increase yields of productive crops (where used in productive horticultural or agricultural settings).
It is particularly useful in reducing annual weeds. A number of the studies found that approximately 30 days was very effective for the soil/weeds to be solarised¹.
Steam
This is generated from water heated to close to or beyond boiling point in some commercially -available saturated steam weeding devices. When applied to a plant/weed via a nozzle/head it causes the plant cells to rupture then wilt and die. It is more effective on very young or just emerging seedlings. As the plants get older and plant tissues thicken, its effectiveness is lowered. Germination of seeds may be stimulated in some species if they require higher temperatures. Unfortunately, this method requires a high energy input.
Hot Water
Application of hot water has effectiveness similar to glyphosate for annual weeds and young perennial weeds. But like steam it requires a high energy input (during manufacture) and repeated applications.
Direct Flame
A hand-held fossil fuel-powered burner (usually fuelled by propane, butane or LPG) can be used to control woody weeds in sensitive or riparian areas. Flaming is a technique where a hot flame is passed over the vegetation in order to increase the temperature of the moisture in the plant cells causing the liquid to rapidly expand and rupture the cells causing death. This can be used effectively on hard surfaces (paths, gravel, concrete etc.) but poses a fire risk if used in areas where combustible material such as mulch or dry vegetation is present.
Some research suggests that flamers should have a shield which keeps the combustible gases close to the ground for a more effective treatment. Many plants require frequent/repeated treatment to keep weeds at acceptable levels.
Biological Control
There are various biological controls for weedy plants. Introduction of specific pathogenic organisms or species is more the domain of government rather than home and community gardeners. A well-known example is the introduction of the Cactoblastus moth introduced to control prickly pear.
Goats
Control of weeds by goats is an approach that gardeners can use, but really only where the weed is more attractive to goats than other surrounding vegetation. It can help stop the weed from flowering, therefore reducing seed dispersal. It can also achieve ringbarking of woody species which will structurally weaken or kill the weed.
Some weeds are highly palatable to goats including scotch broom Cytisus scoparius, sweet briar Rosa rubiginosa, blackberry (Rubus fruticosus agg.) and wild turnip Brassica tournefortii. These species can be grazed all year round. There are many other species of weed that goats find palatable many of them weeds².
Integrated control of heavy infestations of blackberry, sweet briar and scotch broom can take several years and is best done using approximately 30 goats per hectare of fenced-in weed infestation. Goats should be stocked from early spring to allow them to defoliate, browse and ringbark the weeds and should be de-stocked over winter. This cycle should continue over two successive years. However, for this to be fully successful, spraying with strong weed killer in February is recommended followed by burning in April.
Chemical Control
Chemical control is the last resort in weed management. Herbicides work in different ways:
- Some herbicides kill plants by blocking enzyme activity that is required for plant cell activity.
- Non-selective herbicides kill /damage almost all plants
- Selective herbicides kill/damage some plants but not others - much of the time selectivity is achieved by applying the herbicide to specific plants.
Herbicides may be classed as:
- Contact - affects parts of plant directly contacted by the herbicide
- Translocated - applied to plant surfaces and then moved around the plants vascular system to damage the entire plant.
- Residual - the herbicide is applied to the soil and is absorbed by germinating seeds or plant roots. Such herbicides can remain in the soil for long periods of time.
All herbicides must be registered in Australia by the APVMA and are registered (permitted) for use on particular plants in particular situations. Directions for use are detailed on the instruction sheet and product packaging. It is essential that the instructions on any label are followed exactly. Even then, they pose risks to human health and that of other species - SGA’s WiseGardening app provides comprehensive information on potential side effects of herbicides available to the home or community gardener.
Any use of a herbicide which does not comply with directions is considered ‘Off-Label’ use and is then not covered by any warranty, so that the user becomes responsible for all environmental safeguards, occupational health and safety, animal welfare and any potential herbicide/chemical residues.
Bioherbicides
There is ongoing research on development of herbicides whose active ingredient is a living organism³.
There is, however, another type of product also termed "bioherbicide" which is very different. An example is Beloukha Garden Herbicide made from sunflowers to yield nonanoic acid where the active ingredient is a product derived from a living organism. However, the chemical nonanoic acid is used in some other herbicide products which are NOT bioherbicides, to increase effectiveness of low concentrations of glyphosate.
We are very grateful to Bridey Oliver for the research and first draft of this article and to financial support from the Lord Mayor's Charitable Foundation.
References
- Paiman, Yudono P, Sunarminto, BS, Indradewa D. 2020. Soil Solarisation for Control of Weed Propagules. Journal of Engineering Science and Technology Vol. 15 (1) 139 - 151.
- NSW Department of Primary Industries. Meat and Livestock Australia. 2007. Weed Control using Goats: A guide to using goats for weed control in pasture. Appendix.
- Kremer RJ. 2019. In Nano-Biopesticides Today and Future Perspectives,
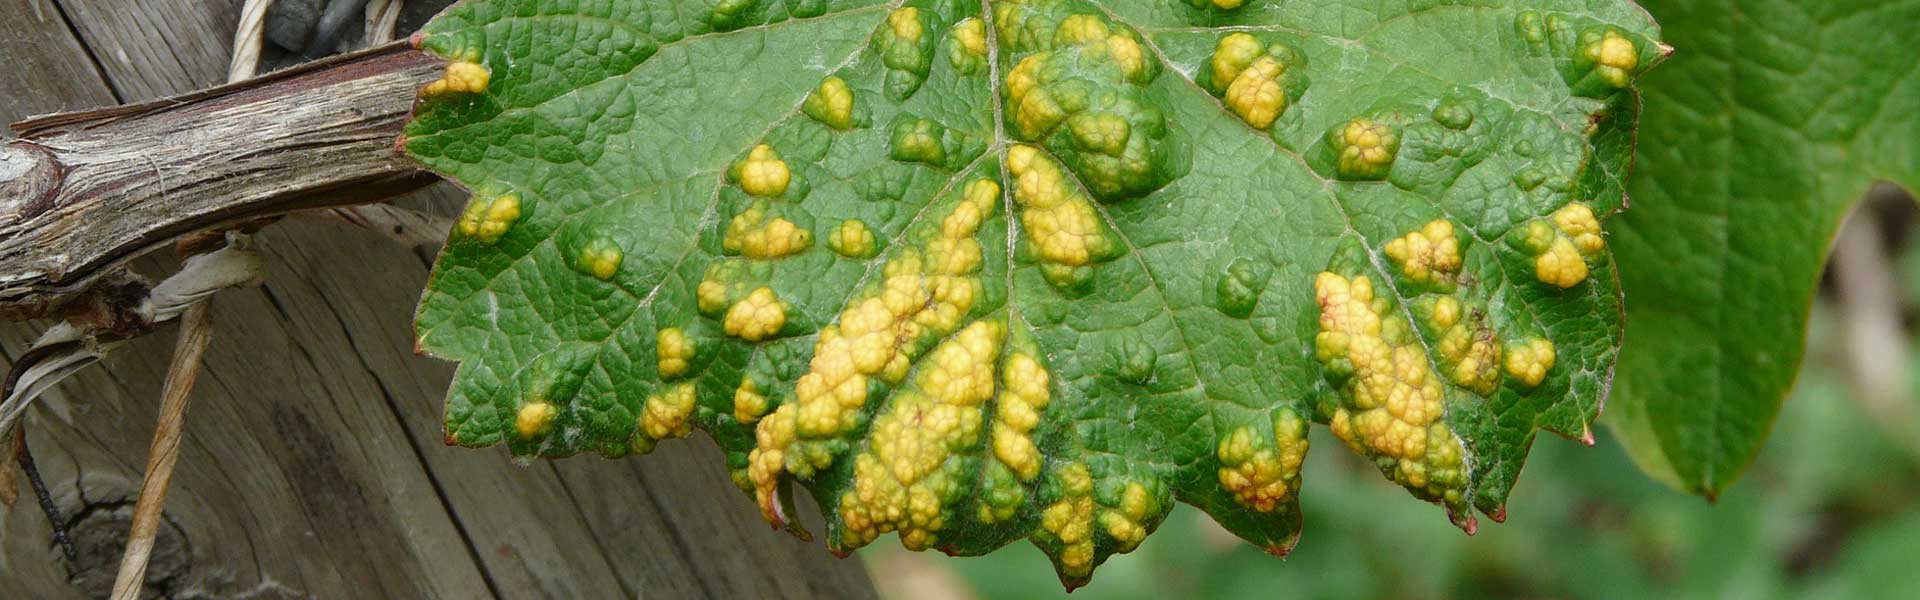
Prevent Pests in Your Garden
If you can prevent pests in your garden you will save time, resources and money as well as helping your garden flourish. Effective pest control is much easier than often thought with the most important method being prevention. As is sometimes said in relation to human health care “…an ounce of prevention is worth a pound of cure.”
By establishing some good garden practices, pest problems in the garden can be minimised.
For pests or diseases to take hold in the garden (on a plant) there must be three things:
- A susceptible host (plant)
- An aggressive pest or disease
- Environment that is favourable to the pest or disease
Effective pest control requires that there is a knowledge of the host, its pests and diseases, their natural enemies and the environment.
Prevention
This involves excluding as many potential problems as possible:
Use of appropriate plants
- Choose plants that are suited to the current and future climate and to the soil types, existing pH and aspect for where they are to be planted. Include plants that do not require lots of water additional to rainfall to thrive. Not only does this this help reduce pest and disease issues, it also reduces the inputs (water, fertiliser, work hours etc), leaving more time for enjoying your garden.
- Use plants that are less susceptible to pests. For example, there are certain cultivars of Syzygium (lilly pillies) that are resistant to psyllids and roses that are resistant to black spot.
- Diversify plantings. Having a variety of different plant communities supports diverse insect and spider populations which may prey on or parasitise pest species. Diverse and insect-rich environments often reach equilibrium with few pest problems causing significant damage.
Garden hygiene
- You wouldn't keep using the same utensils in the kitchen without cleaning them and the same applies in the garden. It is best practice to clean your garden equipment to prevent the spread of disease. Most important is the cleaning of cutting tools (secateurs, loppers, saws etc.) as these can transfer pathogens to an open wound on a plant. This is especially important when pruning plants of the same species as they can be infected by the same pathogens. Not all infections are apparent and by not cleaning between plants, it is very easy to transfer a pathogen from one plant to another. It is best to use methylated spirits or diluted bleach.
- Prune out dead, diseased, damaged or dying vegetation. Dispose of by burning or place in rubbish bin (do not compost or place in green waste bins) to prevent spread of pathogens. This is especially the case with vegetation infected with rusts or fungus.
- Control weeds as some provide habitat for pests in the garden e.g. snails love to hide in plants like Agapanthus [yes… agapanthus is a weed in some areas])
Good Gardening (Horticultural) Practices 1
- No-Dig Gardening This helps maintain soil structure. Good soil structure allows plants to better access air,
 water and nutrients which in turn keeps them healthier and able to defend themselves from pests.
 - Mulch This helps improve/build soil structure and improves soil’s ability to retain moisture which plays a vital role in plant health.
- Crop Rotation In annual vegetable plots rotate crops from season to season to prevent a build up of pests that attack one type/group of plant family. A Four Bed Crop Rotation System is described here
- Fertiliser/Nutrient Management Only fertilise when required. If necessary, have soils tested for nutrient levels. Over-fertilisation doesn’t benefit the plants, in fact it can contribute to many problems, as well as causing unused nutrients to leach/run off. Plants which are over-fertilised may have excessively lush growth which is more likely to be attacked by sap-sucking insects such as aphids or scale and be more susceptible to insect, pest or disease attack. Conversely, under-fertilisation may also cause plant stress leading to them to become similarly susceptible. Pay attention to the differing levels and ratios of nutrients which different plants need for optimum health. Temperature can also have an impact on nutrient uptake in plants (low temperatures can lead to low uptake of nutrients).
- Water/Irrigation Management Apply water at soil level, particularly if watering in the evening, since wet leaves and higher humidity can make a plant more susceptible to fungal infections. Don't leave standing water in the garden as it provides a place for mosquitoes to breed as well as a place for plant pests and pathogens to breed.
- Potting mix Keep potting mixes in sealed containers. Potting mix can be infected by pathogens if stored in open bags/containers for extended periods.
Provide Habitat for Beneficial Organisms 2
Why provide habitat in the garden?
Native wildlife has its own intrinsic value but can also add plenty of value to a functional garden ecosystem.
The table below shows a list of beneficial organisms, most of which can be attracted to your garden by providing suitable habitat. It also shows the pests they can control in various ways.

Often birds and a other native wildlife can help control pest insects and other pests. Birds and microbats are 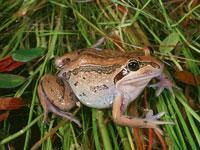 insectivorous, as are reptiles and amphibians, such as blue-tongue lizards, skinks and frogs.
Providing places for shelter, water and food for native animals can help encourage these creatures into the garden. For details about creating habitat see articles on key steps to take, attracting lizards frogs, beneficial flies and predatory insects which prey on pests.
We are very grateful to Bridey Oliver for the research and first draft of this article and to financial support from the Lord Mayor's Charitable Foundation.
References
1. Flint ML. 2018. Pests of the Garden and Small Farm. A Growers Guide to Using Less Pesticide.University of California - Agriculture and Natural Resources.
2. Gurr GM, Wrattan SD, Altieri MA. (Eds) 2004. Ecological Engineering for Pest Management. Advances in Habitat Management for Arthropods.CSIRO.

January In Your Patch
Wondering what to do in January in your patch? What vegetables and herbs should you plant? It's the start of the New Year and whether it's time for a little rest and relaxation after a manic December, or you have a New Year's resolution to spend some quality time with your garden; it's time to get out in your patch! While we have been distracted with festive things, our patches have probably suffered a little and are in need of some serious loving right now. We have loads of tips that will encourage your garden to flourish in the sunshine of Summer.
Warm Areas
Frost free or occasional light frosts (North from about Coffs Harbour and all the way across to the west to Geraldton)
It’s pretty hot out there at the moment, and it definitely isn’t the ideal time to be planting much. That said, you can try eggplant, zucchini, cucumber, capsicum, chillies and tomatoes; towards the end of the month.
- Lettuce can be grown at the tail end of January, but consider popping them under a shade cloth tent.
- Try Lemongrass if you haven’t already. Its woody nature helps prevent too much damage from the heat. Though wait until things cool down for any other herbs.
- Still time to pop in some asparagus, just find a cooler spot in the patch.
- It’s not too late for watermelon, rockmelon and pineapple. Mangos can go in this time of year also.
- Plants feel the need for a feed at this time of year. A seaweed tea or low environmental impact liquid fertiliser is perfect. Throughout the growing period diluted worm teas can be added to your garden every couple of weeks. This will help keep up the growth and fruiting capabilities of your plants. Apply to the soil early in the morning, in the concentrations mentioned on the packet.
- Pretty up the patch with these flowering fancies: marigolds and sunflowers. Popping these in around your veggies will give some colour and interest to the patch, and act as beneficial insect attractors!
- Consider a green manure crop to add some life and love to an overworked patch. At this time of year, try millet, lablab, or cow pea. This will improve your soil incredibly. For a bit of forward planning, you’ll find it well worth the effort!
- Water smarter at this time of year. Water first thing in the morning and instead of quickie irrigation, a nice deep drink a couple of times a week is far more beneficial! Our fact sheet Irrigation In An Arid Nation has loads more info on smart water habits.
- If you haven’t done already, look into drip irrigation. This will put the water where it is needed as well as reducing the risk of powdery mildew when the leaves get wet.
- Top up mulch on your veggie patches, herb gardens and ornamental beds, especially important if you are heading off this holidays. A hot summer tip is to mulch after watering the patch to a depth of about 7cm. Keep mulch clear of plant stems… especially young seedlings. Choose sustainable, low environmental impact mulch, one that will enrich your soil as it breaks down.
- On non-gardening days, why not head out to the shed, and construct a couple of shade cloth tents. They don’t have to elaborate, just a simple, moveable structure that you can pop over the top of some of the sun sensitive veggies (like eggplant, capsicum and others) as the heat becomes more intense. Think of it as slip, slop, slap for plants! Pop these around where required, especially on high UV days, windy days, and during your holidays.
- Protect your pot plants while you are away this summer. Mulch the top of the pots, sit them in a saucer of water (or the bathtub if it gets enough light) and you’ll be set! Or even run dripper lines to them from your main irrigation pipes.
Cool to Cold Areas
Low temperatures for extended periods of time (all of Tasmania, most of Victoria, the southern highlands of NSW, the ACT and a tiny southern bit of SA)
- It’s cool inside (hopefully) and pretty warm outside, but there is still a lot of things you can pop in the patch at this time of year. Tasty herbs that are ready to roll include basil, parsley, watercress, sage and dill. You could give mint a go as well, but be careful to contain it in a pot, otherwise it can take over! As tempting as it is to plant coriander, that screams summer. It will not do well this time of year and will head straight to seed.
- Tasty vegetables to plant this month: spring onions, leeks, lettuces and zucchini!

- Add some colour and movement to the patch, and pop in some of these little pretties: stock, verbena and ageratum.
- Time to pop in some sunflower seeds. Find a sunny spot where you would like to see some happy sunflowers later in the year and plant the seeds to double the depth of the seed. Cover lightly with dirt and be patient, they’ll be popping their heads up in no time!
- Top up mulch on your veggie patches, herb gardens and ornamental beds, especially important if you are heading off this holidays. A hot summer tip is to mulch after watering the patch, to a depth of about 7cm. Keep mulch clear of plant stems… especially young seedlings. Choose sustainable, low environmental impact mulch, one that will enrich your soil as it breaks down.
- Green manure crops, including millet and mung beans are good to go now. Improve that weary veggie patch, and get ready for next seasons heavy feeding plants! Check out the Crop Rotation article on the SGA website for a bit of information why and how Green Manure crops can help
- Plants feel the need for a feed at this time of year. A seaweed tea or low environmental impact liquid fertiliser is perfect, especially for the seedlings planted in at the tail end of last year. Throughout the growing period diluted worm teas can be added to your garden every couple of weeks. This will help keep up the growth and fruiting capabilities of your plants .Apply to the soil early in the morning, in the concentrations mentioned on the packet.
- On non-gardening days, why not head out to the shed, and construct a couple of shade cloth tents. They don’t have to elaborate, just a simple, moveable structure that you can pop over the top of some of the sun sensitive veggies (like eggplant, capsicum and others) as the heat becomes more intense. Think of it as slip, slop, slap for plants! Pop these around where required, especially on high UV days, windy days, and during your holidays.

- Weeding is an awesome job to do at this time of year. Cut down the competition between your tasty treats and these space invaders, and tidy up your patch. It may sound tedious, but it’s incredibly rewarding!
- Water smarter at this time of year. Water first thing in the morning, and instead of quickie irrigation, a nice deep drink a couple of times a week is far more beneficial! Our fact sheet Irrigation In An Arid Nation has loads more info on smart water habits.
Temperate Zones
Occasional winter frosts (pretty much the rest of Australia, most of the inland, some areas of Victoria, most of SA and the southern area of WA)
- It is pretty warm in this part of the world, but there are a couple of things you could pop in to the patch this January. Why not try leek,
 sweet corn, beans, cucumber, spring onions and zucchini.
 - Still too hot for most herbs, but lemongrass will take the heat if planted out now.
- Time to pop in some sunflower seeds. Find a sunny spot where you would like to see some happy sunflowers later in the year and plant the seeds to double the depth of the seed. Cover lightly with dirt and wait. They’ll be popping their heads up in no time!
- Why not try some lovely flowering stuff in your patch as well, like: nasturtium, verbena, petunias and marigolds. These guys are great at attracting pollinators and beneficial insects to your patch, they look attractive and fresh as well.
- Consider a green manure crop to add some life and nutrients to an overworked patch. At this time of year try cow pea, mung bean, soy bean and millet. This will improve your soil incredibly. For a bit of forward planning, you’ll find it well worth the effort! Check out the Crop Rotation article on the SGA website for a bit of information why and how Green Manure crops can help
- Top up mulch on your veggie patches, herb gardens and ornamental beds, especially important if you are heading off this holidays. A hot summer tip is to mulch after watering the patch, to a depth of about 7cm. Keep mulch clear of plant stems… especially young seedlings. Choose sustainable, low environmental impact mulch, one that will enrich your soil as it breaks down.
- Plants feel the need for a feed at this time of year. A seaweed tea or low environmental impact liquid fertiliser is perfect, especially for the seedlings planted at the tail end of last year. Throughout the growing period diluted worm teas can be added to your garden every couple of weeks. This will help keep up the growth and fruiting capabilities of your plants .Apply to the soil early in the morning, and in the morning, in the concentrations mentioned on the packet.
- On non-gardening days, why not head out to the shed, and construct a couple of shade cloth tents. They don’t have to elaborate, just a simple, moveable structure that you can pop over the top of some of the sun sensitive veggies (like eggplant, capsicum and others) as the heat becomes more intense. Think of it as slip, slop, slap for plants! Pop these around where required, especially on high UV days, windy days, and during your holidays.
- Weeding is an awesome job to do at this time of year. Cut down the competition between your tasty treats and these space invaders, and tidy up your patch. It may sound tedious, but it’s incredibly rewarding!
- Water smarter at this time of year. Water first thing in the morning, and instead of quickie irrigation, a nice, deep drink a couple of times a week is far more beneficial! Our fact sheet Irrigation In An Arid Nation has loads more info on smart water habits.
Of course, this is just a rough guide, and many of you will find your situation varies from the above listing, due to microclimates created in your garden, location in relation to your nearest major city, extremes of weather (quite possible at this time of year) and garden type.
But the one thing that remains the same for all zones and regions is this: start out the year as you mean to go on, and give your patch some much needed love!
Have a think about what you want to get out of it. Make a list ( if you don’t already have one). Due to the heat this may be the time where you sit back and plan what you want to achieve so that when the weather does cool somewhat, you’ll be full steam ahead.
Otherwise be smart about the time you spend in the garden, avoid the heat and direct sun and remember to hydrate. Early mornings and evenings can be a blissful time to spend in your garden.
Information sources:
Bagnall, Lyn, Easy organic gardening and moon planting, published by Scribe Publications, VIC.
McFarlane, Annette, Organic Vegetable Gardening, published by ABC Books, Sydney, NSW.
February In Your Patch
Because it is warmer than summers 10 years ago, you might need to change what you normally do your garden. Maybe in February in your patch some of your summer crop is having a little bit of a last hoorah, you may find the tomatoes, eggplant and capsicum and still chugging along. In any case, it’s time to start thinking about preparing your garden for autumn planting. This month's guide has loads of tips and ideas of what to do NOW that will ensure your patch is ready to go. Wait until the heat of the day is off and then spend some lovely time in the garden.
Weeding
Weeding is a great job to do at this time of year. Cut down the competition between your tasty treats and these space invaders, and tidy up your patch. It may sound tedious, but it’s incredibly rewarding!
Mulching
Top up the mulch on your vegetable patches, herb gardens and ornamental beds. This is especially important if you are heading away or caught up in the bustle of back to school. A hot summer tip is to mulch after watering the patch, to a depth of about 7cm. Keep mulch clear of plant stems, especially young seedlings. Choose sustainable, low environmental impact mulch (this means different things in different areas), one that will enrich your soil as it breaks down.
Planning
Time to think about what wonders you will whack into your patch come April. Preparing beds and plots now means that when autumn planting time rolls around, your garden will be ready and waiting. Removing spent plants, clearing areas of weeds and topping up organic matter is an excellent February job. A nail rake, some good organic compost and lovely sustainable mulch is the perfect recipe for productive patches of the future.
Shade for your plants
On non-gardening days, why not head out to the shed, and construct a couple of shade cloth tents. They don’t have to elaborate, just a simple, moveable structure that you can pop over the top of some of the sun sensitive veggies (like eggplant, capsicum and others) as the heat becomes more intense. Pop these around where required, especially on high UV days, windy days, and during your holidays.
Watering
Water smarter at this time of year and always first thing in the morning. A nice, deep drink a couple of times a week is far more beneficial than frequent, short watering.
Green Manure
Consider a green manure crop to add some life and love to an overworked patch. At this time of year try lablab, cow pea, mung bean, soy bean and millet. This will improve your soil incredibly, and, for a bit of forward planning, you’ll find it well worth the effort!
Warm Areas
Frost free or occasional light frosts (North from about Coffs Harbour and all the way across to the west to Geraldton)
- Give leeks, capsicum, chillies, cabbage, silverbeet, lettuce, sweet corn, cauliflower, broccoli and tomatoes a go towards the end of the month.
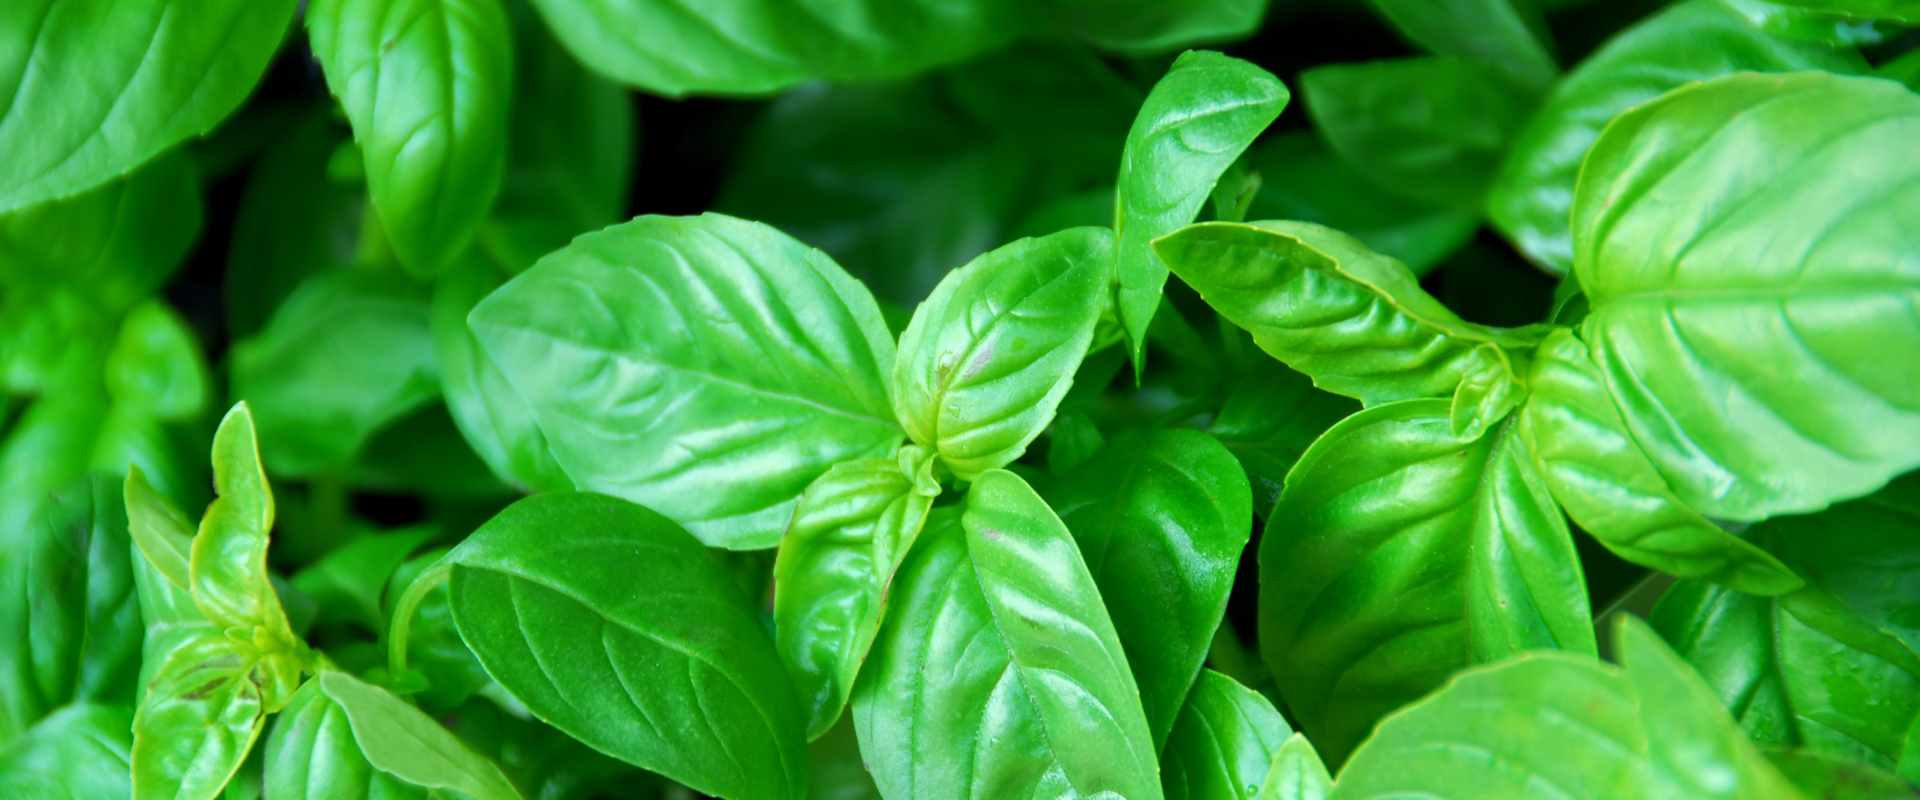
- It’s too hot for most herbs, but you could try some lemongrass. Wait until the end of the month to plant some basil varieties, including our old favourite sweet basil, and the always-stunning purple basil.
- Want a super summer smoothie… for years to come? Then plant some banana, pineapple and mangos!
- Pretty up the patch with some marigolds and sunflowers. Planting these around your veggies will give some colour and interest to the patch, and act as beneficial insect attractors.
- The recent heat in the warm areas may have caused a bit of grief to many plants in the garden, with some foliage looking less than fancy. Don’t be too tempted to tidy these guys just yet – cruddy looking leaves will protect the new, young, sensitive shoots underneath from a serious case of sunburn. Wait until the evenings cool down in about a month or so to get your Edward Scissorhands to your scorched shrubs.
Cool to Cold Areas
Low temperatures for extended periods of time (all of Tasmania, most of Victoria, the southern highlands of NSW, the ACT and a tiny southern bit of SA)
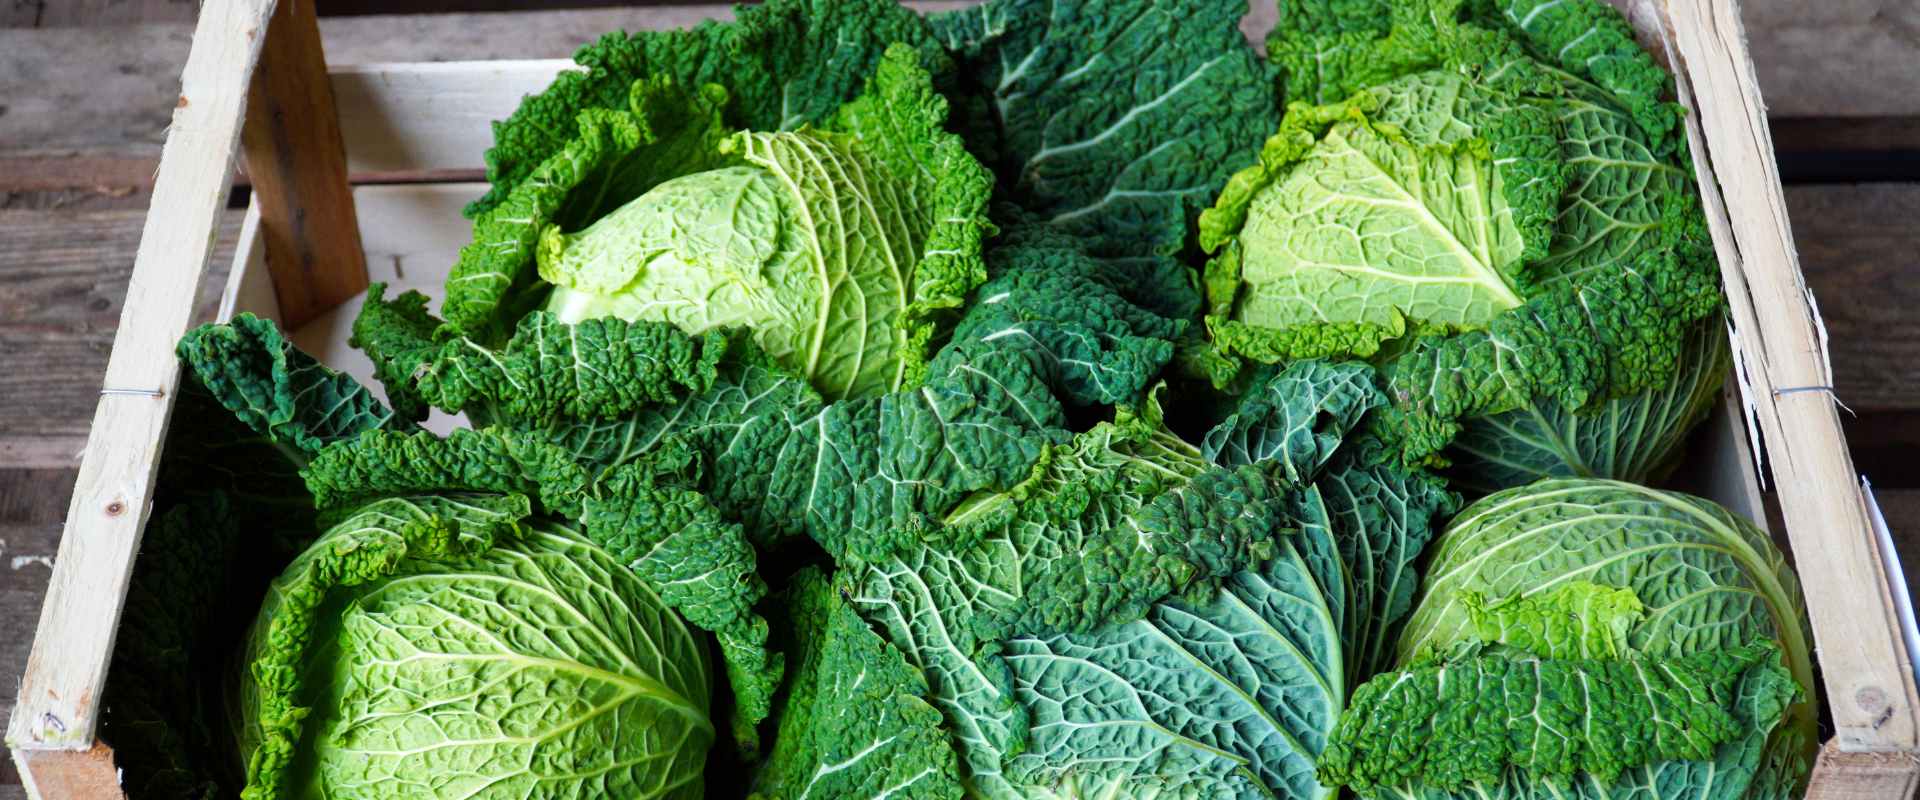
- It is still fairly warm around these parts, but there are a number of incredible edibles ready to go in now. Try lettuce, spinach, leek, silverbeet, and some Asian greens towards the tail end of the month. Broccoli, leeks and spring onions could be worth a shot when the nights get cooler.
- Add some colour and movement to the patch, and pop in some of these little pretties: stock, dianthus, viola, pansy, verbena and ageratum.
- Give most herbs a miss just now, but, if you’re really keen, get rolling with parsley and watercress.
- Garlic is good to go once the weather cools a touch.
- Top up mulch on your veggie patches, herb gardens and ornamental beds. A hot summer tip is to mulch after watering the patch, to a depth of about 7cm. Keep mulch clear of plant stems….especially young seedlings. Choose sustainable, low environmental impact mulch, one that will enrich your soil as it breaks down.
- Plants feel the need for a feed at this time of year. A seaweed tea or low environmental impact liquid fertiliser is perfect, especially for the seedlings shoved in at the tail end of last year. Apply to the soil early in the morning, and in the concentrations mentioned on the packet.
Temperate Zones
Occasional winter frosts (pretty much the rest of Australia, most of the inland, some areas of Victoria, most of SA and the southern area of WA)
- It’s still pretty warm outside, but there are some tasty treats you can plant out this month. Try silverbeet, leeks, spring onions, Brussels sprouts, bush beans, broccoli, cauliflower and celery… but wait until the end of the month.
- Lettuce is lovely at the end of February, but, because the days are still quite hot, consider popping the seedlings under some shade cloth, or a more established plant to protect its sensitive foliage form the sun. Even try growing in partial shade.
- Still too hot for most herbs but lemongrass will take the heat if planted out now. Basil is happy to go in now as well, so why not mix it up and try
 some purple, Thai and lemon basils, as well as our old favourite, sweet basil.
 - Why not try some lovely flowering stuff in your patch as well, like nasturtium, verbena, petunias and marigolds. These guys are great at attracting pollinators and beneficial insects to your patch, and they look great as well.
- Want to save some money? Avocados are relatively expensive at the moment, but in a few years time that won’t worry you. Towards the tail end of February try planting an avocado.
Of course, this is just a rough guide, and many of you will find your situation varies from the above listing, due to microclimates created in your garden, location in relation to your nearest major city, extremes of weather and garden type.
One thing that remains the same for all zones and regions is this: start out the year as you mean to go on, and give your patch some much-needed love. So, grab a cool beverage, slip, slop slap and spend some time under your favourite tree, admiring your patch!
Information sources:
Bagnall, Lyn, Easy organic gardening and moon planting, published by Scribe Publications, VIC.
McFarlane, Annette, Organic Vegetable Gardening, published by ABC Books, Sydney, NSW.
Photos:
Elaine Shallue - Basil and Zucchini
April In Your Patch
The perfect month for chocolate lovers and practical jokers alike, April is also a top time to get into the patch! There is a little bit of rain around, the weather is cooling down, and shed loads of stuff is ready to plant! So, don’t be a bunny, get into gardening this April! Hop to it!
Warm Areas
Frost free or occasional light frosts (North from about Coffs Harbour and all the way across to the west to Geraldton)
- It’s time to love your leafy greens! Whack in the following this month:
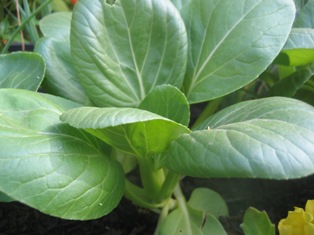 Asian greens, lettuce, mizuna, cabbage, silverbeet, rocket and spinach!
 - Keep the bunnies happy and pop in some carrots during April. Check out the Yummy Yards info sheet on carrots for all the tips!
- Hop into the herb patch with coriander (try a slow bolting variety if it’s still warm), parsley, lemon grass, chamomile and oregano.
- Stick in some spuds… home grown is easy, and incredibly rewarding. The potato page is here!
- Go veggie crazy with artichoke, beetroot, broccoli, brussel sprouts, cauliflower, tomatoes, chilli, garlic and radish.
- If you are in the tropical north (anywhere north of Rocky) you could try some cucumber, pumpkin, sweet corn, squash, tomatoes, sweet potatoes and zucchinis.
- Plants feel the need for a feed at this time of year. A seaweed tea, or any low environmental impact liquid fertiliser, is perfect for giving them a kick start as they establish. Apply to the soil early in the morning and in the concentrations mentioned on the packet.
- Pretty up the patch with these flowering fancies – marigolds, sunflowers and pansies, cornflowers, violas, snapdragons, stock, verbena and lavender (non-invasive varieties of course!). Popping these in around your veggies will give some colour and interest to the patch, and act as beneficial insect attractors!
- Consider a green manure crop to add some life and love to an overworked patch. At this time of year, try millet, oats, lupins or field peas. This will improve your soil incredibly, and, as a bit of forward planning, you’ll find it well worth the effort!
- Water smarter at this time of year. Water first thing in the morning, and instead of quickie irrigation, a nice, deep drink a couple of times a week is far more beneficial! Always check soil moisture before watering at this time of year… don’t waste your precious drinking water if Mother Nature has already done all the hard work for you!
- Top up mulch on your veggie patches, herb gardens and ornamental beds, especially important for weed suppression at this time of year. A hot tip is to mulch after watering the patch, to a depth of about 7cm. Keep mulch clear of plant stems… especially young seedlings. Choose a sustainable, low environmental impact mulch, one that will enrich your soil as it breaks down.
- Weeding is an awesome job to do at this time of year. Cut down the competition between your tasty treats and these space invaders, and tidy up your patch. It may sound tedious, but it’s incredibly rewarding!
Cool to Cold Areas
Low temperatures for extended periods of time (all of Tasmania, most of Victoria, the southern highlands of NSW, the ACT and a tiny southern bit of SA)
- There is still a whole heap of things you can pop in the patch at this time
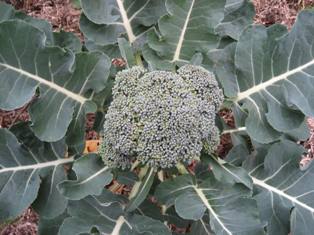 of year. Tasty herbs in the ‘burbs that are ready to roll include our old favourite, coriander. You could give mint and lemon balm a go as well, but be careful to contain it, otherwise it can take over!
 - Try these tasty wonders into your Yummy Yard this month: Chinese cabbage, most Asian Greens, spinach, rocket, broccoli, spring onions, asparagus, celery, endive, squash, onions, silverbeet, leeks and lettuce. Don’t be a bunny, remember to plant some carrots during April!
- Set aside a bit of space and pop in an artichoke! These are gorgeous additions to the patch, look amazing, and taste pretty good too!
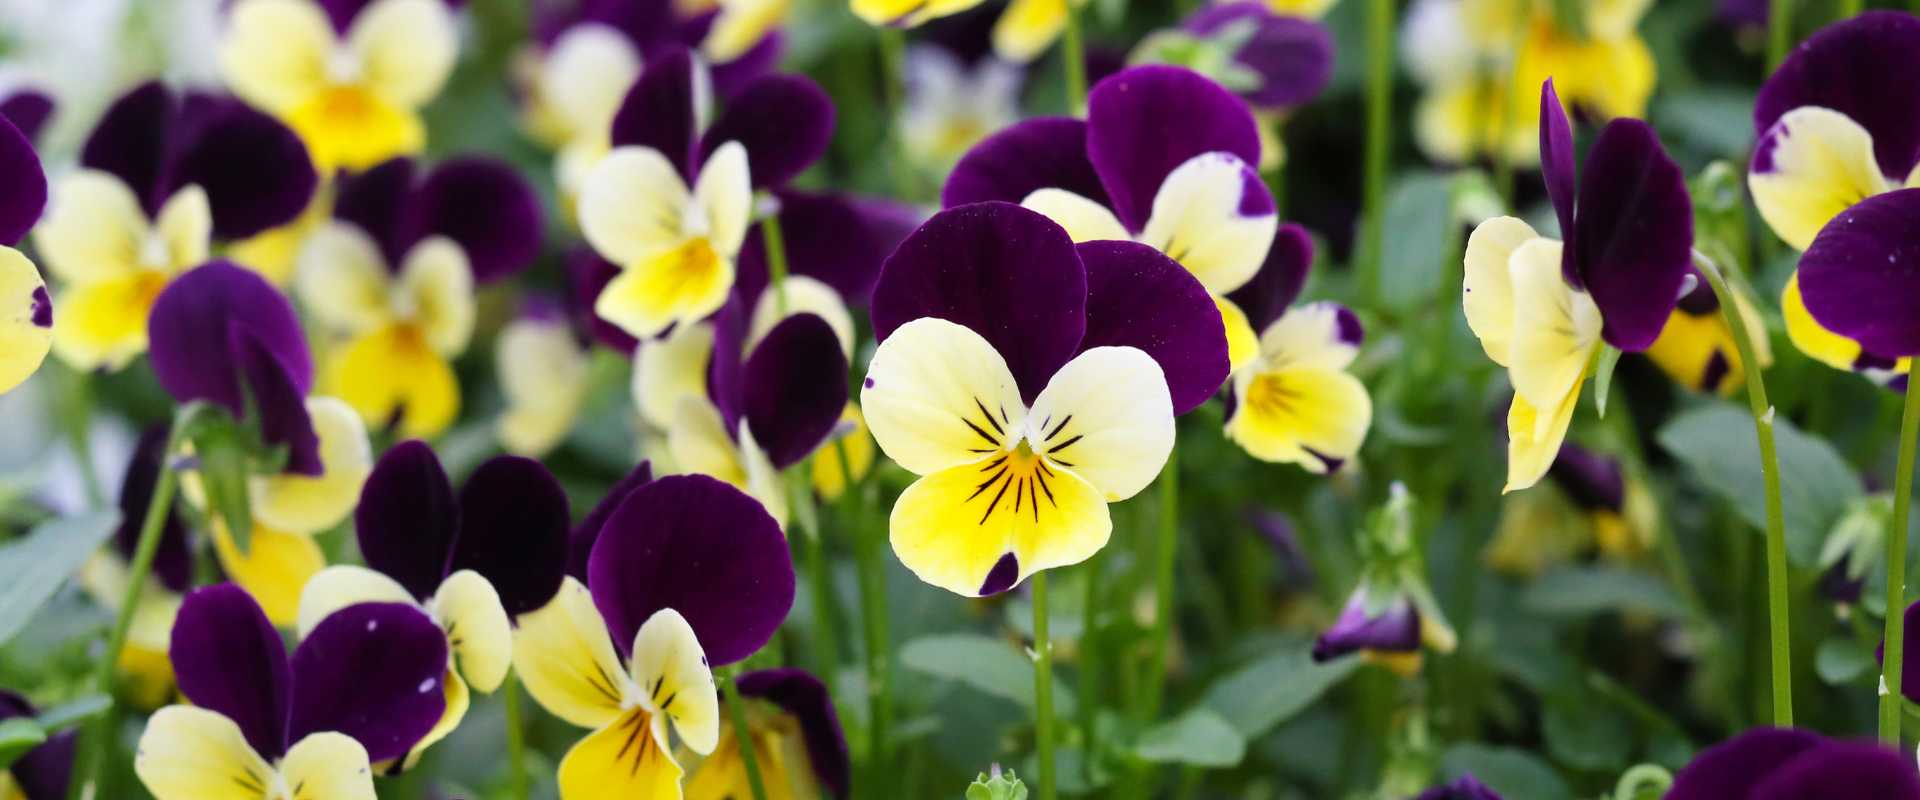
- Add some colour and movement to the patch, and pop in some of these little pretties- dianthus, cornflower, pansy, viola, Echinacea, stock, verbena and lupins. Having these around your veggies will give some interest to the patch, and act as beneficial insect attractors!
- Top up mulch on your veggie patches, herb gardens and ornamental beds, especially important for weed suppression at this time of year. A hot tip is to mulch after watering the patch, to a depth of about 7cm. Keep mulch clear of plant stems… especially young seedlings. Choose a low environmental impact mulch, one that will enrich your soil as it breaks down.
- Green manure crops, including oats, wheat, fava beans and field peas are good to go now… improve that dormant veggie patch, and get ready for next seasons heavy feeding plants!
- Plants feel the need for a feed at this time of year. A seaweed tea, or any low environmental impact liquid fertiliser, is perfect for the seedlings you’ve just popped in. Apply to the soil early in the morning, and in the concentrations mentioned on the packet.
- Weeding is an awesome job to do at this time of year. Cut down the competition between your tasty treats and these space invaders, and tidy up your patch. It may sound tedious, but it’s incredibly rewarding!
- Water smarter at this time of year. Water first thing in the morning, and instead of quickie irrigation, a nice, deep drink a couple of times a week is far more beneficial! Always check soil moisture before watering at this time of year… don’t waste your precious drinking water if Mother Nature has already done all the hard work for you!
Temperate Zones
Occasional winter frosts (pretty much the rest of Australia, most of the inland, some areas of Victoria, most of SA and the southern area of WA)
- Top time to plant in this part of the world, especially now that is has
 cooled down a bit! Why not try cabbage, Asian greens, lettuce, rocket, tatsoi, spring onions, spinach, carrots, celery, cauliflower, broad beans, leek, onions, radish, turnips and swedes.
 - It’s time to get happy with herbs, so try some parsley, basil, coriander (try a slow bolting variety if it’s still pretty warm), rosemary, marjoram and thyme. You could give mint and lemon balm a go as well, but be careful to contain them as they can take over!
- Why not try some lovely flowering stuff in your patch as well, like: cornflower, calendula, dianthus, pansies, viola, snapdragons, stock, nasturtium, verbena and marigolds. These guys are great at attracting pollinators and beneficial insects to your patch, and I reckon they look tops as well.
- Consider a green manure crop to add some life and love to an overworked patch. At this time of year try fava bean, field pea, oats and wheat. This will improve your soil incredibly, and, for a bit of forward planning, you’ll find it well worth the effort!
- Top up mulch on your veggie patches, herb gardens and ornamental beds, especially important for weed suppression at this time of year. A hot tip is to mulch after watering the patch, to a depth of about 7cm. Keep mulch clear of plant stems… especially young seedlings. Choose a low environmental impact mulch, one that will enrich your soil as it breaks down.
- Plants feel the need for a feed at this time of year. A seaweed tea or low environmental impact liquid fertiliser is perfect, especially for the seedlings shoved in this month. Apply to the soil early in the morning, and in the concentrations mentioned on the packet.
- Weeding is an awesome job to do at this time of year. Cut down the competition between your tasty treats and these space invaders, and tidy up your patch. It may sound tedious, but it’s incredibly rewarding!
- Water smarter at this time of year. Water first thing in the morning, and instead of quickie irrigation, a nice, deep drink a couple of times a week is far more beneficial! Always check soil moisture before watering at this time of year… don’t waste your precious drinking water if Mother Nature has already done all the hard work for you!
Of course, this is just a rough guide, and many of you will find your situation varies from the above listing, due to microclimates created in your garden, location in relation to your nearest major city, extremes of weather (Mother Nature does like to keep us on our toes) and garden type.
April is often a time that we overindulge, and often end up regretting it! Same deal with our Yummy Yards… don’t overfeed and over-fertilise at this time of year, while your plants may look as though they’re enjoying the extra food, you are probably doing more harm than good.
May In Your Patch
While the southern parts of Australia have donned winter pyjamas and flannelette sheets, the northern states are still revelling in warm, and mostly sunny autumn days. Regardless of the conditions in your little patch of paradise, there is still loads to do in May in your patch. Get set for those produce plants that need the cooler weather to grow.
May sees a lot of Australia experience the first damaging affects of frost, so why not spend cold or rainy days in the shed making some nice little frost covers from shade cloth offcuts? A couple of old garden stakes, some nails and a bit of (not too) hard yakka will see these covers ready to go when the temperature plummets. Your seedlings will thank you for it!
Cool to Cold Areas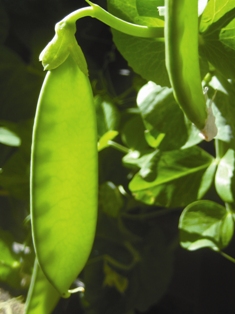
Low temperatures for extended periods of time (all of Tasmania, most of Victoria, the southern highlands of NSW, the ACT and a tiny southern bit of SA)
- It’s almost time for bare rooted fruit trees, so start preparing beds now;
- Lots of lovely rich organic matter, a bit of moisture and some mulch will see the soil absolutely gorgeous by the time your trees are ready to go in!
- Have a think about what tree varieties you are after, you may need to do some research into the best supplier. Especially if you are after an heirloom or unusual variety.
- Give Brassicas a blast this month, and pop the following into your patch:
- broccoli, cabbage, cauliflower and Brussels sprouts. Plant some sage with these guys as a great, caterpillar and moth-repelling companion!
- By putting in peas and broad beans now, you are giving them the winter to extend their roots deep. This means that when the weather does start getting warmer and the frosts disappear you are ahead of the game. Radish, Swedes, turnips and spinach will also crop well if planted now. Don’t forget spring onions either this month.
- Set aside a bit of space and pop in an artichoke! These are gorgeous additions to the patch, look amazing and taste pretty good too!
- Add some colour and movement to the patch and pop in some pretties;
- dianthus, cornflower, pansy, viola, verbena and lupins. Having these around your veggies will give some interest to the patch, and act as beneficial insect attractors!
- Top up mulch on your veggie patches, herb gardens and ornamental beds, especially important for weed suppression at this time of year. Mulch to a depth of about 7cm after watering the patch. Keep mulch clear of plant stem, especially young seedlings. Choose a low environmental impact, locally sourced mulch that will enrich your soil as it breaks down.
- Green manure crops, including oats, wheat, faba beans and field peas are good to go now… improve that dormant veggie patch, and get ready for next seasons heavy feeding plants!
- Plants feel the need for a feed at this time of year. A seaweed tea, or any low environmental impact liquid fertiliser is perfect for the seedlings you’ve just popped in. Apply to the soil early in the morning and in the concentrations mentioned on the packet.
- Weeds run rampant this time of year. Cut down the competition between your produce plants and these space invaders. It may sound tedious, but it’s incredibly rewarding! Try making a weed tea to feed your winter crops.
- Water smarter at this time of year. Water first thing in the morning, and instead of quickie irrigation, a nice, deep drink a couple of times a week is far more beneficial! Always check soil moisture before watering at this time of year….don’t waste your precious drinking water if Mother Nature has already done all the hard work for you!
- Cold days mean a bit of shed time… why not build yourself a nice blackboard for the shed, to keep track of what has been planted in your patch where and when? This makes crop rotation a load easier, and allows you to keep track of feeding times and dates, what worked, what didn’t and what’s happening in the veggie garden.
Temperate Areas 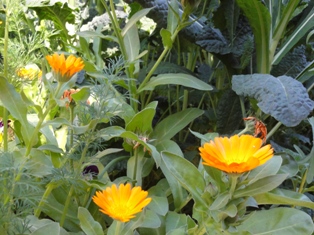
Occasional winter frosts (pretty much the rest of Australia, most of the inland, some areas of Victoria, most of SA and the southern area of WA)
- Still some good planting time left in this part of the world, so pop in some Brussels sprouts, cabbage, cauliflower and broccoli. Peas and broad beans can also go in, as well as radish, turnips, swedes and spinach.
- It’s time to get happy with herbs, so try some chamomile and lemon grass. You could give mint and lemon balm a go as well, but be careful to contain them as they can take over!
- Why not try some lovely flowering stuff in your patch as well, like: cornflower, calendula, dianthus, pansies, viola, snapdragons, stock, ageratum and marigolds. These guys are great at attracting pollinators and beneficial insects to your patch, and the flowers look good as well.
- Consider a green manure crop to add some life and love to an overworked patch. At this time of year try faba bean, field pea, oats and wheat. This will improve your soil incredibly, and, for a bit of forward planning, you’ll find it well worth the effort!
- Bare rooted fruit tree time is almost upon us, so start preparing beds for these guys now.
- Lots of lovely rich organic matter, a bit of moisture and some mulch will see the soil absolutely gorgeous by the time your trees are ready to go in!
- Have a think about what tree varieties you are after, you may need to do some research into the best supplier. Especially if you are after a heirloom or unusual variety.
- Top up mulch on your veggie patches, herb gardens and ornamental beds, especially important for weed suppression at this time of year. Mulch to a depth of about 7cm after watering the patch. Keep mulch clear of plant stems… especially young seedlings. Choose a low environmental impact mulch, one that will enrich your soil as it breaks down.
- Plants feel the need for a feed at this time of year. A seaweed tea or low environmental impact liquid fertiliser is perfect, especially for the seedlings shoved in this month. Apply to the soil early in the morning, and in the concentrations mentioned on the packet.
- Weeding is an awesome job to do at this time of year. Cut down the competition between your tasty treats and these space invaders, and tidy up your patch. It may sound tedious, but it’s incredibly rewarding!
- Water smarter at this time of year. Water first thing in the morning, and instead of quickie irrigation, a nice, deep drink a couple of times a week is far more beneficial! Always check soil moisture before watering at this time of year….don’t waste your precious drinking water if Mother Nature has already done all the hard work for you!
Warm Areas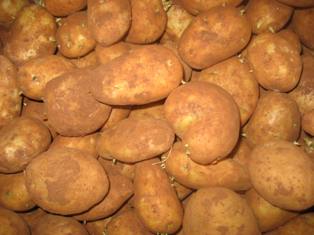
Frost free or occasional light frosts (North from about Coffs Harbour and all the way across to the west to Geraldton)
- Time to plant some winter wonders – think about some leeks, beetroot, celery, lettuce, broccoli, cabbage, carrots, cauliflower, turnips, onions, kale, kohl rabi, spinach and silverbeet.
- Give peas a chance this May; they are a top addition to any patch. Just keep them away from onions and garlic.
- Herb it up with lemon grass, spring onions, chamomile, thyme, mint, rosemary and lemon balm. Why not try the lemon balm in a pot around the outdoor area? It will stop it spreading, and keep away mozzies!
- Stick in some potatoes, home grown is easy, and incredibly rewarding. The potato page is here! Don’t forget about sweet potatoes, they are great fun to grow as well!
- Plants feel the need for a feed at this time of year. A seaweed tea, or any low environmental impact liquid fertiliser, is perfect for giving them a kick start as they establish. Apply to the soil early in the morning and in the concentrations mentioned on the packet. Don’t forget to give the fruit trees a bit of a feed as well (particularly paw paw).
- Pretty up the patch with these flowering fancies- marigolds, lupins, pansies, cornflowers, violas, snapdragons, stock, verbena and lavender (non-invasive varieties of course!). Popping these in around your veggies will give some colour and interest to the patch, and act as beneficial insect attractors!
- Consider a green manure crop to add some life and love to an overworked patch. At this time of year, try millet, oats, lupins or field peas. This will improve your soil incredibly, and, as a bit of forward planning, you’ll find it well worth the effort!
- Water smarter at this time of year. Water first thing in the morning, and instead of quickie irrigation, a nice, deep drink a couple of times a week is far more beneficial! Always check soil moisture before watering at this time of year… don’t waste your precious drinking water if Mother Nature has already done all the hard work for you!
- Top up mulch on your veggie patches, herb gardens and ornamental beds, especially important for weed suppression at this time of year. Mulch to a depth of about 7cm after watering the patch. Keep mulch clear of plant stems… especially young seedlings. Choose sustainable, low environmental impact mulch, one that will enrich your soil as it breaks down.
- Weeding is an awesome job to do at this time of year. Cut down the competition between your tasty treats and these space invaders, and tidy up your patch. It may sound tedious, but it’s incredibly rewarding!
Of course, this is just a rough guide, and many of you will find your situation varies from the above due to microclimates created in your garden, location in relation to your nearest major city, extremes of weather (Mother Nature does like to keep us on our toes) and garden type.

December In Your Patch
Life really starts ramping up festive wise at this time of year, so it is important to know some December gardening tips! Hopefully you’ve already put in loads of produce plants but it’s not too late to get some more growing, especially if you’ve had the pleasure of already harvesting some plants. Keep up the good work in the garden - despite the rising heat there’s still plenty to do this month in your patch. And with Christmas coming, there are plenty of ways you can create gifts for family and friends. Get some tips!
 And if you’re heading off on a trip this break, read our tips on preventing “holiday-itis” in the garden. It’s an all too common occurrence that can turn the most beautiful backyard into a garden grave in a matter of weeks! Give your garden the gift of a bit of your time this December… you’ll be so pleased you did!
Warm Areas
Frost free or occasional light frosts (North from about Coffs Harbour and all the way across to the west to Geraldton)
- It’s pretty warm, and fairly humid this month, but there are a few things you could still pop into the patch. You can put in some capsicum, chilli, eggplant, carrots, lettuce, tomatoes and zucchini.
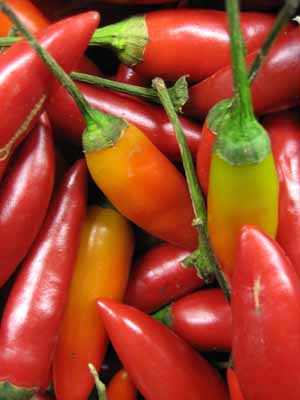
- Too hot for most herbs, but you could try some lemongrass.
- Still time to pop in some asparagus… just find a cooler spot in the patch.
- It’s not too late for watermelon, bananas, mangos and passionfruit. Try a Bromaliaceae that fruits as well, sound crazy? Pop in a pineapple and see… perfect for summer Daiquiris!
- Plants feel the need for a feed at this time of year. A seaweed tea or low environmental impact liquid fertiliser is perfect, especially for the seedlings put in during November. They are probably in need of a bit of a feed by now. Apply to the soil early in the morning, and in the concentrations mentioned on the packet.
- Try some companion plants as well as these pretties: marigolds, cosmos and sunflowers. Popping these in around your veggies will give some colour and interest to the patch, and act as beneficial insect attractors!
- Consider a green manure crop to add some life and love to an overworked patch. At this time of year, try millet, lablab, or cow pea. This will improve your soil incredibly and for a bit of forward planning, you’ll find it well worth the effort! You just have to have a bit of forethought to what you want to plant in that space come the time to ‘dig over.’
- Top up mulch on your veggie patches, herb gardens and ornamental beds, especially important if you are heading off this holidays. A hot summer tip is to mulch after watering the patch, to a depth of about 7cm. Keep mulch clear of plant stems. Especially young seedlings. Choose a sustainable, low environmental impact mulch, one that will enrich your soil as it breaks down.
- On non-gardening days head out to the shed and construct a couple of shade cloth tents. They don’t have to elaborate, just a simple, moveable structure that you can pop over the top of some of the sun sensitive veggies (like eggplant, capsicum and others) as the heat becomes more intense. Think of it as slip, slop, slap for plants! Pop these around where required, especially on high UV days, windy days, and during your holidays.
- Going away? Consider installing a drip irrigation system in your patch before you leave. These systems deliver water where it is needed, the roots, and when covered by mulch, are invisible garden lifesavers! Install on a tap timer and you’re set! Make sure you choose one appropriate to the needs of your plants; they come with a variety of ‘drips per minute.’
- Weeding is an awesome job to do at this time of year. Cut down the competition between your produce plants and the weeds and tidy up your patch. It may sound tedious, but it’s incredibly rewarding! Weeds use nutrients that you have set aside specifically for your produce plants, don’t let it leach away!
- Protect your pot plants while you are away this summer. Mulch the top of the pots, sit them in a saucer of water (or the bathtub if it gets enough light) and you’ll be set! Or even run dripper lines to them from your main irrigation pipes.
- Give the gift that keeps on giving. A productive pot plant! There are potted plants to suit every back pocket, and some awesome selections include chillies, cherry tomatoes, citrus, olives or a mixed herb pot. Get creative… and get giving!
Cool to Cold Areas
Low temperatures for extended periods of time (all of Tasmania, most of Victoria, the southern highlands of NSW, the ACT and a tiny southern bit of SA)
- It’s a great time of year in the garden in this part of the world, and it’s not too late to pop these into the herb patch: dill, basil, chives, parsley, rosemary, pyrethrum, sage and thyme. Pop some mint into a couple of pots - good to grow now but it can take over if planted in the patch!
- Add some of these highly productive plants to your patch this month; carrots, cucumber, eggplants, lettuce, french beans, leeks, pumpkins, silverbeet, squash, sweet corn and zucchini.
- It doesn’t all have to be all edible, flowering plants assist to attract insects for pollination as well as making the area look great. Plant out some of these; celosia, petunias, snapdragons, phlox, marigolds and verbena.
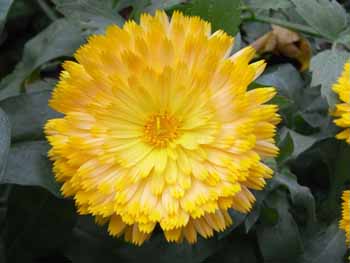
- Top up mulch on your veggie patches, herb gardens and ornamental beds, especially important if you are heading off this holidays. A hot summer tip is to mulch after watering the patch, to a depth of about 7cm. Keep mulch clear of plant stems. Especially young seedlings. Choose a sustainable, low environmental impact mulch, one that will enrich your soil as it breaks down.
- Green manure crops, including soy bean, wheat, millet and mung beans are good to go now. Improve that veggie patch that may be a bit nutrient deficient. Doing this will ensure that you are ready for the next seasons heavy feeding plants.
- Plants feel the need for a feed at this time of year. A seaweed tea or low environmental impact liquid fertiliser is perfect, especially for the seedlings planted in during November. They are probably in need of a bit of a feed by now. Apply to the soil early in the morning, and in the concentrations mentioned on the packet.
- On non-gardening days head out to the shed and construct a couple of shade cloth tents. They don’t have to elaborate, just a simple, moveable structure that you can pop over the top of some of the sun sensitive veggies (like eggplant, capsicum and others) as the heat becomes more intense. Think of it as slip, slop, slap for plants! Pop these around where required, especially on high UV days, windy days, and during your holidays.
- Going away? Consider installing a drip irrigation system in your patch before you leave. These systems deliver water where it is needed, the roots, and when covered by mulch, are invisible garden lifesavers! Install on a tap timer and you’re set! Make sure you choose one appropriate to the needs of your plants; they come with a variety of ‘drips per minute.’
- Weeding is an awesome job to do at this time of year. Cut down the competition between your tasty treats and these space invaders and tidy up your patch. It may sound tedious, but it’s incredibly rewarding! Weeds use nutrients that you have set aside specifically for your produce plants, don’t let it leach away!
- Protect your pot plants while you are away this summer. Mulch the top of the pots, sit them in a saucer of water (or the bathtub if it gets enough light) and you’ll be set! Or even run dripper lines to them from your main irrigation pipes.
- Give the gift that keeps on giving. A productive pot plant! There are potted plants to suit every back pocket, and some awesome selections include chillies, cherry tomatoes, citrus, olives or a mixed herb pot. Get creative… and get giving!
Temperate Zones
Occasional winter frosts (pretty much the rest of Australia, most of the inland, some areas of Victoria, most of SA and the southern area of WA)
- It is pretty warm, so if you are heading away for a while, it’s probably best to avoid planting at this stage. If you are hanging around at home, why not try some of these favourites; silverbeet, lettuce, leek, beans, corn, squash (summer), leek, eggplants, beetroot, carrots, chilli, cucumber, pumpkin and zucchini.
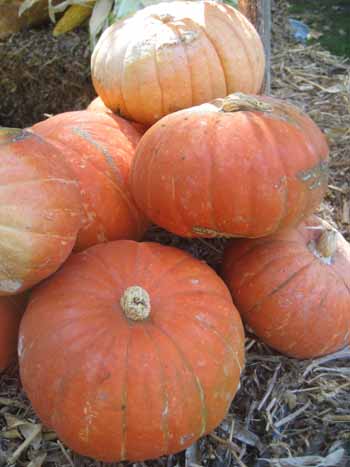
- For some super herbs in the temperate areas, try basil (both sweet and purple), parsley, pyrethrum and lemongrass. Mint can be planted now but you might want to keep it in a nice sized pot, just to prevent serious mint invasion!
- Why not try some lovely flowering stuff in your patch as well. Nasturtium, verbena, petunias, marigolds, phlox and celosia are great at attracting pollinators and beneficial insects to your patch. They add a touch of pretty to your patch too.
- Consider a green manure crop to add some life and love to an overworked patch. At this time of year, try cow pea, mung bean, soy bean and millet. This will improve your soil incredibly, and return some nutrients that are needed for healthy vigorous growth. With a bit of forward planning you’ll find it well worth the effort!
- Plants feel the need for a feed at this time of year. A seaweed tea or low environmental impact liquid fertiliser is perfect, especially for the seedlings planted in during November. They’ll be ready for a bit of a feed by now. Apply to the soil early in the morning, and in the concentrations mentioned on the packet.
- Top up mulch on your veggie patches, herb gardens and ornamental beds, especially important if you are heading off this holidays. A hot summer tip is to mulch after watering the patch; to a depth of about 7cm. Keep mulch clear of plant stems, especially young seedlings. Choose sustainable, low environmental impact mulch, one that will enrich your soil as it breaks down like pea or lucerne straw.
- On non-gardening days, why not head out to the shed, and construct a couple of shade cloth tents. They don’t have to elaborate, just a simple, moveable structure that you can pop over the top of some of the sun sensitive veggies (like eggplant, capsicum and others) as the heat becomes more intense. Think of it as slip, slop, slap for plants! Pop these around where required, especially on high UV days, windy days, and during your holidays.
- Going away? Consider installing a drip irrigation system in your patch before you leave. These systems deliver water where it is needed, the roots, and when covered by mulch, are invisible garden lifesavers! Install on a tap timer and you’re set! Make sure you choose one appropriate to the needs of your plants; they come with a variety of ‘drips per minute.’
- Weeding is an awesome job to do at this time of year. Cut down the competition between your tasty treats and these space invaders and tidy up your patch. It may sound tedious, but it’s incredibly rewarding! Weeds use nutrients that you have set aside specifically for your produce plants, don’t let it leach away!
- Protect your pot plants while you are away this summer. Mulch the top of the pots, sit them in a saucer of water, or the bathtub if it gets enough light, and you’ll be set! Or even run dripper lines to them from your main irrigation pipes.
- Give the gift that keeps on giving. A productive pot plant! There are potted plants to suit every back pocket, and some awesome selections include chillies, cherry tomatoes, citrus, olives or a mixed herb pot. Get creative… and get giving!
Of course, this is just a rough guide, many of you will find your situation varies from the above listing, due to microclimates created in your garden, location in relation to your nearest major city, extremes of weather and garden type.
But the one thing that remains the same for all zones and regions is this: the festive season is better outdoors! So, grab a cool beverage, slip, slop slap, and spend some time under your favourite tree, admiring your patch!
The SGA team would like to wish all of our readers (and their gardens) a safe and happy holiday season… see you back here next year!
Information sources: Bagnall, Lyn, Easy organic gardening and moon planting, published by Scribe Publications, VIC. McFarlane, Annette, Organic Vegetable Gardening, published by ABC Books, Sydney, NSW.
Photos: Joanne Bate, Elaine Shallue, Mary Trigger
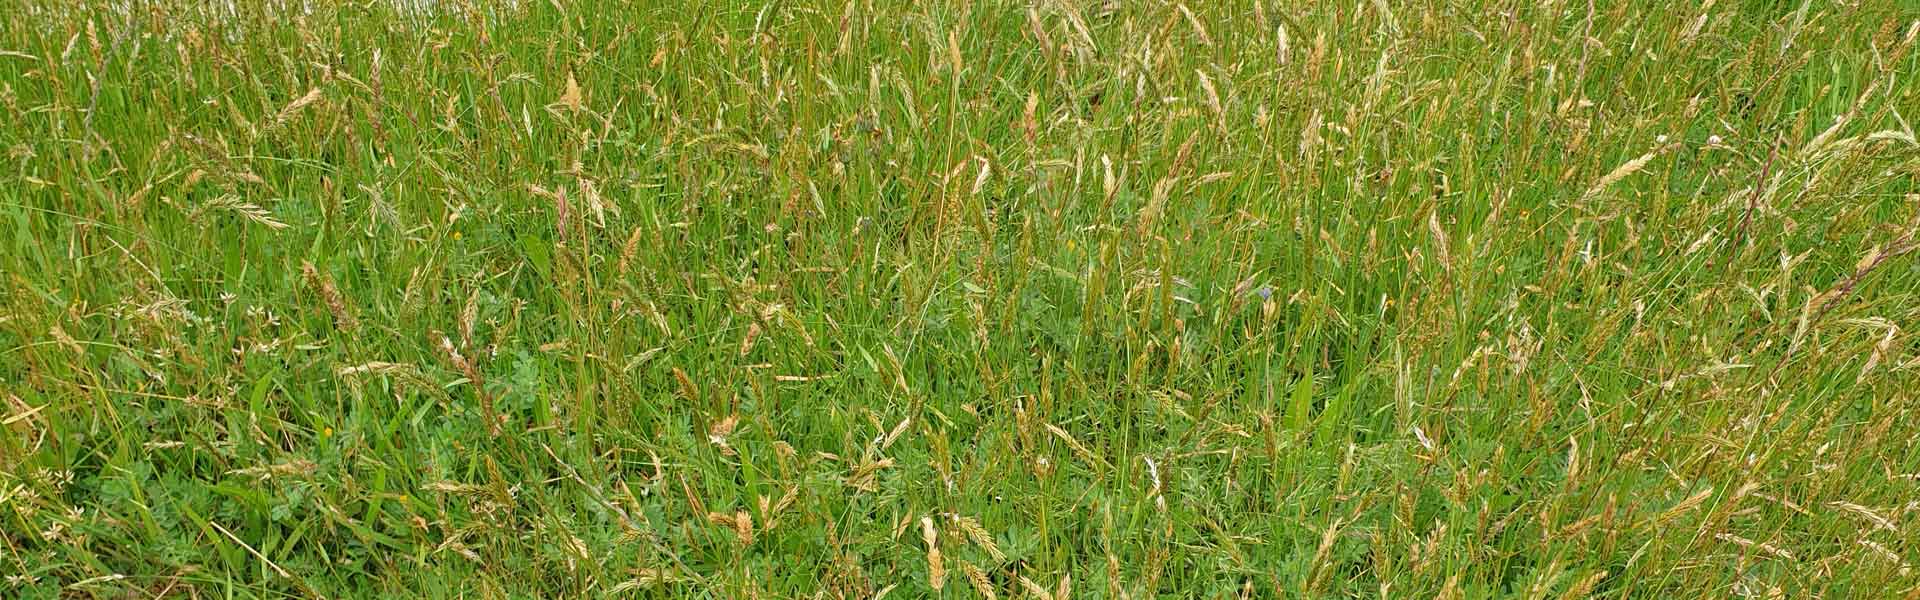
All About Weeds
Let’s find out more about why we call some plants weeds and why they are not all really bad. So that we can think usefully about removing unwanted species we need to get a full picture of their negative and, dare I say it, positive impacts.
There are many interpretations of what a weed is, dependent on, amongst other things, personal preference for plants and their particular role, use or contribution to a home, person or landscape. We thank Bridey Oliver for research and draft of this article.
What is a Weed?
“….a weed is simply a plant which in a particular place at a particular time arouses human dislike…”
William Stearn -Journal of the Royal Horticultural Society 19561.
However at the environmental and agricultural level there is less room for personal preferences as weedy plants can have serious impacts.
Various bodies have defined what a weed is. Whilst not dissimilar, they are not exactly the same.
- A weed is plant that is growing where it is not wanted2
- A plant that requires some form of action to reduce its harmful effects on the economy, the environment, human health and amenity3.
- A species that adversely affects biodiversity, the economy or society4.
A useful overview was provided in a University of Melbourne course handbook5. “Weeds are plants that grow where they are not wanted, can cause health problems in humans (hayfever, contact dermatitis etc), cause health problems in livestock, reduce the aesthetics of an area and can compete with desired plants for light, water and nutrients. A successful weed is a plant that can have high levels of seed production, seed dormancy, can propagate from other plant parts such as bulbs, rhizomes and can live a long time in the soil. Some weedy plants propagate by both seed and vegetative parts. They tend to establish quickly and can quickly occupy disturbed land areas. Many successful weeds can tolerate conditions that may be more challenging for non-weedy species. I.e, drier or wetter sites, hotter or shadier places. “
Many of our worst pest plants (weeds) are escapees from gardens. In fact, around 65% of pest plants that naturalised (became established) in Australia between 1971 and 1995 were imported as ornamental plants for gardens6. For example some of the worst weeds include plants like agapanthus and arum Lilies. Let's not forget, though, that native Australian plants can also become weeds.
Impacts of Weeds
Bearing in mind that a plant’s classification as a weed can be quite subjective, many plants considered as weeds can also quite useful. Potential benefits or drawbacks depend on a number of factors including species of weed, the location and the needs or desires of the user.
|
POSITIVE |
NEGATIVE |
| Provide a cheap/free source of food containing high levels of vitamins and minerals if correctly chosen. | Weeds provide competition for nutrients, light, water and space and can reduce those available for the desired species. |
| Can provide food or habitat for species of fauna (eg. Bees) | Weeds can provide a breeding ground or home for a number of garden pests and diseases. |
| Important medicinal plants | In the broader environment invasive plants can displace native species, having a serious negative effect on native habitat (i.e. reducing food or nesting sites) potentially leading to extinctions. |
| Weeds, like many other plants, can give an indication of soil condition. | In Agriculture weeds can be costly, through herbicide use to reduce or remove them and through reduced yields, through injury or illness to livestock (in the case of toxic plants), or contamination |
| Some weeds are also poisonous or irritating to people |
Know your weeds
 Being able to identify the common weeds in your garden allows you to take effective action for reducing them (if you want to of course). The State of Victoria, under the Catchment and Land Protection Act 1994 has declared a number of plants as noxious weeds. This means that they are harmful or have the potential to be harmful to the environment or cause economic harm or be harmful to humans. Plants classified as noxious weeds are placed into one of four categories; State Prohibited Weeds, Regionally Prohibited Weeds, Regionally Controlled Weeds, Restricted Weeds.
Classification of Weeds7
|
Classification |
Description |
Example |
|
| State Prohibited Weeds | Are either not yet present in Victoria or present in very low numbers but present a significant threat if allowed to invade. The State Government of Victoria is responsible for eradicating these weeds, but may direct landowners to take action on them. | Mexican Feather Grass - Nassella tenuissima
Water Hyacinth Eichhornia crassipes |
|
| Regionally Prohibited Weeds | P | Not widely spread through a region (catchment area defined within the CaLP 1994) but have the potential to do so. They must be managed with eradication the goal. Landowners (private and public) must take all reasonable steps to eradicate these weeds on their land | Artichoke Thistle - Cynara cardunculus if prohibited in the Goulburn, North East and West Gippland Catchments. |
| Regionally Controlled Weeds | C | Usually widespread in a region. Control measures must be undertaken by landowners to prevent growth and spread of weeds on their land | Hawthorn - Crataegus monogyna in the Goulburn and Port Phillip and Western Port Catchments |
| Restricted Weeds | R | Plants that post a very high risk of spread within Victoria and also pose a threat to another state or Territory. It is prohibited to trade seeds, plants of these species. | Hawthorn - Crataegus monogyna in the Mallee, North Central, Corangamite and Glenelg Catchments |
Many local government areas (LGA) and Catchment Management Authorities provide identification resources for plants considered weeds or problem plants in the local area and management methods. These lists can usually be found online at the LGA websites or sometimes in hard copy in council offices, information stands/centres in parks and gardens. For example the Mornington Peninsula Shire Council produce a brochure that is available in hard copy and online to help identify invasive/pest plants in that area8.
Online weed databases such as Weeds Australia9 which is a website run by the Centre for Invasive Species Solutions (a research and extension partnerships between Australian Federal and State Governments, CSIRO, Government bodies and Universities).
For other sources of information relating to weeds, identification and management see our reference and resources lists at the end of this article.
Weed Categorisation
 It is possible to categorise weedy plants a number of ways; by life cycle, life form, by survival strategies, by impact, amongst others. Categorising weeds can inform the most effective way to deal with them or if removal is necessary. The two easiest, therefore most useful to most people are life cycle and life form.
|
LIFE CYCLE |
LIFE FORMS |
| ANNUAL - Complete their lifecycle in one growing season. They need to flower and then set seed each year in order to continue the next generation. | BROAD LEAF (DICOTYLEDON) - emerge and develop two seed leaves, flat and broad leaves and the veins resemble a spreading network and a taproot system. |
| BIENNIAL - These plants complete their lifecycle in two years. In the first year they germinate and develop leaves and in the second year they flower and set seed. | GRASSES (MONCOTYLEDON) - emerge and develop with one seed leaf, has long and narrow leaves that are characterised by parallel veins and a fibrous root system. |
| PERENNIAL - These live for many years and flower and set seed each year. Perennials may be fixed in position, generally only reproducing by seed, or spreading. Perennials which spread do so by the development of their vegetative parts including stolons, runners, rhizomes, corms, tubers, bulbs and bulbils as well as reproduction by seed. |
Of course, if you’d like to learn to identify weeds for other uses (e.g. edible weeds) there are books to assist with identification and, in most Australian states, weed walks/foraging walks with experts who show you some of the edible and easily identifiable weeds.
http://www.edibleweeds.com.au/
https://www.eatthatweed.com/
https://pfaf.org/user/Default.aspx
We are very grateful to Bridey Oliver for the research and first draft of this article and to financial support from the Lord Mayor's Charitable Foundation.
References
- Stearn 1956. Review of Weeds by W.C. Muenscher. Journal of the Royal Horticultural Society. p285.
- Richardson, DM,Pyšek P,Carlton JT. A compendium of essential concepts and terminology in invasion ecology. Fifty years of invasion ecology. The legacy of Charles Elton (ed. by D.M. Richardson), pp. 409–420, Wiley-Blackwell, Oxford.
- Department of Environment and Water Resouces 2007. The Australian Weed Strategy. p. 21.
- Groves RH, Boden R, Lonsdale WM 2005. Jumping the Garden Fence. CSIRO Report prepared for WWF.
- University of Melbourne Burnley Lectures - 2016. NRMT20016. Plant Protection - Weed Management
- Commonwealth of Australia 2017. Australian Weeds Strategy 2017 – 2027.
- Agriculture Victoria. Invasive Plant Classifications. 2020. https://agriculture.vic.gov.au/biosecurity/weeds/invasive-plant-classifications
- https://www.mornpen.vic.gov.au/Your-Property/Environment/Flora-Fauna-Biodiversity/Environmental-Noxious-Weeds
- Weeds Australia. 2021. Centre for Invasive Species Solutions. Identify a Weed in Your Region. https://weeds.org.au/identify/
Other Useful Resources
Grubb, A Raser-Rowland A. 2012. A Weed Forager’s Handbook.
Aldous D. 1991. Weed Control for the Home Gardener. Lothian Australian Garden Series.
Herrera PJ, Dorado J, Ribeiro A.2014 A Novel Approach for Weed Type Classification Based on Shape Descriptors and a Fuzzy Decision-Making Method. Sensors14, 15304-15324.
http://www.edibleweeds.com.au/