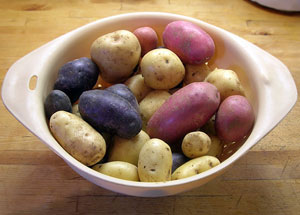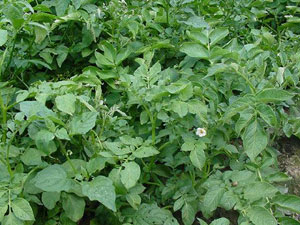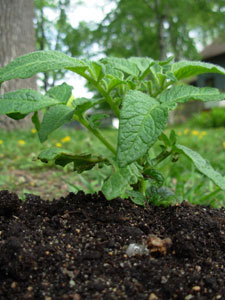
The humble spud… is there any vegetable more versatile than these tasty tubers? Grown around the world, spuds are the only vegetable to have had a year dedicated to them (2008 was the International Year of the Potato) owing to their importance as a food crop in combating world hunger. So stave off hunger in your household and stick in some spuds!
Planting Schedule
Warm Areas: March – August (try planting in the cooler months, so harvest can be completed by December)
Temperate Areas: September – February
Cool to Cold Areas: September – February
Position, Position, Position!
Despite outward appearances, spuds can be, well, a bit fussy. For a start, they can take up a fair bit of room, and are a bit slow growing, so consider giving them a place of their own. Many folk grow their potatoes in a raised, no-dig garden bed, or a custom designed potato patch.

Remember your Nana growing her spuds in a stack of old tyres? Great in theory, but there can be some issues with this – used tyres have the potential to harbour some problematic heavy metals (like cadmium and friends), which potatoes are super efficient at absorbing. Now, I like my heavy metal as much as the next person, but I prefer it in my music, not my mash! A better option is grabbing a few polystyrene fruit boxes, cut the bottom out of them, stack them up (three high is great) and away you grow (see the “Hot Tip” for more on this!).
Our fussy spuds need a full sun position, top notch drainage, and must not be planted where Chilis, capsicums, tomatoes or eggplants have been planted in the last few years.
Talking Dirty
Spuds need rich soil, chock full of organic matter, and some well-rotted cow poo. Like my Saturday afternoon six-pack, spud soil has to be well-drained, so I reckon a no-dig system is the way to go. So, here’s how to do it: mix compost with your aged cow poo and some straw, and lay this to a depth of 15 – 20cm in you potato patch, and water it in. Lay out your seed potatoes, leaving about 25cm between each, and cover these guys up with about 15cm of the same mix.
When the little green shoots begin to peak through this mix, put in another 15cm of your compost, cow poo and straw mix on top. Keep repeating this through the growing season until you have achieved a total depth of about 60cm. This gives your spuds the space to grow, and prevents the tubers getting “cooked” or over-heating. Potatoes grown in this beaut mix will be tastier than you ever imagined! Spuds need a soil pH of about 5.5 – 6 for top notch, scab-free growth.
Feeling Seedy
Top notch potatoes are grown from what is known as “seed” potatoes, which are virus-free spud tubers which have formed “eyes”. Generally, putting a shooting supermarket spud (found in the back of the cupboard) into your Yummy Yard will not result in anything even remotely edible, so head to you local garden centre and buy the “real deal”. Certified seed potatoes are best if you can track them down, as this ensures they are disease free.
Seed potatoes about the size of chicken eggs are good to go as is, whereas the bigger boys can be cut into large chunks that contain a couple of good-looking eyes. Seed potatoes should be exposed to light for about a week prior to planting, as this toughens them up, greens their skin and gives the eyes an opportunity to shoot.
Feed Me!
Like me, spuds need a decent feed, and have a pretty big appetite. Organic matter (the compost and cow-poo we talked about earlier) are essential, as is a bit of seaweed tea at planting time. I tend to give mine a diluted seaweed tea when they flower, but, with good soil preparation, that’s all they need. The more organic matter in their well-drained patch, the better.

What about the Water?
Just like me, spuds aren’t huge water drinkers, and need very little irrigation over their lifetime. In fact, over-watering and poor drainage are responsible for loads of potato pests, so hold back on the H2O. As always in our Yummy Yards, say no to grey water. My hot tip here is to wet down the different layers of mix (see “Talking Dirty”) when you “hill” them up, as this will pretty much do the watering for you.
Are We There Yet?
Like all root vegetables (and life I suppose) timing is everything! Depending on the variety of spud you plant, your harvesting time can vary from 12 to 20 weeks. I know this is pretty broad, but, when you notice the leaves beginning to yellow (the lower ones first), your spuds are ready to harvest. Harvesting just as the lower leaves change colour will give you new (or chat) potatoes, whereas late season spuds are harvested after their top foliage has died off. It’s best to harvest new spuds on a meal to meal basis, so ferret around in the soil for the largest tubers and collect, leaving the remainder to “grow old gracefully”.
Old or late season spuds are best stored in the soil, but, because I can never remember where they are, I prefer to rip them all up at maturity. You know they are ready to be harvested and stored when their skin feels firm and doesn’t rub off. Store your spuds in a cool, dark place, with the dirt on, and avoid exposing them to light. Spuds exposed to light will turn pretty green, and should definitely not be eaten… they are related to nightshades after all!

Pests and the Rest
Spuds can have a fair range of issues, most of which can be avoided with good planning. Free-draining soil will prevent soggy spuds, whilst good crop rotation will see nematodes and other nasties avoided. Checking the soil pH and avoiding alkaline soils will prevent potato scab, and a bit of seaweed tea at planting and flowering time will do wonders. For the best start in life, buy certified disease-free seed spuds when available, and, for the love of the Garden Gods, don’t overwater!!
Hot Tip
Polystyrene fruit containers with the bottoms removed make top notch potato patches, but they can look pretty ordinary. Why not get the kids (or grandkids, or big kids at heart) to wow you with their creative flair and paint them? This can create a unique, functional, funky and full-on sustainable potato patch that costs very little and is perfect for the job. I reckon three is the magic number here, with the layers added as your spuds grow up.
Eat Me
One Pot Potatoes
Garlicky and potatoey and oh so delicious and simple! Just throw it in the pot and walk away:
1kg Potatoes
1/3 cup veg oil
3/4 cup water or stock
4 tbsp Tomato paste
6 cloves of garlic
1 tsp Salt
1 tbsp Paprika
1 cup home grown parsley
Method
Chop potatoes into small cubes. Place in a heatproof saucepan or casserole dish.
Add the rest of the ingredients.
Bake in covered dish for 1 hour. Check after about 45 minutes.
This dish can also be cooked on the stove top or in a slow cooker. You may need to check it regularly and stir it occasionally if cooked in this way.
This dish matches well with roasted meats or accompanies Lebanese dishes. The herbs can also be varied and tailored to your accompanying dish. e.g. try adding some home grown oregano or rosemary.
Related Articles:
Tomato Brown Rugose Fruit Virus (ToBRFV)
Tomato Brown Rugose Fruit Virus (ToBRFV) is a plant virus that causes severe crop losses (up to 75%) in tomatoes, but also in peppers (capsicums and…
Garden Journaling – Slow down to tune in.
As we move through the year and our gardens evolve, there's something magical about documenting the journey. Garden journaling is an art that enables…


