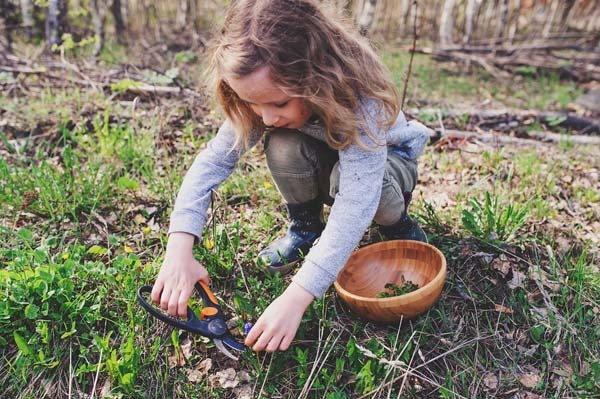
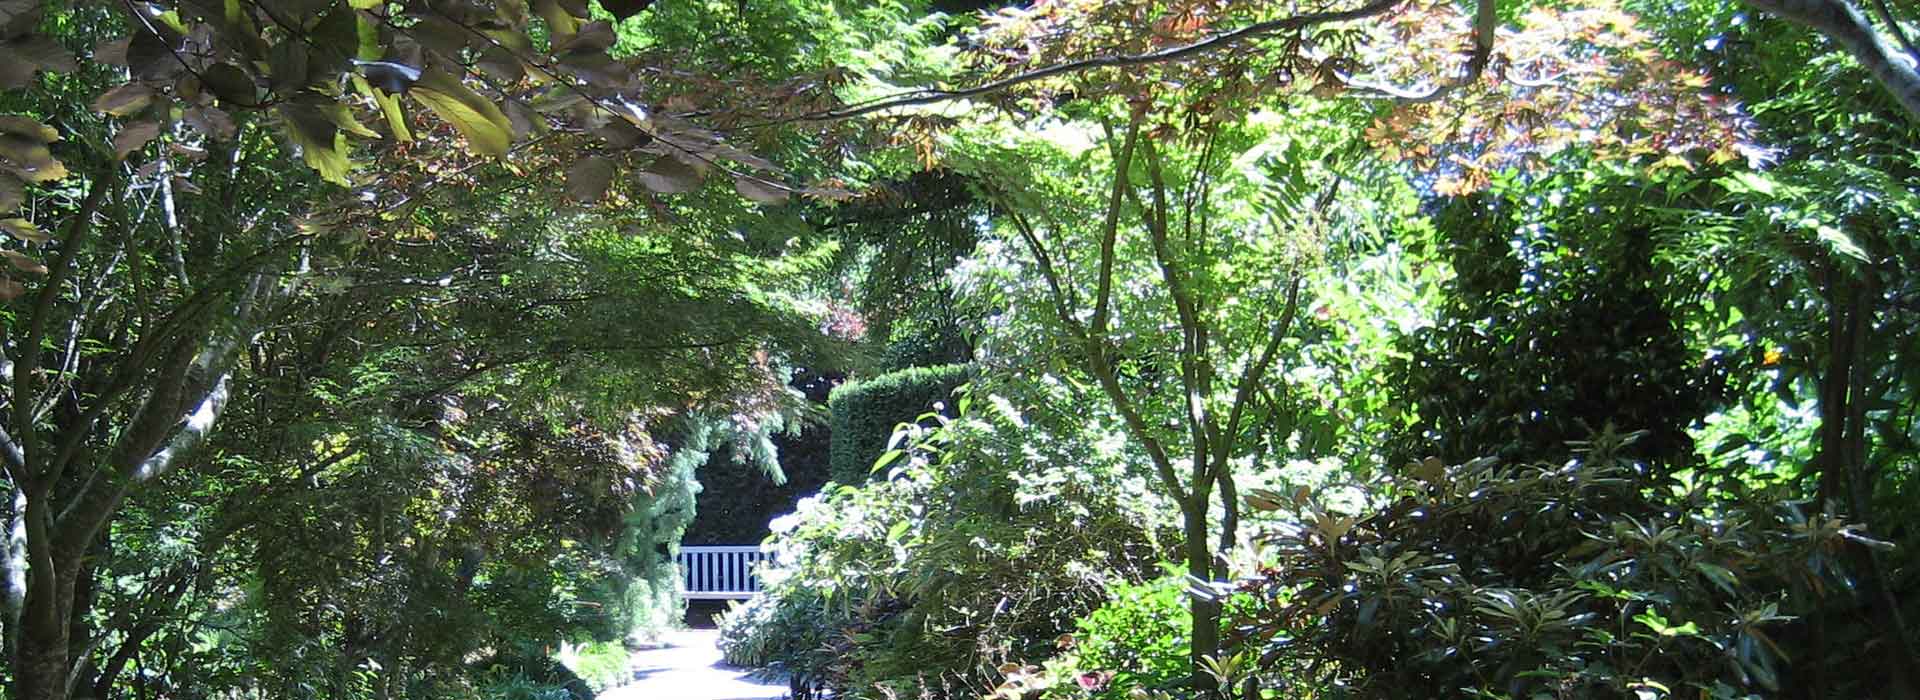
7 Ideas for Designing and Landscaping a Backyard Naturescape Playground
The concepts of sustainability and providing a better future for our younger generations are intertwined with physical and mental health. We can design and landscape our gardens to be both sustainable and engaging for our children by creating a backyard naturescape playground. This can encourage your children to value, learn about and engage with their natural environment in their garden naturescape wonderland.
Article written by Dan Nitsche.
1. Child Friendly Design
The first step is getting your child involved in the design. Whether you hire a landscaper to do the work or you do it yourself, this is an opportunity to talk about the importance of sustainable concepts and how these can be incorporated into your design. You may like to have an overall vision of how the finished garden will look, but it is important to get your little ones to also give you ideas of how they want to use this outside space. They may like to have quiet areas for building an outdoor cubby house or a messy mud kitchen for creating some culinary master pieces. Part of the design is to also ensure that all aspects are accessible but that there is also an element of adventure. This means considering the height and depth of any raised garden beds and also ensuring that the design is flexible enough to let your child’s imagination run wild. One day they could pretend they are captaining a tall ship, the next creating culinary masterpieces in their own outdoor kitchen. Letting your child’s imagination run wild will show them that they can have even more fun engaging in unstructured play with natural elements than simply playing on plastic playground equipment. By including your child’s design ideas they will be more likely to be intrinsically motivated to spend time playing, exploring and learning from the natural world. Fostering an appreciation of the natural world from an early age will lay the foundation for sustainable practices throughout your child’s life.
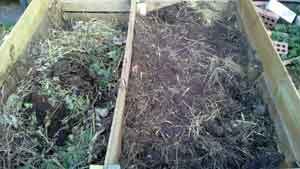
2. Construct with the Kids
Once a design developed, it’s time to get constructing. Getting your children involved in this will give them greater understanding of sustainable building materials such as recycled timbers, straw bales, recycled and repurposed plastics as well as fallen branches and leaves from already established plants and trees. Their involvement will also provide them with ownership over the finished garden and help them understand the concepts of sustainability and sourcing local materials. Your backyard naturescape playground will be an ever-evolving creation. By involving your children in design and construction of the nature play space they will be subtly learning the benefits of protecting our environment.
3. Integrating Sensory Experiences
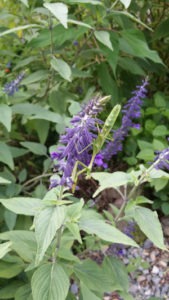
 Children are tactile creatures, and learn through their senses. Sensory experiences can be created throughout the design using different materials (such as sand, stones, native mulch and wood) and also through the plants you select. Fragrant plants such as lavender, rosemary and other herbs are great for children to use in their pretend play and also to bring inside to cook with. Having spaces where children can combine different sensory elements is also important – a sand area with wooden tree stumps would allow your child to get their hands dirty mixing sand, water and plants they have picked. By incorporating multiple sensory experiences you will foster a greater appreciation of the natural world. They’ll be bursting to get out into the great outdoors to learn and explore, leaving computer and TV screens behind.
4. Ensuring Edible Elements
Children love watching seeds sprout, flowers bloom and fruit grow and by planting edible plants in your garden you will be helping your child understand where fresh fruits and veggies come from. They will understand the concept of seasonal produce and the different growing conditions needed for their favourite summer fruits and winter vegies. Eating produce in season reduces transportation required as well as the need for creating artificial growing conditions, decreasing the carbon emissions involved in getting these foods on your plate. If they are part of growing their own fruit and vegetables they are also much more likely to enjoy eating a healthy range of these foods when it comes to dinner time.
5. Reuse and Recycle Local Natural Materials
Central to the concept of sustainability is reusing and recycling local natural materials. This may mean getting on your local area social media pages to see if anyone has any landscaping materials, mulch or plants. Another idea is to ask your local council if you can have access to any timber that has recently been pruned from trees in the area. Some things to spark your child’s imagination could be creating a water wall using recycled bottles or heading to the local op-shop to source utensils for a mud kitchen. From these activities your child will see the potential for items to be repurposed for a new use and will encourage them to think of other ways they could reuse and recycle items in their day-to-day life.
6. Non-toxic
It goes without saying that everything you use in your backyard naturescape should be non-toxic. This ensures that your child can safely use all of their senses to fully interact with their outdoor wonderland. Especially important is considering the properties of any elements that you are re-using. For example, some wooden pallets have been treated with harsh chemicals making them unsuitable for your garden.
7. Welcoming Backyard Critters
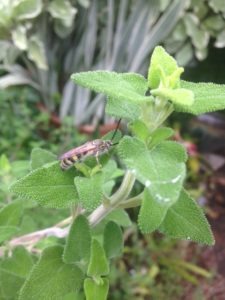
A big part of enjoying the natural environment is learning to live with the plethora of spiders, insects, lizards, frogs and other creatures that all help to create a healthy ecosystem. By understanding the different environments these species like to inhabit you can ensure that spiders will be discouraged from areas of play – this can be achieved through incorporating ‘insect hotels’ into the design. These give spiders a safe place to live while also allowing your child to appreciate their role in the garden. They also will provide homes for insects. Careful plant selection will encourage natural pest controllers such as ladybugs and pollinating bees. Children who are encouraged to interact with garden insects have a greater understanding of their importance to ecological balance and are therefore less likely to resort to using pesticides in later life.
Incorporating sustainable and educational ideas into your nature playground garden design can help nurture environmental values in future generations. So start collaborating with your kids and build your very own naturescape play area in your backyard.

Ashwood High School COMMUNITY GARDEN INC.
In 2007, the garden was established within the grounds of the Ashwood High School. using the mandala system, based on Linda Woodrow permaculture principles. Inspiration for the garden was prompted by a fresh food desert prevailing in that area of the Melbourne suburb, Ashwood. It was spearheaded by one of the school council parents, Mariëtte Tuohey, supported by the former school Principal, Kate Long.
As an incorporated not-for-profit volunteer-run organisation, it aims to encourage like-minded people who wish to learn about growing their own food, sharing their food-growing knowledge, learning more about basic permaculture principles and basic chook care, and engaging socially with others in a friendly garden atmosphere.
The garden has a Management Committee that meets monthly and is governed by the Associations Incorporation Reform Act 2012 and registered with Consumer Affairs Victoria. We have public liability insurance, incorporated association rules and a code of conduct. Our volunteers attend the garden on open days each Wednesday and Saturday. We have a chook roster in place for one person to tend the hens each day. New volunteers are always welcome, membership is only $10 per annum and there are no waiting lists or assigned plots, we all garden collectively.
 It is a self-funded garden, relying on sale of mulch, plants, seedlings, produce, membership subscriptions and grants. The money is used to buy chook grain, seeds, seedlings, fruit trees, mower fuel, animal manure and tools. Grants are sought to support larger infrastructure projects i.e. the construction of permanent composting bays.
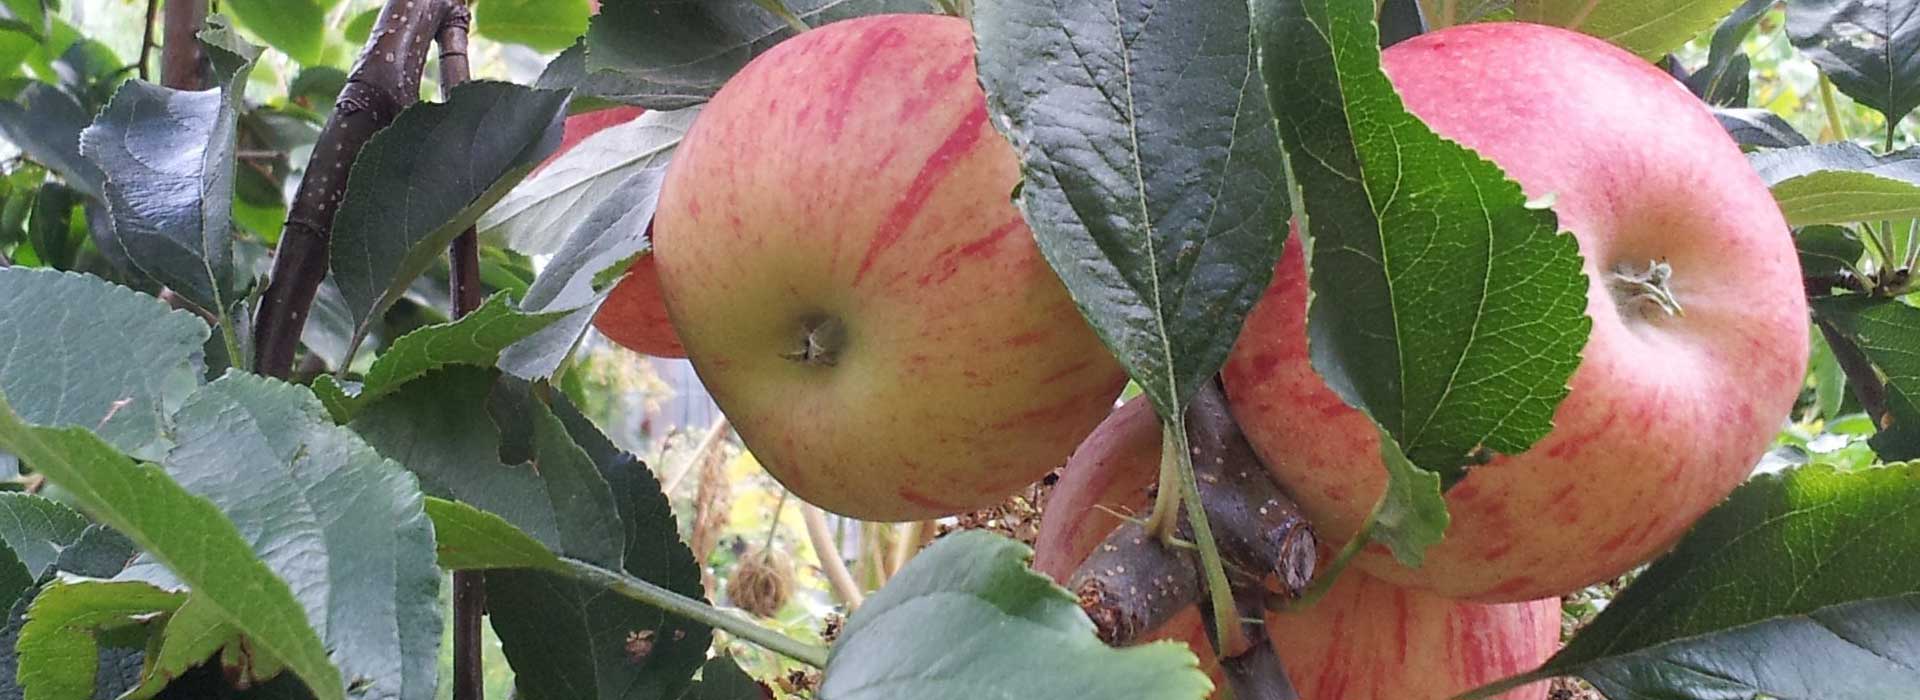
The garden covers over 2,000 square metres, and contains about 60 fruit trees, several wicking beds, a shade house, pergola, pizza oven, a chook dome protected from foxes by a small electric fence, composting facilities, worm farms, beehive, and two 75,000 litre rainwater tanks. The rainwater tanks are fed with runoff from the roofs of nearby school buildings.
Our fruit trees include:
- Granny Smith, Early McIntosh, Sturmer Pippin, Gala, Cox’s Orange Pippin, and Orange Blenheim apples;
- Josephine, Red d’Anjou, Doyenne du Comice, and Nashi pear;
- two white and a black variety of fig; and
- mulberry, almonds, feijoa, lemon, orange, pomelo, macadamia, olive, guava, apricot, plums, nectarine, peach, cherries, quince, varieties of plum, peach, blueberries and loquat.
 We move our chook dome every month depending on the condition of the planting circle it is located on. Once the hens have been moved from a circle, it is prepared for planting. Depending on the season, our plantings include heritage tomatoes, root vegetables, pumpkins and other gourds, Asian greens, beans, green leafy vegetables, summer salad vegetables, melons and marrows and brassicas.
Our recent activities have included the delivery of a free wicking bed construction workshop, our end of year celebration using the onsite pizza oven. We have in the past been part of Duke of Edinburgh and community placement activities of students from Ashwood High School.
We currently have eight working compost bins, which we maintain using some coffee grounds and food preparation scraps (vegetable, of course) from cafes, sawdust, occasional private kitchen scraps, and donated and bought animal manures.
We have an area set aside for deposit of wood chip mulch by commercial tree loppers, with the wood chips used in the garden for mulching paths, chook dome and fruit trees. The wood chips are available for sale to members of the community ($2 per bag, or $10 per trailer load).
To join, come along to an open day on Wed or Sat – 10:30am till 1:30pm, we are located at 50 Vannam Drive, to the immediate south of Ashwood High School (Melways 60 J 9). Enter at Gate C, walk down the drive and you will locate the garden entrance to your right. No parking in the drive way please.
You can also email us at ahscginc@gmail.com or contact us through Facebook or Instagram (@ahscginc)
Starting Your Own Vegie Patch
If you would prefer to just focus on designing and starting a vegie patch rather than a whole garden, here is a description of how to do it - even on balconies. Richard Rowe, SGA's Training and Learning Coordinator was interviewed by the RACV to create these guidelines which will help you start your own vegie garden to provide you with benefical and tasty food. Building/starting it will give you a healthy dose of sunshine and some gentle exercise. All important when so many of us are working from home. They are republished here from the RACV's website.
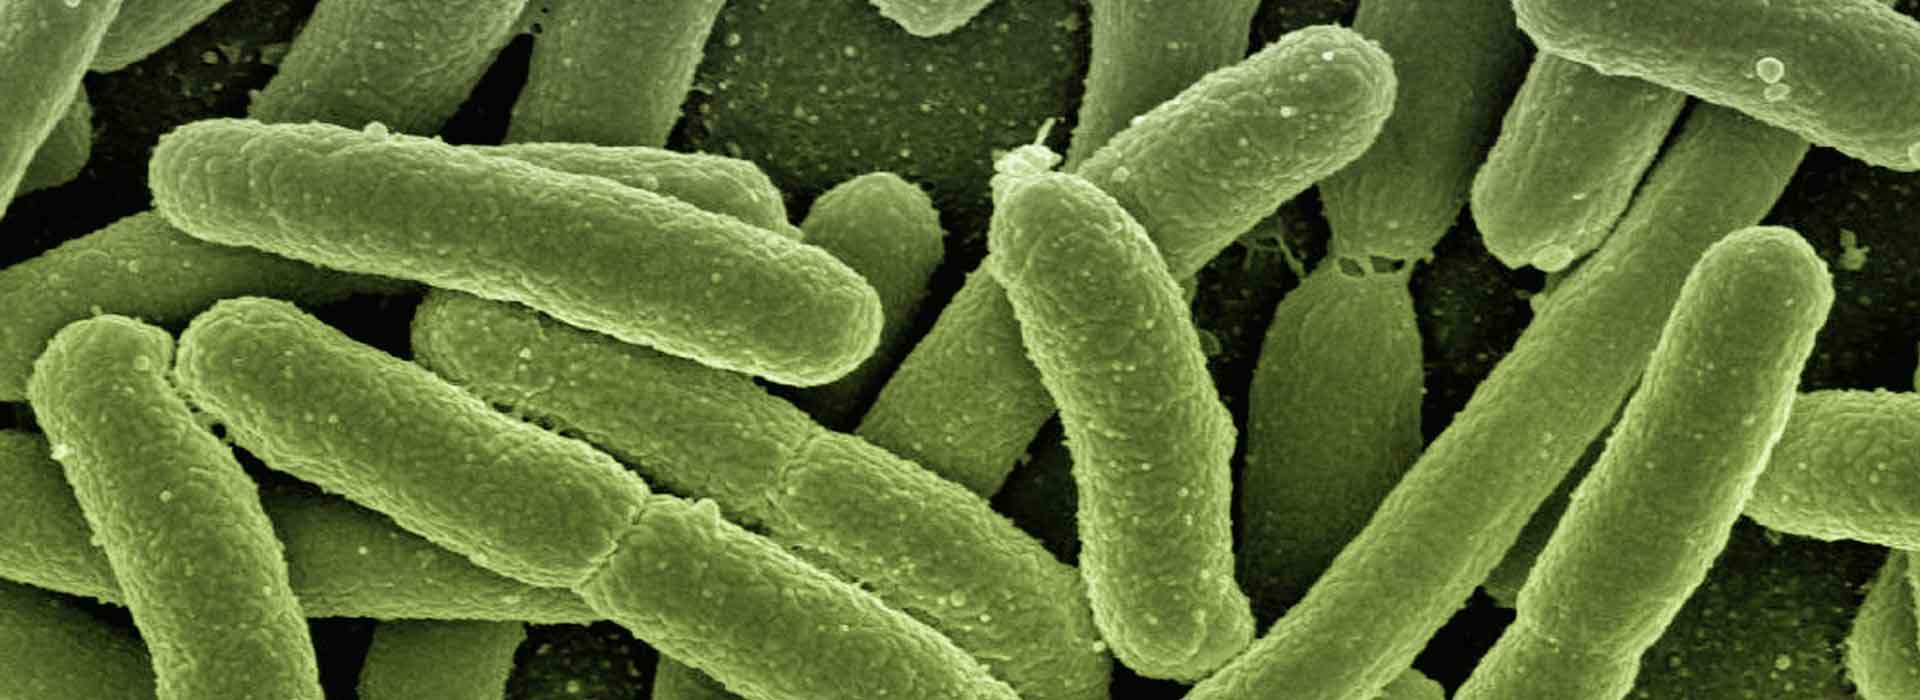
Bacteria
More than 200 different plant bacteria cause plant disease in Australia. However, there's also a host of bacteria that are beneficial to the plants we grow. Some bacteria have been harnessed for commercial products, to control plant pests and diseases, and some live in mutually beneficial, symbiotic relationship with plants.
Beneficial Bacteria
There is a long list of bacteria that help our gardens stay fertile and help break down and recycle nutrients. Here are just a few.
Agrobacterium sp
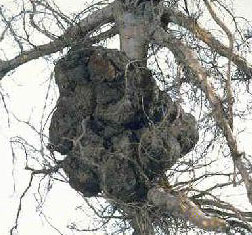
Scientists had been battling the 'Baddie' Agrobacterium that causes Crown Gall Disease for decades. It causes cancer-like growths on lower stems and roots. It was a particularly devastating disease of the fruit industry worldwide.
In 1969, a student at the Waite Agricultural Research Institute in Adelaide isolated a strain of the Agrobacterium that infected plants but didn't cause the cancer-like growth. In fact, this benign strain somehow protected young fruit trees against the virulent form of the same bacterium.
Professor Allen Kerr and his team dubbed the strain K84 and later discovered why it worked. K84 produces an antibiotic that is deadly to the pathogenic strain but it is unaffected itself because it possesses a resistance gene that makes it immune to its own antibiotic (and this antibiotic was also found to be harmless to most other bacteria).
Unfortunately, the close relationship also meant that eventually there was gene swapping and the pathogenic strain also developed resistance. Undeterred, the team then worked with overseas scientists, and identified the region of DNA that allowed the transfer to other bacteria. They deleted this region. The bacterium retained its ability to synthesise the antibiotic, but could not pass the resistance gene to other bacteria.
This genetically modified bacterium was then called K1026. In 1988, the NSW Department of Agriculture approved K1026 for commercial use as a pesticide. It was subsequently given the name No Gall and this product is now used all over Australia. It's not been approved for release overseas, as K84 is still an effective control.
In 1990 Professor Allen Kerr, Professor Eugene Nestor (USA), and Professor Jeff Schell (Germany) were awarded the Prime Minister's Australia Prize for Science for this work.
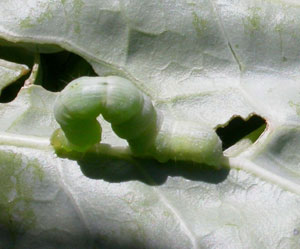
Bacillus thuringiensis (Bt)
Various forms of this bacterium have been harnessed to control some species of leaf-eating caterpillars (like the Cabbage White caterpillar pictured right), mosquitoes and varieties of beetles. It can be found in products called Dipel, Xen Tari, Cybate, Vectobac, and Novodor.
Bt is a naturally occurring soil bacterium and several strains are known to kill insects. Bt's ability was discovered in 1911, but it wasn't commercially available until the 1950s.
Unlike typical nerve-poison insecticides, Bt acts by producing proteins that react with the gut lining. The proteins paralyse the digestive system and the insect stops feeding. The Bt-affected insects die from starvation, which can take several days.
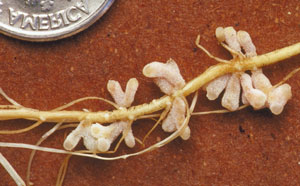
Rhizobia
Nitrogen-fixing bacteria. Legumes (members of the Fabaceae family, which include peas and beans) have a symbiotic relationship with this bacterium. The bacteria are seen as nodules on the roots of legume plants, as can be seen above, and should not be confused with nematode damage (see our information sheet on Nematodes).
Rhizobia provide the plant with additional nitrogen that would otherwise be unavailable to it by converting nitrogen from the atmosphere into ammonia that plants can use.
Legume crops therefore require less nitrogen than other crops because of this relationship.
Acacias have the same relationship with bacteria, and because they are one of the first plants to germinate and grow after fire, they help the plants that follow. Acacias provide nearby plants with nitrogen all year round.
When using pea straw as mulch, often pea plants will germinate. This is to be encouraged. Chop the plants down before they flower, and you also have additional nutritious mulch. Win, win!
Composting Bacteria
Very important for recycling nutrients are the bacteria which are active in both soil and compost heaps. Most of the composting work is done by bacteria, but fungi and yeasts, as well as certain bugs assist. And, of course, worms very valuable too.
There are a large number of different bacterial species but they can be broadly divided into aerobic (requiring oxygen) and anaerobic (do not require oxygen). Aerobes are most efficient at breaking down organic material and do most of the work to release the nutrients (carbon, nitrogen, phosphorus and minerals) that provide the growth-promoting qualities of compost. To keep them happy we need to turn compost heaps regularly, avoid them getting "gluggy" or put in tubes with holes punched in them to keep an air supply going.
The anaerobes can also break down organic material, but rather slowly and, if there are too many of them, compost piles will start to smell ugly because they release hydrogen sulphide which smells like rotten eggs.
Biodegradation - various species
Various bacteria species have been found to break down pesticides, pollutants (such as hydrocarbons in oil spills, as seen above), sulphur and nutrient residues into non-toxic compounds.
They are being used in bioremediation and as natural biodegradation agents.
Other
Plant growth promoting bacteria (PGPR) are various species of bacteria that exist in the root zones and enhance plant growth.
Ice nucleation active (INA) bacteria, such as Erwinia herbicola, are epiphytes, that is, they are grown upon or attached to plants. These bacteria actually promote frost damage to sensitive plants by initiating the formation of ice crystals.
So foster growth of beneficial bacteria in your garden.
Is Biochar “Wonderstuff”?
 Biochar has been hailed as a useful contributor to reducing the world’s increasing carbon emissions since it stores carbon in the soil1 . It has also been recommended as an alternative to chemical fertilisers, since it remains in the soil to increase productivity for a very long time2. We review what is known about biochar and its use and one of SGA’s supporters, Keith Laker, shares with us his experience of making and using it in his garden. It is claimed that the pre-Columbian Amazonians created rich fertile soils by burning their agricultural waste in pits and covering the smouldering material with soil. This material, called terra preta de Indio, was stored underground. It is believed that it was then incorporated into the soil by earthworms.
How biochar is made
The production of biochar requires that all or nearly all oxygen in the atmosphere is excluded in the process of pyrolysis – in contrast to what happens when biomass (i.e. plant material including grain stalks, wood, grass, bamboo, nut shells) combusts above ground with adequate oxygen supply3. The process used in pre-Columbian days, however, actually produced significant amounts of carbon dioxide and other gases along with the charcoal. In contrast, modern systems control the temperature so that at 400 – 500 oC biomass burns quickly and produces more char along with small amounts of liquids and gases. At temperatures higher than 700 oC, more liquid, energy and gas are produced and they can be harnessed for energy supply. Although some carbon dioxide is produced, it is less than would be released if the biomass had been allowed to decompose in landfill to release methane – a more powerful greenhouse gas.
There are many commercial systems around the world for processing biomass. Many are small scale, suitable for use by communities and farms for processing local waste materials. Depending on the system, different proportions of energy or char are produced. In many instances, systems for energy production have been favoured because of attempts find alternatives to fossil fuels.
What are its benefits to soil?
As well as being a soil sink for carbon, biochar is reported to increase crop production by virtue of its highly porous structure. Since biochar is highly porous it helps retain soil moisture, absorbs nutrients on to the microsurfaces inside particles and retains them, improving the efficiency of added fertilisers4. It improves soil structure for earthworm populations and enhances microbial growth by providing increased internal surface area for growth of bacteria and especially fungi which process soil organic matter making it available to plants 5,6. Since it does not decompose readily, it does not need to be replaced each year.
The downsides
It seems that different biochars have different properties depending on the type of biomass used, which crops it is used for and the type of fertilizer applied along with it. A major criticism is that, because of world demand for fuel, commercial crops low in food productivity are being grown instead of good food producing crops and that forests may be felled just for the purpose of producing biofuel and accompanying biochar.
A personal experience with making and using biochar
An SGA supporter, Keith Laker, writes:
You can make your own biochar using a home-made TLUD (Top lit up draught stove). I made mine from a design in the book The Biochar Revolution and from watching Youtube videos of other people’s efforts. This Youtube link shows a stove made from materials very similar to my own. Watch this youtube video.
 TLUD stoves burn waste wood from the top down rather than the bottom up. At the end of the burn process the wood is carbonized but retains its shape.
My TLUD stove is made from a stainless steel bucket, an upturned stainless steel bowl, a ducting connector and a short length of galvanized pipe for the flue.
Holes have been drilled under the bucket to let in limited air when the stove is first lit. The main air source is from the holes drilled around the rim of the upturned bowl.
 During the burn process the bucket is fractionally raised off the ground by sitting it on three long nails so a little air can enter through the holes in the bottom.
To light the fire from the top I spread a small amount of citronella lamp oil on the top layer of material and then drop a lit piece of paper, again dipped in lamp oil, down the flue.
The fire burns brightly with virtually no smoke. TLUD stoves can be used as cookers and for heating water in many developing countries. The skill, gained from a bit of trial and error, is knowing when the wood has burned enough to carbonize but not too much so it turns to ash. I use a folded bit of paper inserted under the stove next to the nails. When it starts to scorch I know the heat has reached the bottom of the bucket and the burn process has to be stopped.
 The three nails elevating the base of the bucket are removed to stop air coming in from underneath.
The flue and bowl are removed and the fire rapidly begins to die down. I smother the fire by using the heavy lid of my cast iron Cheminea outdoor fireplace which conveniently fits the top of the bucket, and leave it overnight to cool. You can also douse the fire with water to end the burn process.
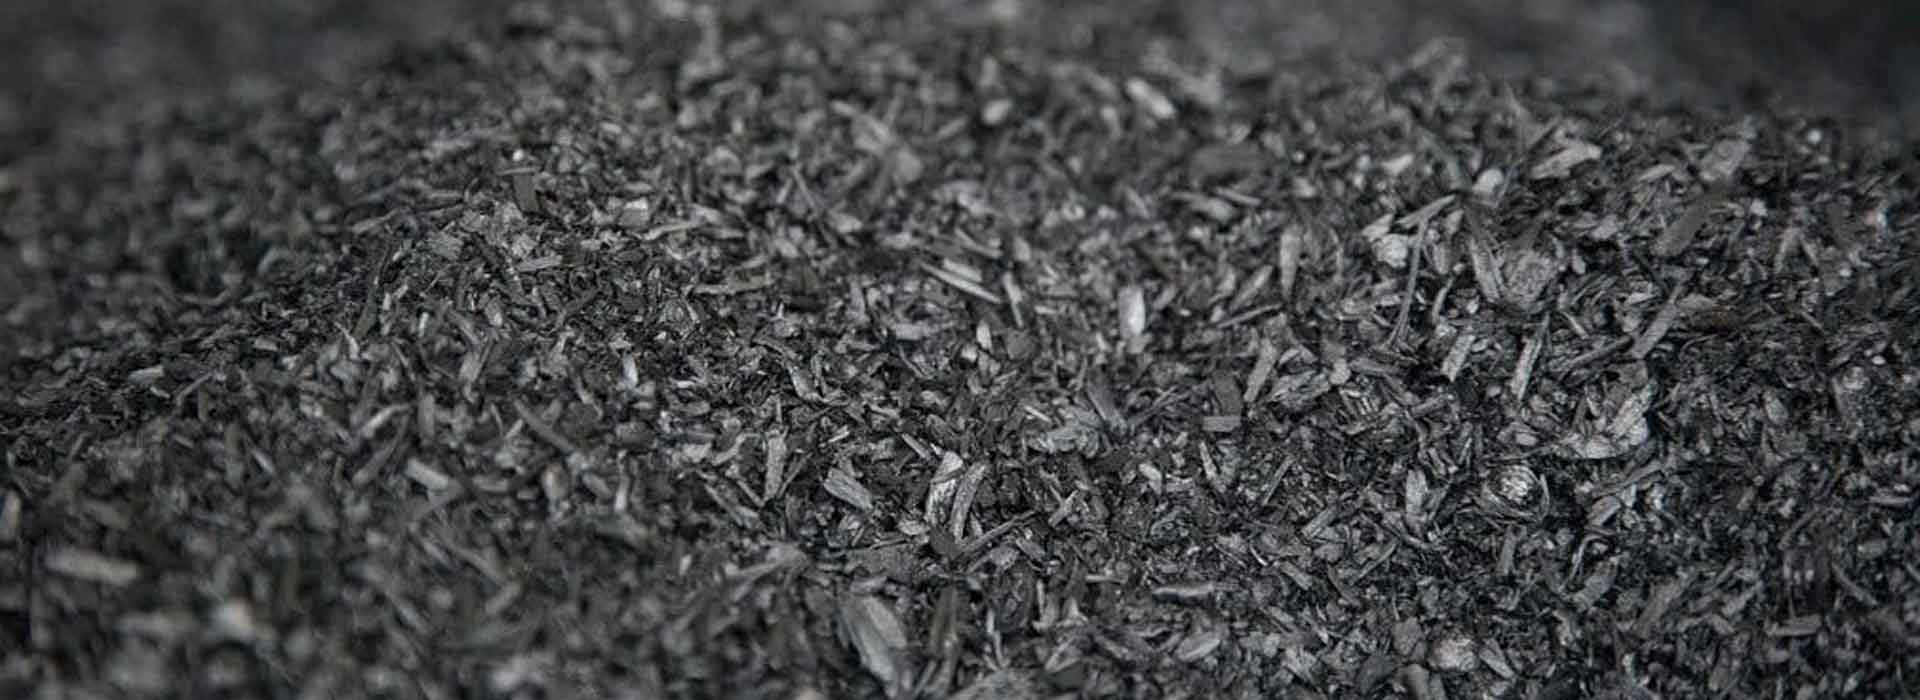
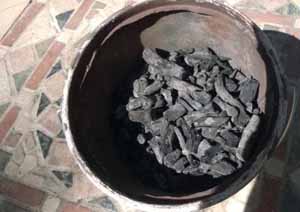
The result is carbonized wood ready for inoculation.
The charcoal has a very fine and porous structure which powerfully attracts and holds beneficial soil microbes and water. This can mean that when initially applied, it can draw in microbes from the soil. For this reason many biochar makers believe it is better to inoculate the biochar with nutrients such as compost tea, worm juice, Seasol and other organic fertilizers and let it “brew” for about three weeks before adding to the soil7.
The recommendation is four parts compost to one part biochar. My compost is primarily grass cuttings and green waste made in a tumbler. I also add worm juice and castings. Everyone develops their own recipe. The mixture is then left to charge for three weeks before use.
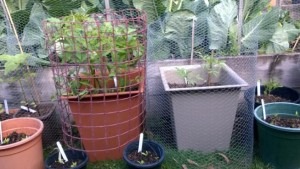 Results? I’ve done some simple experiments where I planted identical seedlings, some with biochar some without. Here is an example of two pots of tomatoes, same species, planted at the same time. The biochar ones are on the left (note the possum guards.
In fact we have never had better tomatoes than we had this year, all either planted with inoculated biochar or have had biochar added later. We planted heirloom Periforme Abruzzese and Tigerellas. They have fruited phenomenally. Likewise our broccoli, cauliflower, beans and silverbeet.
Photos: Keith Laker.
Keith is retired small business owner involved in energy efficient cooling, solar and heating products for typical suburban homes. He founded Breeze Power Natural Cooling Pty Ltd, a natural, whole of home cooling system that partners roof top solar panels. His passion now is improving the life force of the soil in his garden.
References
1. Lehmann J, Gaunt J, Rondon M. (2006) Bio-char Sequestration in Terrestrial Ecosystems – A Review. Mitigation and Adaptation Strategies for Global Change 11, (2): 395-419.
2. Woolf D, Amonette J E, Street-Perrott E A, Lehmann J, Joseph S.(2010) Sustainable biochar to mitigate global climate change. Nature Communications 1, Article Number 56.
3. Winsley P. (2007) Biochar and bioenergy production for climate change mitigation.
Zealand Science Review 64: 1-10.
4. Taylor P. (2010) The biochar revolution. www.biochar-books.com/.
5. Laird D A. (2008) The charcoal vision: A win–win–win scenario for simultaneously producing bioenergy, permanently sequestering carbon, while improving soil and water quality. Journal of Agronomy 100 (1): 178-181.
6. Major M. Biochar for soil quality improvement, climate change mitigation and more. (accessed 08-10-2014).
7. Crowley D, McGiffen M, Hale Lauren. (2011) University of California, Riverside. Biochar as a Carrier for Microbial Inoculants.
What makes my garden sustainable?
The vegetable garden is a flop, the drought tolerant plants turned up toes as soon as the summer rain came so I planted plants that like water, and my husband ripped out my favourite native shrub because it had thorns. It sounds like exactly the opposite of sustainable gardening doesn’t it?
If my garden doesn’t exactly fit the mould, what claims can I make to being a sustainable gardener?
Kate Wall tells us about her gardening journey, revealing to us that there is more than one way of creating a sustainable garden.
Sustainability looks different in each garden. Overall it is about reducing the environmental footprint of our gardening activities. The means of achieving this are as diverse as are the gardens themselves. I don’t strive for best practice, nor do I encourage best practice from my clients. When it comes to true sustainability, best practice is a big ask. Instead, I look for steps in the right direction.
Actually, in spite of my background in environmental biology, I did not set out to be a sustainable gardener. Probably because I assumed that by being a gardener I was already doing a good thing – growing plants is good for the environment right? Surely that is enough?
Back when I was a uni student, decades ago, we were young and eager. We believed that lawns were bad for the environment, and natives were good. We spent hours in the bush poisoning weeds that seemed to grow back faster than we could kill them.
I ended up with a garden that was full of natives, had no lawn and was ugly and unusable. I threw my eco views to the wind and decided it was time to create a garden I could love. I planted common things that looked beautiful and were hardy, I pulled out thorny and unattractive natives and put in a small lawn. The pumpkin patch gave way to lawn and the failing vegetable garden gave way to yet more salvias.
 The outcome is a garden which ticks many sustainability boxes, even if they are not the obvious ones. Many of the choices I made were driven by lack of budget or lack of time, but the end result was sustainable. Overall the garden has low resource use which is a big sustainability tick. It does get watered but not regularly and mostly by rainwater or greywater, chemicals and fertilisers are very rarely used –even the organic ones, most of the materials used are reused or repurposed, plants are mostly sourced locally, and are climate suitable, it features some natives and some edibles, it has trees and green spaces which cool the home and provide some storm protection, very little stormwater leaves the site, it has very little green waste leaving the site, with most being composted in the garden or in the chook pen and it is teaming with life, from the very tiny to the furry fruit stealing varieties!
The garden has been designed as a purely ornamental garden. That aim has been achieved – it is a beautiful place to be, and gives me immense joy. While putting in a simple grey water system was very deliberate, many of the other sustainability features were more accidental.
I have always been passionate about caring for the soil, so composting and mulching were just part of gardening to me. I am a mad plant person, so having a biologically diverse garden was driven not by a desire for diversity but by a desire for a flower I didn’t already have. Sourcing locally was easy – sharing cuttings and swapping plants with local gardeners makes good economic sense as well as giving access to plants not found in nurseries. This also led to climate appropriate plants – things that were growing in nearby gardens and did well in our conditions. Climate appropriate plants tend to need less care so that is a huge bonus not just for sustainability, but also for time-poor me.
The garden features reused materials in abundance – from rock edging to decorative gravel, to large pots, gates, garden ornaments and even some of the plants – all unwanted somewhere else, and found a new lease on life in my garden. Even the cubby was made entirely out of cast off materials.
Lack of time meant that I was not busy watering, or spraying pests. Plants had to cope or not with whatever came at them.
Over time I realised that I had actually created a very ecological garden. It has a very complex interplay between plants creating microclimates which supported each other. Things were planted to cope in the wet spots, or the dry spots, or the shady spots or sunny spots, and this allowed dense plantings into every nook and cranny – much the way nature does. By filling these spots, there was no room for weeds. By letting the plants fully fill the spaces, the garden is dense, lush and beautiful without needing regular mulching as the soil is shaded and covered by natural leaf drop.
Being mad about flowers, I have always grown as many as I could, with the benefit of bringing in the pollinators and the good bugs. These days 90% of the pest control in the garden has no input from me. Sure there are a few holes in some leaves, but I get the joy of a garden teaming with butterflies, and our son gets the joy of discovering all sorts of interesting insects in the garden.
I believe that sustainable gardening is not a “one size fits all” sport. It is an exercise in increasing awareness of our natural world, and with that increased awareness comes joy, appreciation and an ever increasing desire to always go one step further. And so the journey begins….

Malabar Spinach Research Project
A great spinach to grow in summer as an alternative to English spinach, which can struggle in the heat, is Malabar spinach, also known as Ceylon spinach or vine spinach. Its berries contain a rich deep purple pigment which is currently the subject of research because it is thought to have a powerful capacity as a cancer preventive agent. We asked for people who would like to receive free seeds to grow this plant and then to contribute its berries to scientists for research. We had a great response!
The vine
This decorative vine can provide nutritious, lush, green leaves for cooking or salads all summer long. The small tender leaves are best for salads. Malabar spinach originated in tropical Africa and Asia so grows best in the warmer northern regions of Australia where it grows as a perennial. In cooler regions it will grow as a vigorous annual in summer, dying off in winter. There are two species: Basella rubra with an attractive, dark red stem and B. alba with a green stem. Both species grow as a vine with many heart shaped, slightly spongy dark green leaves, which can become quite leathery with age. When grown in good compost and watered twice a week, the vines will climb steadfastly upwards covering tripods and trellises creating a wall of leaves. Undeterred by extreme conditions they almost seem to go crazy in heatwaves. Cook the leaves as you would spinach. They make valuable additions to curries and stews.
The berries
Towards the end of summer many small pink flowers appear which attract insects. The flowers transform into clusters of green berries which later turn deep purple. The rich deep purple pigment contains betacyanins which are being analysed by researchers.
The Research
It is known that these betacyanins are related to a similar pigment, betanin, found in red beetroot (Beta vulgaris L.). Betanin is known to be capable of preventing growth of cancer cells and also has antioxidant and anti-inflammatory properties 1 so red beetroot has been suggested to be a disease-preventing functional food 2. The pigment in Malabar spinach, gomphrenin I, has a slightly different structure. But scientists, who are in Europe, have been searching for the dried berries to conduct research and asked gardeners in Australia to grow the vines, harvest the berries then dry them either in the sun or in a dehydrator. And, of course, they could eat some of the leaves on the way! A large number of people contacted them for a starter pack containing a packet of free seeds and some simple growing instructions.

From this great response 10 kg pf dried berries were obtained and sent to the European researchers. Most of the dried berries came from an amazing garden at a primary school in Alberton SA. The gardener there had grown the spinach over a dome-like wire structure to provide shade. About 8 kg of dried berries came from this structure.
 It is amazing how connections can be made in the organic gardening world - one was someone who has a connection to a small village in the Philippines. Some of the villagers are now growing the spinach to collect the berries. Apparently it grows wild there. The researchers are hoping that the villagers will become the main suppliers since they are in real need of the income. We'll see.
References
How to protect heritage biodiversity in your own garden
Here’s a great combination in a very small package! And it doesn’t cost much either.
Heirloom seeds (aka heritage seeds) produce great-tasting veggies, fruit and herbs along with seeds you can plant for more great produce next season. An added bonus is that you’ll also be helping to preserve our collective gardening heritage.
Most commercial enterprises grow only a few varieties of any particular fruit, vegetable or herb. It makes sense for them to choose what to grow on the basis of productivity, what can survive transport and storage conditions, and what looks good in the supermarket.
So what’s the problem? Unfortunately, appearances can be deceptive. If those lovely red tomatoes and colourful apples don’t live up to expectations, it could be you’re eating a variety that transports well but lacks the yumminess of older varieties. The older, tastier varieties might have disappeared because they bruise more easily during transport, don’t store well for long periods, or simply aren’t highly productive on the farm or in the orchard.
You may already know you can avoid some of those issues by growing your own produce in the backyard, on your balcony, or in the local community garden. But a growing number of modern varieties are hybrids. And that means any seeds they produce are likely to either be non-viable – they won’t grow into new plants, or any plants that do grow just won’t be as good their parents.
In contrast, heirloom seeds are ‘open-pollinating’. They’re naturally pollinated, most likely by wind, insects or birds. 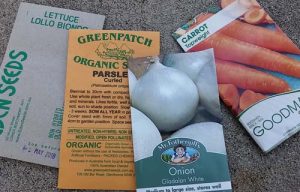 Their seeds will probably grow like the parent plant. However, they could also surprise you as a result of natural genetic variation, something plant breeders have used for centuries to develop new varieties with better or more unusual characteristics. So preserving heritage means using seeds like those in the 2 packets to the left and not the others on the right of this picture.
Growing plants from seed makes a lot of sense when you’re on a limited budget. Per plant they’re much cheaper than seedlings, and easier to purchase online. Buying heirloom seeds makes sense too, because you won’t have to buy new seeds every year. You could also look for a local seed swapping network to help you broaden your collection.
Sustainable Gardening Australia strongly supports the use of heirloom seeds and most good nurseries and garden centres stock them. Our Friends of SGA (FOSGA) page HERE lists several good heirloom seed suppliers. When you join FOSGA, you can get heirloom seeds at discount prices from these suppliers, which means that using your garden to recreate and share history just got even better!
Further reading
When nature produces plants that set seed, it usually means that this is the best way for the plant to reproduce.
The best reason to grow heirloom veggies may be this: they are dead easy, even for beginner green thumbs!
Cabbages, Brussels sprouts, cauliflower, broccoli, kale, collard greens, kohlrabi and some Asian varieties all come from the ‘wild cabbage’ native to southern and western Europe.
Penny Woodward on sustainability
For over 10,000 years, humans have been breeding vegetables and fruit trees, developing tens and hundreds of thousands of different varieties that can be used in different countries and different climates to feed everyone. But since the early 1900s we’ve lost nearly 90% of those due to industrial agriculture.
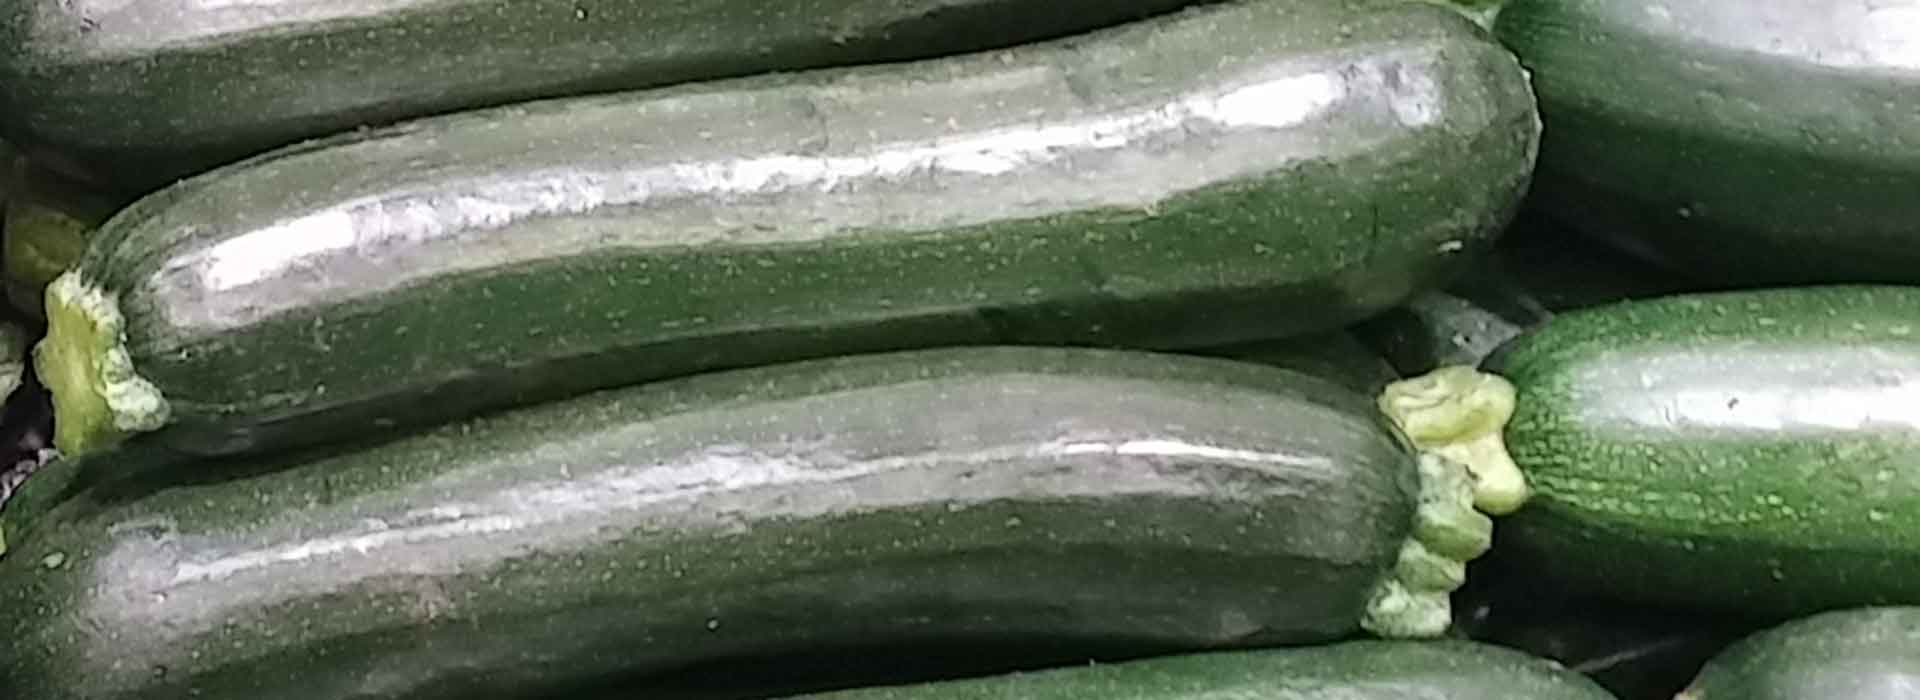
Zucchini
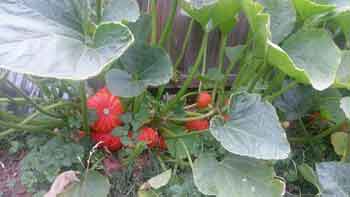
Zucchini is an ideal plant for the beginner vegetable gardener because it is quick and easy to grow. Zucchini or courgette (Cucurbita pepo) is closely related to cucumber, watermelon, pumpkin and squash. There are also many ways to use the prolific fruit.
Planting schedule
Warm: April - September except for arid areas where September is the best.
Temperate: September - January
Cool: October – January
In temperate and cool areas it is best to sow seeds in small pots (try making them out of newspaper) indoors or in a greenhouse since they do not like cold weather. They usually germinate in 1 – 2 weeks and can be planted when there are several true leaves. In warm areas, direct sow seeds.
Position
Find a sunny spot with at least 6 hours of sun per day. It is best that they are sheltered from wind since their large leaves can catch the wind and cause damage to their soft stems. In exposed locations a trellis or some other form of support will be needed.
Because zucchini plants are large and sprawling, leave about 50 – 60 cm between them. You might sow seeds or plant seedlings closer and then thin them out to the desired spacing.
Talking Dirty
Like most fruit and vegetables, zucchini like good well-draining soil – raised beds will provide appropriate drainage or plant on a slight mound of soil.
Feed Me
Add plenty of compost or aged manure a week or so before planting and then again when flowering starts.
What about the water?
Since the fruit are very fleshy, zucchini need plenty of water - irrigation 2 – 3 times per week or a thorough deep hand watering once per week. It is important to avoid watering the leaves, especially late in the season when mildew and other diseases can be a problem. Don’t worry if the leaves wilt on very hot days – they will recover as long as the roots zone is watered regularly. Mulching with pea or lucerne straw will help keep soil moist.
Are we there yet?
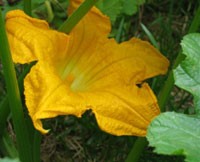 Zucchini have separate male and female flowers and, like most species, it is the females that product fruit. The male flower grows directly on the stem of the plant in the leaf axils (where leaf meets stem) on a long stalk, and they are slightly smaller than the female. The male flower grows directly on the stem of the plant in the leaf axils (where leaf meets stem) on a long stalk, and they are slightly smaller than the female. Inside the flower, females have a rounded stigma whereas the male has a long stamen with pollen on the outside.
This is important to recognize if you find that flowers are forming but they bloom and fade, with no fruit growing afterwards. It could be that your garden lacks pollinators especially in recent years when bee numbers have been declining. If this occurs, you could try hand pollination. Use a fine paint brush in the mornings and carefully brush it against the male stamen and transfer pollen to the female stigma.
Planting other flowering plants, especially nasturtiums, which are a good companion plant for zucchini, will help attract bees to your garden.
Fruit usually appear 5 – 8 weeks after planting. Zucchini need to be regularly harvested to encourage continuous cropping. They are usually harvested quite small and immature as allowing them to continue growing results in fruit that is too big to be used as a vegetable. So watch carefully since once they start appearing since they can grow rapidly producing large unwieldy fruit. It is best to harvest when they are around 12 – 20 cm long.
The flowers are also edible - this is a good way to use the occasional excesses of male flower. They can be used in salads, as garnish, and even fried or stuffed with cheese, bacon, mushroom or tomato and baked.
Pests and the rest
Few pests cause serious problems for zucchini but, like all Cucurbits, they can be susceptible to a range of fungal diseases. In particular, powdery mildew, but this is easily eradicated. Another potential problem is blossom end rot, which isn't a contagious disease, but is caused by calcium deficiency.
Varieties
Zucchini are available in a range of shapes and colours, not just the familiar dark green sausage-shape that is readily available in supermarkets, but yellow, striped in different shades of green and even curved or almost round. For example, 'Blackjack' is a prolific bush variety with very dark-green long fruit, and 'Golden', is a yellow-skinned variety. A number of seed suppliers stock a variety of heirloom varieties that are worth investigating, including 'Crookneck Early Summer', which is very suited to those who aren't able to harvest fruit as frequently, as they remain an edible size for much longer than other varieties. There are also more compact varieties, such as Cocozelle, which means you don't need to provide support or have a large garden space.
Information sources:
Yates Garden Guide, 42nd Edition, 2006, published by Harper Collins Publishers.
Blazey, C., The Australian Vegetable Garden - what's new is old, 2001, published by New Holland Publishers.
Wikipedia
The Pros and Cons of Hydroponic Growing
Hydroponic farming is one of the biggest trends in home gardening. But where this growing method is really making waves is in industrial agriculture. Ben Naumann of the Conservation Institute evaluates its strengths and weaknesses.
In recent years, Australia has positioned itself as one of the world’s leading hydroponic produce growers. This feat is made even more impressive by the fact many of our hydroponic facilities are located in some of the most arid parts of Australia, with one of the country’s largest greenhouses operating in the Southern Australian desert.
 Growing fresh tomatoes in the harsh desert, using only seawater and sunlight, is an incredible achievement no matter the scale. So, when this growing method also promises to end world hunger and slow down the drain of natural resources, it’s no surprise that hydroponic farming has gained such a following.
But is hydroponic farming really as perfect as it seems? And what might stand in the way of hydroponics paving the way for a more sustainable future?
Hydroponics for the Home Gardener
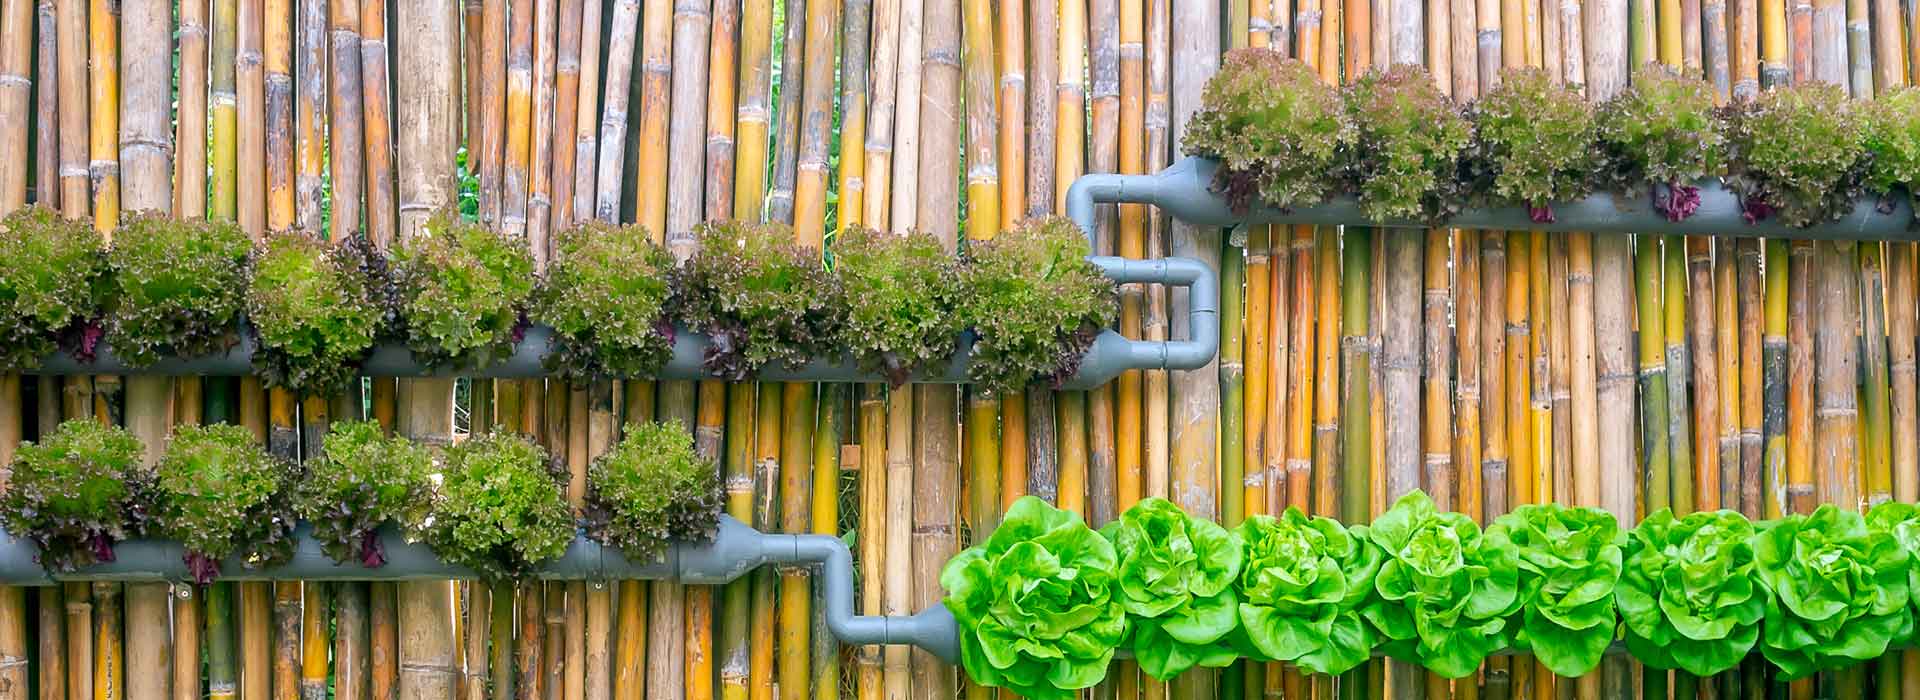
Hydroponic techniques are also becoming increasingly popular in the home gardening world. Today, almost anyone can visit their local hardware store and walk out with the materials for a D.I.Y. hydroponics setup in hand.
For ornamental gardeners — those who spend their weekends tending to rose bushes and hydrangea shrubs — hydroponic gardening doesn’t offer too much appeal. But for those growing vegetables, herbs, and leafy greens, hydroponics can feel like the answer to healthier and more prolific harvests as shown in the banner image to this article.
On top of elaborate outdoor setups that promise endless salads filled with lettuce and tomatoes, space-conscious gardeners can also grow small batches of hydroponic herbs in their flats.
At-home hydroponic systems, no matter their size, are an exciting advance for the gardening hobby as a whole. However, when it comes to the global impact of hydroponic technology and growing techniques, large-scale farming is the industry to watch.
The Realities of Hydroponic Growing
Most home gardeners are attracted to hydroponic growing because of its novelty, efficiency, or minimal space requirements. On such a small scale, this is pretty much where the benefits of hydroponics end. When you expand this system to an industrial scale, though, it has the potential to change how we grow the food sitting on our supermarket shelves.
Pros
Most sources choose to focus on the benefits of hydroponic farming, and for good reason. After all, according to the Conservation Institute, hydroponic farming can produce up to three or four times more produce than traditional methods (using the same or even less growing space). Not only does it use less growing space, but it also uses fewer resources. By using fewer resources, like water, fertiliser, or pesticides, less harmful pollutants are released into the atmosphere, or, even worse, into the ground. Ground water contamination has a negative impact on things like drinking water supply, soil health, and the health of the nearby ecosystem. By incorporating hydroponic farms and gardens, we can reduce some of these effects.
And that’s only a few of the potential benefits offered by hydroponic growing methods. Here are some others:
- Hydroponic produce grows faster than soil-grown produce
- Farms utilizing hydroponics use up to 90 percent less water
- Hydroponic farms use up to 75 percent less fertiliser
- Hydroponics makes farming in urban areas possible
- Hydroponic produce requires fewer pesticides and herbicides
Cons
Although it’s tempting to position hydroponic farming as the utopian solution to dwindling resources and a growing world population, nothing is perfect. Perhaps the largest drawback for Hydroponics is the excessive amount of energy it requires for indoor operations (like vertical farming).
Certain set-ups, like the project in the Southern Australian Desert, or at-home hydroponic rigs, have the luxury of extra space to add things like solar panels or even direct sunlight for their plants. Vertical farms, multi-level farming structures set up inside of tall and thin urban buildings, don’t have this luxury. Therefore, the energy required to grow fleshy plants like tomatoes or sweet corn can often exceed 1200 kilowatt-hours of electricity for one kilogram of food. For reference, that’s about the annual energy consumption of the average refrigerator for a relatively small amount of produce.
Some additional pressing concerns about hydroponic farming and its consequences include:
- Hydroponics systems have extremely high start-up costs
- Farming hydroponically can still contaminate groundwater if the nutrient solution is improperly disposed of
- Hydroponic produce costs more for consumers
- Hydroponic produce can be diseased if pests or other foreign entities infect the system water supply
- Hydroponics systems may compete with organic growing methods
The Dispute With Organic Farmers
Hydroponic farming isn’t the first new agricultural fad and it certainly won’t be the last. Organic farming gained popularity around the same time and provides many of the same benefits. However, disputes between these two have begun after Hydroponic farming companies began labeling their products as “organic”. There are around 200 Hydroponic Farms in the U.S. that are organically certified, and this number may rise due to the premium on organic products. This has provoked some competition between the two.
Both sides of the argument claim their products are better. “Organic farming allows the use of manure as a natural fertilizer. This has caused a recurring health problem due to E. coli and salmonella outbreaks. Hydroponic growers have completely eliminated the need for soil and its microorganisms” says EZ Gro, a hydroponic supplier. However, Mayo Clinic claims Organics are healthier and provide more flavor, stating “Studies have shown small to moderate increases in some nutrients in organic produce. The best evidence of a significant increase is in certain types of flavonoids, which have antioxidant properties”. The jury is still out on both of these methods, but if you are looking for any type of produce that is a step up from traditional farming, you can’t go wrong with either.
Looking to the Future
Maybe hydroponic farming is the answer to impending world hunger and agricultural sustainability. At this time, though, even the experts aren’t quite sure what’s in store for the future of food production. While there are valid criticisms of hydroponic farming (most notably its high energy consumption), some industry leaders have taken proactive steps to increase sustainability.
For example, Port Augusta’s Sundrop Farms relies on solar power to operate its expansive hydroponic greenhouses. By relying on renewable solar energy, this hydroponic farm has completely avoided the issue of high energy consumption.
The only way to further improve our understanding of hydroponic and other sustainable agriculture methods and their potential is to invest time, research, and money into these endeavors. Without these investments, new and more efficient sustainable agriculture technology will never emerge.
At the end of the day, hydroponic farming may not become the be-all, end-all of sustainable agriculture. But it could definitely be a major piece of the puzzle.
Habitat - A Practical Guide to Creating a Wildlife-Friendly Australian Garden
As we book-loving gardeners know, there’s always enough room on the shelf for one more. Well, if you haven’t already done so, you should make sure that your next “one more” is a copy of Habitat: A Practical Guide to Creating a Wildlife-Friendly Australian Garden by AB Bishop. And with Australian native plants undergoing something of a renaissance thanks to the general public’s increasing interest in growing indigenous plants as both a means of increasing biodiversity and one step amongst many in the fight against climate change, the release of Habitat… is timely indeed.
Written in a relaxed and straightforward manner, Bishop easily articulates her concerns regarding the loss of public habitat gardens, and provides simple-to-follow suggestions on how mitigate the pernicious affects on the eco-system of urban sprawl, industrialisation and runaway population growth. But rest assured – instead of dwelling on the darkness or viewing our contemporary ways as a harbinger of the end of days, Bishop approaches these aforementioned pernicious affects as problems that can be solved with a bit of elbow grease and a smile, and as obstacles that can be overcome through togetherness and the old adage of “one step at a time.” Ultimately, Habitat… is no vitriolic polemic on the “evils” of modern life but a kind-of guidebook showing us how we can do our part, no matter how small, in making the world a better place.
 Part 1 – Biodiversity for Life – is a thoughtful and almost philosophical beginning to the book, providing an in-depth explanation of not only habitat gardening, but also biodiversity, food chains, ecology and natural philosophy, in order to show how ecosystems don’t exist in isolation but are instead part of an interconnected web that stretches from coast to coast and even further. It is an excellent and inspiring section, especially because Bishop approaches the topic not just from the perspectives outlined above, but also from a human-centric one. In essence, as Bishop argues, habitat gardens aren’t only important to the natural world but also to our own lives – they are one of the few garden “types” that we can create which encourage and support biophilia (a term coined by German psychologist Erich Fromm in the 1960s, covering our innate tendency to connect with nature and other forms of life).
 Part 2 – Backyard Habitat – treads a much more traditional gardening book path, covering everything – EVERYTHING – you need to know to create and sustain your own habitat garden. It is an exhaustive “how-to” guide, and consists of individual chapters focussing on specific aspects of habitat gardens, including planning, plant selection, insects, reptiles and amphibians, birds and mammals. But wait, there’s more – Bishop also includes a chapter on specific small-scale projects that can be included in a habitat garden (nesting boxes, insect hotels, frog ponds, lizard lounges), and concludes with a chapter on Australia’s biodiversity hotspots (the country’s 15 most fragile ecosystems).
By dividing Habitat… into two sections, Bishop offers readers new to habitat gardening the chance to thoroughly understand their importance to both the environment in general and native flora and fauna in particular, before being plunged head-first into the “nuts and bolts” of creating your own. It is an extraordinary book containing a wealth of fascinating and detailed information, and is peppered with individual garden case studies, photographs, tables and maps. No matter whether you’re new to the field of habit gardening or have prior experience, you’ll find something within Habitat: A Practical Guide to Creating a Wildlife-Friendly Australian Garden to benefit both your garden and your life.
Backyard Food Forest Gardening using Ecological Principles
Backyard food forest gardening is based on ecological principles. Have you ever wondered how forests develop, how they regenerate after destruction, why certain plants grow happily in certain areas without any human intervention? And have you wondered if we can learn from how nature does it to create more productive, low environmental impact gardens?
Ecological principles applied in backyards promote high productivity in a small space because relationships between soil, plant species and environmental factors are considered. Angelo Eliades explains in this video the permaculture approach to backyard gardening.

From Farm to Renting in the 'Burbs
Megan Ambrus, one of SGA's subscribers has written this inspiring account of her gardening experience. Thank you, Megan!
Growing up on a farm we always grew our own food and space was never an issue. The kitchen led straight into an orchard, that had been there in one form or another since the house was built around 1800.
Tree branches bowed with the weight of apples, figs, walnuts and mulberries among many others. The vegetable gardens overflowed with corn, beans, tomatoes, cucumbers and just about every other vegetable able to grow in the region. Herb gardens produced a myriad of fresh herbs. What wasn’t used or given away was composted or went to the chickens.
I moved to Hobart in 2000. Living in a unit, my yard was a tiny patch of cement. It left me so frustrated I stopped gardening and for the next fifteen years, my only plants were potted flowers. Yet, the desire to grow my own food never left me. In 2015 I moved to my current location with a small backyard and it gave the motivation to start food gardening again. Challenges soon arose.
The first was composting. I bought a black plastic compost bin. Everyone else I knew with a garden used them so I figured it was the way to go. The material in the bin turned in mass of stinking wet sludge. Even my neighbours complained about the smell.
On the farm, composting bins were nothing more than three sided wooden frames producing lovely rich compost. After the disaster with the plastic bin, I returned to this method and built a couple of bins from recycled wood. The end product was beautiful moist compost with a lovely earthy smell.
Having sorted that issue, I turned my attention to creating some gardens. My soil was heavy clay soil; boggy in the winter and rock hard in the summer. I decided to use raised beds instead.
Soon after in 2015 I lost my job and there was suddenly no spare money to purchase ready-made raised beds or the materials to build what I wanted.
I decided to plant directly in the ground. It took some hard work over the winter but eventually I got the clay soil to a stage it was suitable to grow in. In spring 2015 I created two gardens and got some plants in the ground. I soon realised my little plots were not going to be sufficient as I wanted to produce a variety of foods. I had two choices. I could stick with growing only a few things in my plots or I could use containers.
The first attempt at container gardening in the spring/summer of 2015/16 failed miserably. Everything died. When I finally admitted defeat and pulled them out I found a wet stinking mass of soil in the containers. Not prepared to surrender so easily, I spent autumn and winter of 2016 researching container growing and what had gone wrong.
My first big mistake was putting soil in the containers. My second was using plants that simply weren’t well suited. My third was overwatering. My fourth was using containers that were simply too big. The roots of the plants were not filling the entire space, resulting in compacting wet soil beneath. My poor plants just couldn’t cope.
In the spring of 2016, with the ground plots doing well for a second season, I was ready to try container gardening again.
This time, I did some planning rather than just sticking things in randomly. I used potting mixes with some of my compost as well more appropriate containers sizes for the various plants.
I researched the plants I wanted to grow in containers so I understood their needs. I raised the containers on bricks to aid in drainage and mulched properly. I made sure I checked if they actually needed watering rather than just drowning them regardless.
I was rewarded. The two plots produced an abundance of corn, peas and other foods. My herb and vegetable container gardens gave me among other things, blueberries, carrots, tomatoes, parsley and chives.

There was so much I couldn’t possibly use or preserve everything. Not liking to see food go to waste the excess went others and community food programs and waste matter composted.
In 2017/18 I added dwarf fruit trees, cape gooseberries and other berries to the container garden.
The 2018/19 garden was grown from all my own seed.
Pests
On the farm, we never used chemical or poisons and never had a major problem with pests. The dogs kept the herbivores away and the owls removed rodents. The blue tongues took care of snails and the birds and insect predators cleaned up other pests.
The birds did eat the fruit and the blue tongues loved the strawberries but with such an abundance, sharing it with them as a reward for removing pests was never a problem.
Here in my little suburban garden it’s no different. The herbivores don’t like the dogs so they stay away. The birds take care of problem caterpillars and other pests. The two resident blue tongues gorge on snails and an army of ladybirds and other predator insects appear to keep aphids and other pests under control.
Last year two owls moved into a nearby tree. This year, they hatched two babies and I’ve had the privilege of watching the family come at night. They’d perch on aviary, the parents swooping down to catch the rats living under the aviary, feeding their fledglings before consuming their own dinner.
As a result rodent poison is banned in my garden as poisoned rats kill the owls through secondary poisoning. Snail bait is banned as well as it also kills blue tongues and birds if they eat dead and dying snails.
The absence of poisons and chemical sprays means I have an array of beneficial bird, insect and reptile life visiting my garden. I’m happy for the birds and blue tongues to take a bit of produce in return for their work.
Nature’s natural pest controllers are a far better option than poisons and chemical sprays.
In conclusion
Starting a suburban garden had its challenges. On the farm unlimited space meant no containers and growing whatever one pleased.
In suburbs I have to think carefully about what I really want to grow and how I will use available space. The pumpkins and other vining plants grow on trellis instead of taking as much ground space as they please and I now grow some bush varieties that don’t vine.
Suburban gardening means more planning and being choosey about what I grow. It means there are things we grew on the farm I can only dream about growing in the suburbs due to limited space.
Yet I have produced a healthy garden with so many more varieties of food plants than I thought possible in a small space. What isn’t used, preserved or given away is composted.
I’d love to be back on the farm, yet the challenge of finding ways to grow good food in a small suburban backyard and still produce more than enough to feed myself and others is very satisfying.
Now to find a bit of space for a couple of hens…
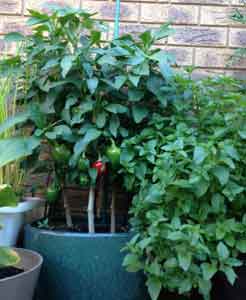
Overwintering Capsicum
One of SGA's staunch supporters and volunteers, Gianni Montalto, tells us his experience with growing capsicum.
"Over the last few years I have reduced the veggies I grow in garden beds, and instead have been growing more in large pots. Mostly along the east facing back wall of the house.
 "The main reasons for the gradual move include:
- The fruit trees in the garden have grown up, don't let much light through and they drink up practically all the water and any fertiliser I apply, before annual summer veggies can get a foothold. This has become even more of an issue with the earlier and hotter starts to summer in the last few years. Winter growing crops like broccoli that can get established before Spring turns to summer, do fine under the deciduous fruit trees or in the exposed beds, but I then mulch and rest that ground over summer.
- Easier access - The pots are close to the back door and rainwater tanks for quick picking and watering.
- More favourable light conditions at the east facing wall - they get full morning sun until the middle of the day and then shade in the hotter afternoon, but still mostly open to the sky. The plants may wilt on really hot windy mornings, but recover in the shady afternoons.
- Better control of water - the pots sit in large dishes to catch runoff, which the plants wick up during the day.
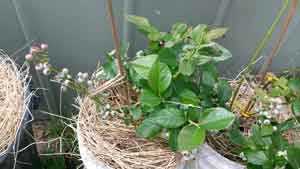
"So being more efficient with water has been an unexpected benefit. Another revelation was finding that capsicum plants can in fact be grown over two seasons in Melbourne without a green house. I never found this possible by growing them in the ground in exposed garden beds, where they would inevitably wither and die. In the pots they grew well and produced a reasonable crop last summer. I left them there over winter, expecting them to completely die off, but they came back to life and are doing well.
"Keeping the pots under the roof eaves at the east wall over winter I think really helped. This meant they got protection from frosts and little if any rain, watering them rarely, just enough to keep the potting mix barely moist. Also, they continued to get morning sun and a fair amount of warming. The pots are ceramic so they retain some heat into the afternoon/night. I could have moved them to the north facing wall where they would have received more sustained sun over the day during winter, but that was too much work! I thought about covering them with plastic sheeting or with a temporary protective enclosure to extend the warmth of the day into the evening, but that would have reduced air circulation, increased humidity and may have resulted in mouldy plants.
"They gradually lost all their leaves and the thinner branches died off (but they did not go mouldy). The few thicker green branches that remained then began to sprout new growth as the days warmed in Spring. This was the signal to re-start watering and feeding them - I use liquid fish fertiliser at about a third the recommended rate once a week (or sometimes two or three weeks go by) and occasionally mixed manure pellets. They really took off, filling with green leaves, flowered and fruited in no time - certainly earlier in the season than last year.
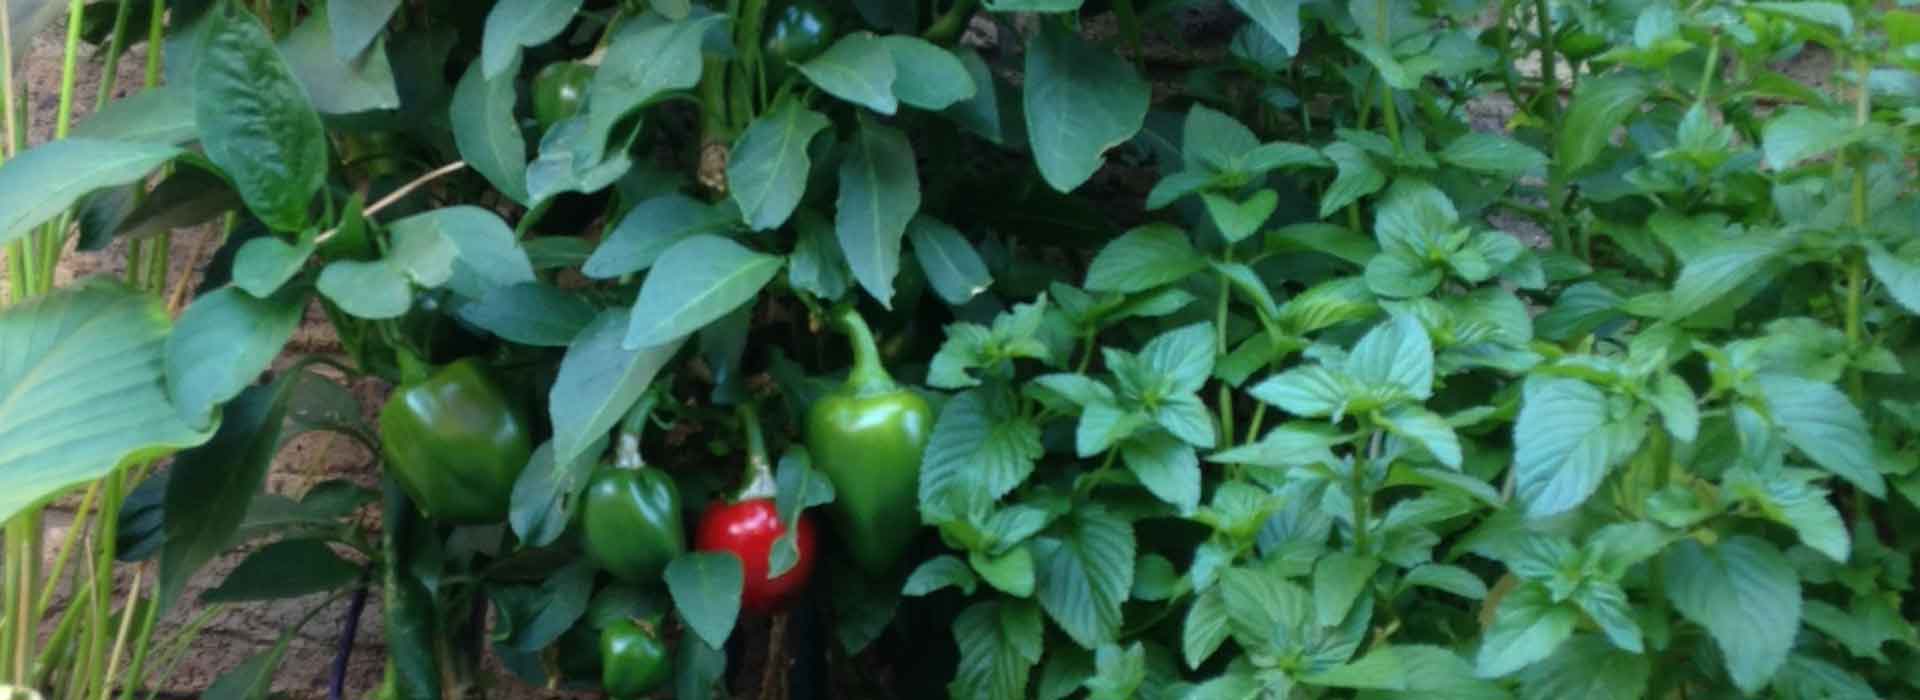
"I did start with a good quality organic potting mix and I normally rotate what goes in the pots, so in the year prior to planting the capsicum, there had been a crop of basil, and tomatoes the year before that. Adjacent pots this year include basil, mint and tomatoes. The plants have not been sprayed or treated with anything.
By mid-summer the plants are still sending out new growth and flowers. The yield has already equalled last year's crop and it has arrived sooner, which is not surprising as the plants were essentially mature plants, which just needed a warm spring kick-along to get going again."

Kale
Belonging to the family, Brassicaceae, kale has been rediscovered as a superfood. It is mostly rich in lutein, folate, vitamins A,C, E and K, magnesium, iron and contains a load of anti-oxidants.
It originated around the Mediterranean and was grown for many centuries until the Middle Ages. In more modern times, it became popular in post-war periods because it was easy to grow and very nutritious. However, in the USA ornamental varieties were favoured for use in floral arrangements – even wedding bouquets – and it even has its own national day, the first Wednesday of October.
There are over 50 types of kale, both ornamental and edible. However, three varieties are readily available to grow:
Dwarf Curly, a compact, leafy green with mildly sweet, crinkled leaves
Red Russian, a blue-green variety with purplish-red veins
Black Toscana (Cavalo Nero - pictured above), a long dark-green/blue leaf variety.
Planting Schedule
 Warm areas: March to April (in seed trays*), May to June (transplant seedlings)
Temperate areas: March to April (in seed trays*), May to June (transplant seedlings)
Cool areas: January to February (in seed trays*) April to May (transplant seedlings)
*You could also try sowing seeds directly in the soil if the soil is not too hot
Position, Position, Position
 In temperate areas, all three varieties of kale like full sun. But in hotter regions, part shade will assist its growth. Also, being a winter vegetable, kale can tolerate mild frost, with Red Russian still able to thrive and survive at a temperature of -10 degrees C. Actually, frost tends to intensify its sweetness.
Talking Dirty
Kale, like many vegetables, prefers a well-drained soil, rich in organic matter. However, its pH range is a little towards the acidic side with a preference for a pH of 5.5 – 6.5. If your soil is rich in clay you might add some sand and compost. If it is very sandy, try adding powdered bentonite clay or compost. Actually, compost is the magic ingredient for any soil! Another useful addition to sandy soil is coir peat (ground coconut fibre). Coir is available in blocks which expand when soaked in water and will hold moisture when added to soil.
Feed Me!
Since kale is a leafy green, it needs a rich nitrogen source to thrive. A green manure crop planted and dug in before planting kale is ideal. Or aged manures, pelletised chicken manure or “blood and bone” are important soil additions, but make sure you don’t overdo them – little and often is the way to go. Drinks of fish emulsion and seaweed extracts during the growing season will provide both food and moisture.
What about the Water?
Although kale is a winter vegetable and drying out is not such a problem, regular watering is required to provide the moisture it requires. Mulching around plants will protect the soil from moisture loss.
Are we there yet?
 For most varieties harvest can start after around 7 - 8 weeks. If there are too many leaves for your household, take them to your local Harvest Swap, feed them to your chooks or add them to your compost heap or worm farm!
Pests and the Rest
Kale is generally pest-resistant, but can fall prey to cabbage aphids, harlequin bugs and cabbage white butterfly. The best way to deal with such pests is to prevent them by crop rotation, keeping the soil healthy and encouraging predatory insects into the garden by including flowering plants. But if all that fails, try hosing small ones off and picking caterpillars and larger bugs off and dropping them into a bottle containing soapy water.
Good Neighbours
Rhubarb, onions, cucumber, beets, celery, marigold, nasturtium, herbs (sage, dill, camomile).
Bad Neighbours
Climbing beans, mustard, strawberry or members of the nightshade family (tomato, chili, capsicum, eggplant).
Eat Me!
There are many recipes now for kale. When used raw it needs some extra attention to reduce bitterness. This may be by chopping it finely into well-dressed salads or including it in a smoothie with nut milk and fruit. However, it has a delicious savory flavour when chopped and baked to make “chips” or steamed, sauteed or stir-fried with garlic or onions. Just search online for one of the hundreds of recipes out there!
