
Wheeley Good Green Waste Solutions - Video
Ever felt like the third wheel? Now you know how the green bin feels. It’s here for good and not for evil, so treat it right and feed it nice. One of our most misunderstood and intriguing bins.

Return of the Weeds - Video
So they’ve made it past your defences and past your bio-controls. They are running rampant threatening to take over. Fear not, help is at hand with these tried and tested and very sustainable garden weed remedies.

Trees, not Just for Hugging - Video
Think like a Koala and take a look at trees from a whole new perspective. The home of our famous Aussie icon can also add significant value to our homes, reducing energy use, improving air flow, building soil health, and more. Our friendly neighbourhood koala (who resembles a certain horticulturalist we know), gets enthusiastic about the many sustainable benefits of trees at home and how to maximize their value in the backyard. And if you have never seen a koala ride a bike, watch on.

DIY Composting Videos
Composting food and garden waste is easy, but there are a few tricks.
Episode 1 – Lord of the Bins (Part 1)
Lord of the Bins is a hard-hitting, 2 part expose of the relationships in your compost bin. In part one Helen reveals the uncensored story of decomposition that’s smouldering in the backyard compost bin. Capture carbon, improve your soil, feed a worm, reduce household waste and discover why a hot and healthy relationship with your compost is an essential part of being a planet conscious gardener.
Episode 2 – Lord of the Bins (Part 2)
Things really start to warm up in part two as we delve deeper into the compost heap. Helen shares her own special family recipe for sweet smelling compost, no science degree required. Find out what makes your compost sing and what should go in the rubbish bin, it’s all about the balance in this relationship. Who would have thought that reducing your carbon footprint could be so steamy!
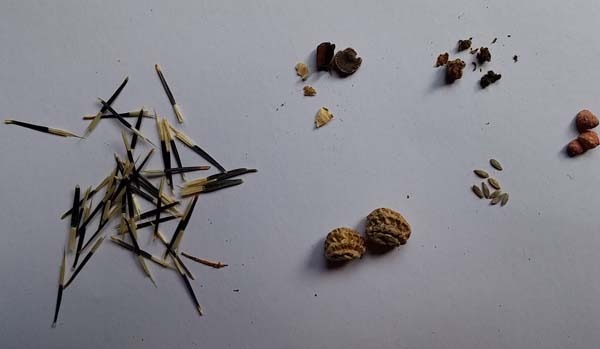
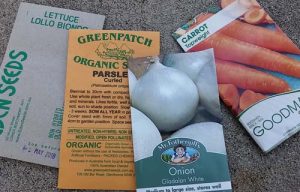
Growing Plants from Seed
If you would like to have an attractive and productive garden which doesn’t cost a packet and which allows a wider range of choice than is available with buying seedlings or potted plants, starting from seed is a good strategy to use. When nature produces plants that set seed, it usually means that this is the best way for the plant to reproduce. Of course, not all plants can be propagated by seed, but it might be worth having a go with those that do.
Why start from seed
Range of choice
Because seeds are small in comparison to seedlings, they take up little space and don’t weigh much so can be easily supplied by post and available via online catalogues you can choose from an extremely wide selection of seeds with particular properties such as heritage/heirloom varieties or organically grown.
Saving Money
For around the same sum of money it is possible to obtain a large number of seeds for the same price as a punnet of seedlings. And, if stored properly, they can be sown in successive years – something not possible with seedlings.
Better growth
Plants grown from seed sown directly in your garden soil will not suffer from root disturbance. Purchased seedlings often have quite extensive roots crammed into small punnets so that they must be teased out and are often broken when transplanted. If you sow seeds in trays you have control of transplant timing so root disturbance can be minimized. And after germination, the plants will be in a constant environment and not subjected to different sunlight and watering regimes which seedling punnets experience.
How
Preparing the soil
Ideally, soil should be broken up and fine to allow easy penetration of young roots. So, dig compacted soil and add compost. This will provide organic matter which conditions the soil and allows slow release of organic nutrients. Alternatives to help aerate the soil and retain moisture are coir (coconut fibre), vermiculite or perlite. Coir has the advantage that it is a waste product from coconut harvest, while the others are mined inorganic materials which have gone through manufacturing processes which probably require more energy than coir production.
Pre-treatment
Some seeds require special treatment before sowing. Many ornamental plant seeds are in this category, so read up on it first and the likelihood of success will be much greater.
Treatments include:
- Damage to the outer coat prior to sowing, to break down natural inhibitors of germination. Wattle seed, for example, needs to be soaked in boiling-hot water to soften its seed coat.
- Treatment with smoke - to mimic bushfire, as is the case with some Australian native seeds. Smoke water is now sold in nurseries, especially native plant nurseries. The seeds are soaked in this water prior to sowing. The smoke breaks down the chemical inhibitor in the seed coat.
- Soaking in warm water for a few hours immediately before planting e.g. peas, carrots and parsley - some seeds sprout in a few hours. Sturt’s Desert Pea (Swainsona Formosa) for example, germinates very readily after soaking in warm water.
- Physical damage of the outer coating with, for example, sandpaper or a knife.
- Some gardeners recommend pre-sprouting vegetable seeds indoors on moist tissue or kitchen paper in a container. When the first root appears, the seeds are carefully removed and put in soil.
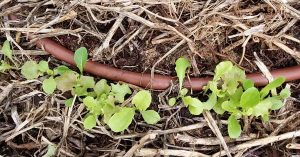
Sowing
 On packets of seeds, there should be instructions on how to sow. There is certainly plenty of information on the web and in books on sowing a wide variety of vegetables, herbs, annuals and perennial seeds.
Some seeds germinate on the surface and some won't germinate until well-covered. A general rule of thumb here is that the finer the seed, the closer to the surface it is sown. Generally, planting at twice the width of the seed is best.
If planting several types of seed in the same bed, to ensure that they all get adequate sun exposure, sow those which grow tallest at the back.
You may wish to plant seeds in furrows in rows and then cover with soil – do not compress it but press lightly. It will be easier to plant very fine seeds if they are first mixed with sand. It is possible to buy some very small seeds spaced at appropriate intervals on tape – or you can make you own by mixing seeds with a stiff mixture of corn starch and putting dollops of it on tape.
Protection
From drying out
 It is vital that soil is moist but not too wet. Possible methods:
- Cover a row of seeds with a piece of wood, shade cloth or plastic until the first leaves appear.
- Use a layer of very fine mulch which will absorb moisture and minimize evaporation.
- Sow seeds near irrigation lines.
If you are raising seedlings in punnets or pots, place a clear cover e.g. plastic, glass over the top to prevent evaporation until you can see growth.
Once leaves appear, water with a fine spray until plants are about 1cm high.
From birds
Many birds like disturbing soil to look for food such as seeds and also like to eat newly emerged seedlings. It may be useful to place cages made of fine wire or mesh over seeded areas.
From snails and slugs
Emerging seedlings are prime targets for these creatures (see our information page on snail and slug control).
From fungal growth
Damping off (Fusarium sp) disease is a fungal disease caused primarily by over watering. A sure sign of the disease is when seedlings start falling over, one after the other. This can often be prevented by not overwatering and watering in the morning so that soil does not stay too wet. If disease occurs, it's wise to start again, thoroughly cleaning all equipment and composting the infected seedling raising mix. Seedlings can be drenched with a weak copper fungicide solution too.
Thinning
Check that plants emerging from rows are not too close. You might use tweezers to pick them out if you have fat fingers. If the plants are edible e.g. lettuce, beetroot, you could eat them. Some might even be able to be transplanted – but remember they will suffer a little from the disturbance.
Collecting, saving and storage
If you are growing organic, heirloom or non-hybrid seeds you can save some from your own mature plants and use them for future sowings. (Don’t save seeds from plants grown from hybrid seeds as they have been bred from 2 specific varieties and will not breed true, or may not grow at all).
Remember, it's not always legal to collect seed from wild plants, especially rare and endangered plants, so check with your relevant environment authority first. The Australian National Botanic Gardens provides useful advice on growing Australian plants from seed at www.anbg.gov.au/PROPGATE/plant01.htm
Store seeds in labelled paper bags, in a dark, dry cool place.
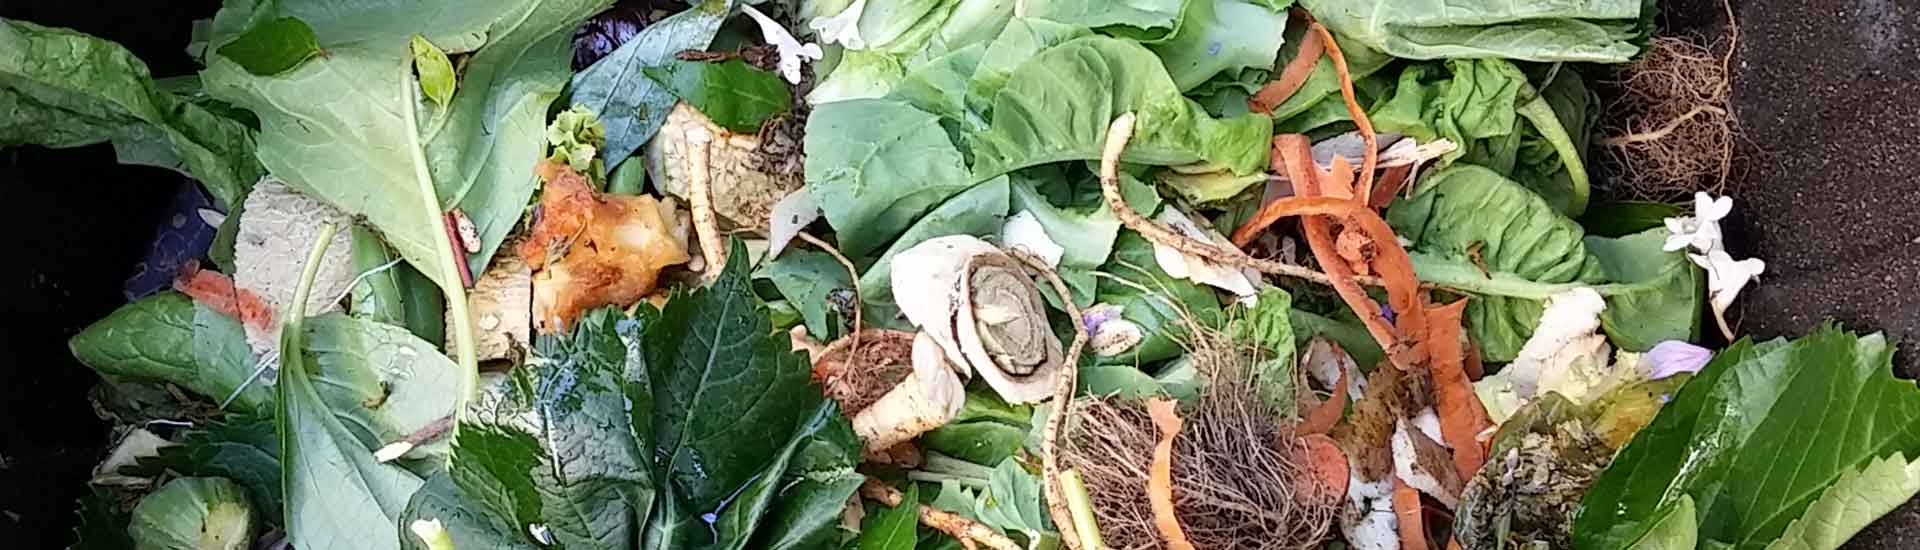
Can't compost food waste? Try sharing it
Would you like to reduce your carbon footprint by decreasing food waste which accounts for 30% of all the resources used in farming i.e. water, energy, fertilisers? And also reduce the production of methane if food scraps go to landfill? Methane is 25 times more potent than carbon dioxide as a greenhouse gas.
Maybe you think you can’t because you don’t have space for a compost bin or you live in an apartment. But there is a way for you to do this.
A couple of years ago a young couple in Sydney started an organisation to help address the problem of food waste and help all those renters and apartment dwellers play a larger role in reducing the human environmental footprint. So they started the ShareWaste project to enable people with waste they couldn’t recycle (donors) to give it to those (hosts) who wanted more compost for their gardens.
ShareWaste is a community project which not only helps to close the food loop, but enables people to better connect within their community, share skills and resources. Its website and apps provide an easy way for donors and hosts to sign up and connect via an interactive map. The map shows hosts and donor around Australia, Asia, Europe, Iceland and North America. The site is also a social platform to promote sustainable life choices and projects, community gardening, growing your own food and demonstrating examples of good practice and community or sustainability projects.
Eliska and Tom built ShareWaste in their spare time without expecting it to grow as much as it has – to nearly 5000 people so far. They are the only service/initiative doing what they do and offering it for free. They'd love to see the platform thrive, grow and be useful to as many communities and people as possible. So far their only marketing has been users' testimonials and the enthusiasm of supporters on social media.
Donors are not only apartment dwellers, but also residents owning a bokashi system or people who are travelling and are looking for a place to drop off their organic waste ecologically. Compost hosts include residents with their own composting system or a worm farm, community gardens and people with chickens. ShareWaste is looking for more community garden hosts since they play an important part in environmental education and connecting the community. Some of ShareWaste’s most active hosts are people who run their own workshops in sustainability or people who simply need a lot of organic material for their garden.
Some relationships between users and donors grow into friendships where, as well as exchanging organic waste, people also small share gifts, produce from their gardens, eggs or invite each other for a cuppa etc.
This year, ShareWaste launched the Compost Collective in New Zealand and a collaboration with Auckland Council where six hundred sign-ups were made in the first 4 months. A newspaper report highlights this remarkable response.
Their community in the US is growing and they have been approached by a council there to develop a customised version.
Eliska and Tom plan to make their current app a bit more social by adding some new features and they wish to enable users to measure the amount of waste they have diverted from landfill.
To read some of the inspiring gardening and waste sharing stories go to their blog.
Crowd Seed Harvests
 Tiny Trowel, a relatively new initiative, seeks to engage the wider community to supply excess fresh fruit and veggies from back yard gardens to not-for-profit food relief providers and empower people to develop sustainable food growing practices.
Crowd Harvests were developed as one practice to achieve this goal. Crowd Harvests are an online communication tool designed to redirect food gardening excess towards those facing food insecurity. Crowd Funding with a twist!Read more
Rentals & Small Spaces as Productive Oases
As population and cities grow, houses on traditional quarter acre blocks are becoming more expensive and you may only have the option of renting or choosing a living space with a smaller footprint. For many this might mean forgetting about a garden, but it doesn’t need to be so. It is possible to have verdant growth and even a thriving veggie patch in small spaces and in ways that allow moving it all when you need to live elsewhere.
A Garden Full of Pot(s)
Great for veggie and herb growing, pots allow you a moveable feast, meaning that if your lease expires or you move to a larger property, you don't have to give the plants up. It also means that you can move plants in and out of shade as the seasons change.
The problem is, glazed and terracotta pots can be pricey, especially if you need a few of them, and plastic pots can be... .well... ugly! So, what's to be done? Never fear, there are many economical solutions! And the word for the week is scrounge...
Glazed and Confused
First stop... the local pot shop. Have a look in their seconds area, or even ask them if they have some gear they are throwing away. You'd be amazed how much decent stuff gets marked down to virtually nothing in garden centres and pot retailers, and what little gems you can find. Cracked and broken pots should be snapped up - cracks and chips can be turned to the back, and pots broken in half can be excellent vessels for trailing plants (like, oregano, thyme, and strawberries). Do look out for massive pot clearance sales, as you can often pick up some unbelievable bargains here also.
Be aware though that some glazed and terracotta pots can have huge environmental footprints, and may not be the most sustainable solution!
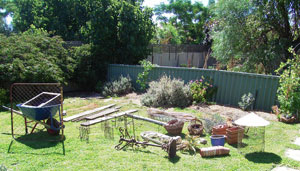
Next place to visit... the local tip! This may not be the most appealing idea, but tips can be amazing and you would be astounded at the range of gardening gear you can pick up for almost nothing! Think pots, sleepers, containers, sinks (if you find a cheap kitchen sink... grab it!!), bits of wire and shade cloth, stakes, ornaments, lattice... whatever you think you could work into your garden. The photo to the right shows what can be collected from a tip in just one (cheap) trip. And you're pulling stuff out of landfill, going for the full reuse, reclaim, recycle on hard rubbish... super sustainable and cheerfully cheap!
Fantastic Plastic
Where ever you happen to see a plastic pot, regardless of size, grab it... they are so useful in the garden for a whole host of things. You'll often see these just hanging round on footpaths and by rubbish bins... grab them! Have a look at your garden centre too... the really big pots are perfect for miniature fruit trees, and can be pretty cheap. But, they can look really ordinary, so, read on, we have a couple of solutions.
Plastic pots are enormously versatile and the bulk of them end up in landfill. So hang on to them... you'll be amazed what you can use them for - storage, moving soil, mini worm farms, raising seeds, striking cuttings, making scarecrows... the list is endless. Plastic pots can be painted (with non-toxic acrylic based paints), and you will find this a rewarding and garden enhancing project!
Other options are "mis-tints" (these are the colours that didn't quite work, and get sold off cheaply) or sample pots, and get painting! If you happen to own (or can borrow) a hot glue gun, you can "draw" some designs on the pot before painting... they look amazing, and give your boring old plastic pots some real life!
The other thing you can do with plastic pots is disguise them. It's simple... if you have spare land space, place your planted pots in the appropriate space, grab some wide plastic trellis mesh, a couple of stakes and a bale of pea straw. Wrap the mesh around the pot, leaving about an inch gap between the pot and the mesh, attach the stakes to the mesh and hammer them in. Then, simply chop off any excess mesh width and stuff the area between the mesh and the pot with pea straw. Use the left over pea straw to mulch the pot plant. The result is a really rustic looking, permanent appearing pot disguise, for the princely sum of about $10 a pot (including the pot!). It also insulates the pots and stops them heating up and damaging delicate young plant roots.
If you can track them down, polystyrene fruit boxes are great in the garden... all you need to do is punch a couple of pencil sized holes in the bottom if they don’t already have them. These can also be painted, and look good as an edge for a garden bed, or around an entertaining or sitting area. They are deep enough to grow a whole host of perennials, annuals and edibles, so why not give it a go? They also make excellent worm farms, potato pits or storage boxes for the shed. Ask at your local fruit shop or market, they generally just toss them out.
Keep it Clean!!!
Even if you despise cleaning, this is really important. If you've grabbed some used pots from the tip, hard rubbish, the local op shop or wherever, it's really important to clean them out before you plant into them. Ideally, soil should not be brought into the property, as it seriously increases the risk of soil borne pathogens, viruses, diseases and bugs attacking your precious plants. To clean pots, first brush them clean (an old dish brush is perfect) over some old newspaper so you can wrap up the suspect soil and dispose of it in the green waste bin. Follow this up by rinsing the pots in warm, soapy water (some people add a thimble full of bleach). You'll need to use a bit of elbow grease on terracotta and glazed pots.
Raising Babies
Thrifty and experienced gardeners know that they get the best value by growing plants from seeds. Lazy gardeners know the costs can begin to add up if you need to purchase tiny seed raising pots to get you started. But there are solutions that cost you nothing!! Firstly, egg cartons are useful for seed raising trays - just pop seeds in and leave them in a warm, sunny, humid place. Once the young plants are big enough, cut up the tray into the twelve individual sections, moisten well (including the egg carton base) and just plant them out.
The other option for seed raising, and raising cuttings, is to make newspaper pots – just fold newspaper around a bottle or other pot of the appropriate size. They can be planted straight into the ground or container... so no risk of damaging the roots when transplanting! No issues with the newspaper ink either... Australian newspapers use vegetable based inks in their printing process, so it's safe, and sustainable! You can also use soil blocks described here.
It's all about Position!
Containers look best when they're grouped together. A group has a greater visual impact, cuts down on watering, creates some mini-biodiversity and means you don't have to walk so far to enjoy a plethora of plants. Group plants that require similar levels of watering together, bearing in mind that plants in terracotta pots will dry out a bit faster than others. It’s a good idea to keep your 'frequently nibbled upon' edibles by the kitchen door, as they are more likely to be used and monitored there. Put the ornamentals further away so they can be admired. Why not experiment with some mosquito repellent plants (like citronella, geranium, rosemary and lemongrass) in an area where you like to sit during the warmer months.
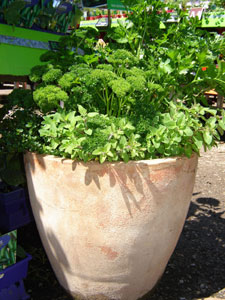
Pick Your Plants
A large range of plants can be grown in pots, but if you really want to save money, and make the most of your space, grow as many edibles as you can. The initial outlay for potting mix, compost and accessories will be well and truly offset by the amount of money you save buying household veggies, herbs and fruit. Growing your own food at home also reduces your carbon footprint (fewer trips to the shops, less packaging), and saves you a lot of time. So, here is a selection of tasty plants for pots:
Veggies: Tomatoes, spring onions, silver beet, baby carrots, capsicums, lettuces, rocket, chilli, eggplants, spinach, Asian greens and beetroot.
Herbs: Coriander, parsley, basil, mint, chives, curry plants bay tree, Vietnamese mint, oregano, thyme, sage, rosemary and lemon grass.
Fruit: Dwarf citrus trees, Tahitian Limes, pepino, feijoa, Ballerina dwarf apples, guava, olives, strawberries and dwarf stone fruits (like peaches and nectarines)
Remember to plant what you like to eat, and cook with. There is no point taking up valuable space and resources with edibles you don't enjoy or won't use.
Watering
In many parts of the country, and at certain times of the year, water is a luxury, especially in the driest inhabited continent on Earth. So, let's have a look at some affordable water saving tips, tricks and techniques.
Storing Rain Water
If you are renting, it is fairly unlikely you are going to get a water tank installed and on a balcony or courtyard there is not much space. But there are solutions.

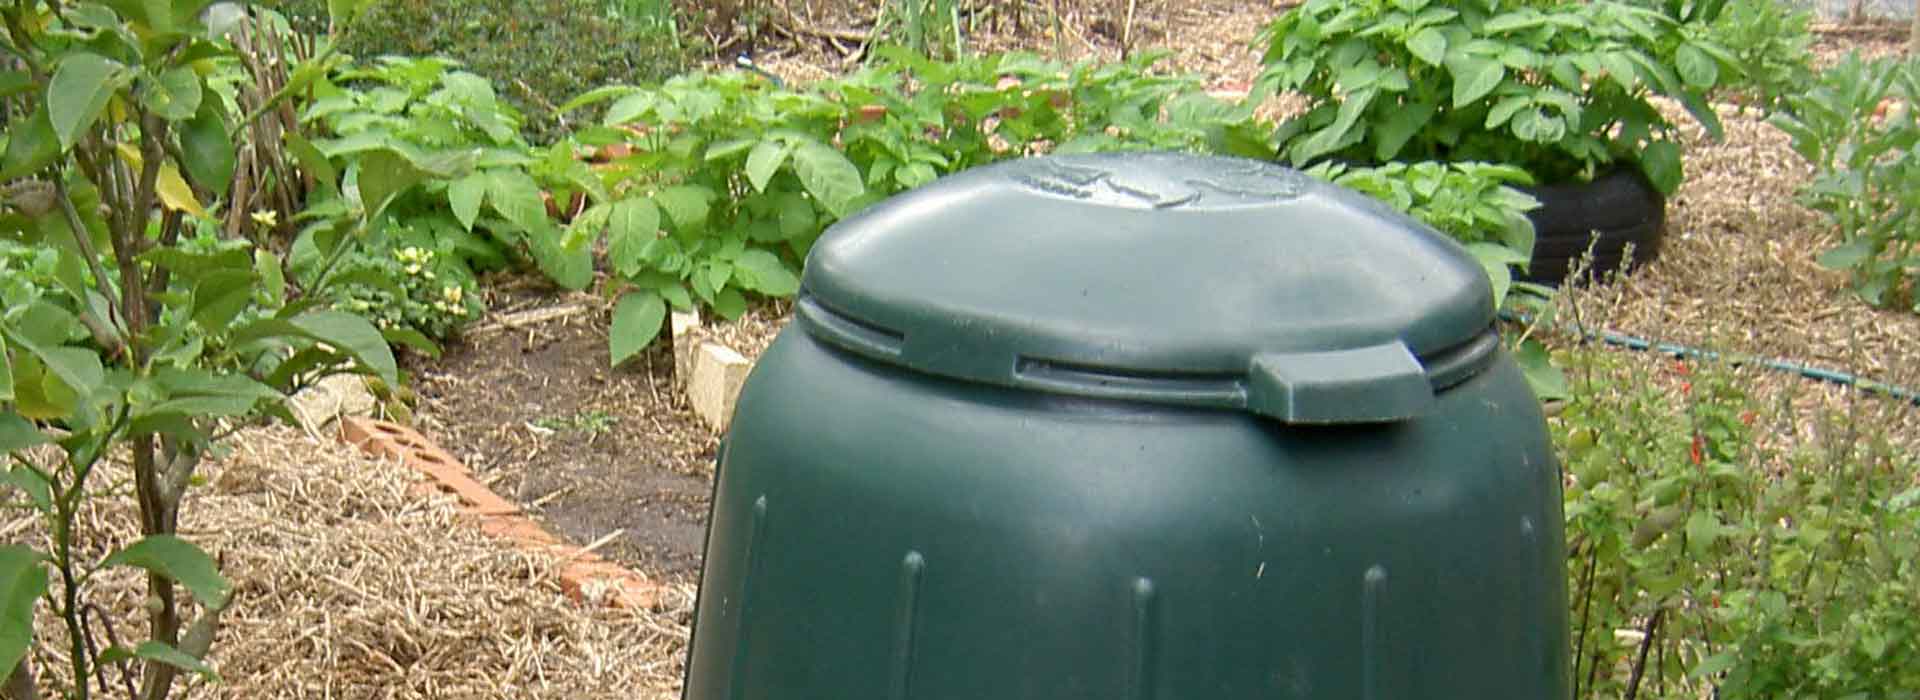
A rubbish bin
Converting a wheelie bin into a rainwater tank is cheap and effective. Most garden related retail outlets now sell wheelie bins in a variety of sizes and guises. With a little bit of work and a couple of fittings, these bins can provide useful storage. Some retail outlets will actually fit wheelie bins out for you (complete with basket filter and tap fittings at the base). But if you are up for a wee challenge, see the end of this page to learn how to build one yourself from scratch!
Create a diversion
How does the water actually get into the bin. You’ll need to buy some cheap fittings – but you can take them with you if you move. The best option would be a downpipe diverter. They are available in round or square to suit different piping. Remove a small section of the downpipe and fit the diverter into the gap. If you are renting, keep the removed section to enable you to replace it when your lease is up. Generally they require a small length of garden hose to be attached to a supplied tap fitting, and can be turned on and off as required. Make sure you measure up before you go shopping, and don't try to fit a square diverter in a round hole.
Grey water
Grey water is water from your shower, bath and laundry. It does not include water collected when the taps are warming up, or water collected in a bucket from washing your fruit and veggies. Both of these types of water have no detergents and soaps in them, and are therefore not included in the following do's and don'ts:
- Untreated grey water must never be stored for any longer than 24hours... ever!!!!
- Untreated grey water and vegetables DO NOT MIX!!!!! Edible plants (with the exception of fruit trees) should never be watered with untreated greywater.
- Don't let children, pets, partners or random strangers play in or drink greywater
- Untreated grey water must be dispersed via subsurface irrigation (that is, in the soil, or on top of soil and under mulch).
For more information about grey water see articles accessible here.
There are a number of ways to collect and divert greywater but by far the best method is to use buckets. Every shower in every house (rented or otherwise) should have a bucket to collect warm-up water. You would be amazed how much clean, fresh water you can collect every time you bathe, and this water is perfect for veggies, herbs and pot plants. You could buy an additional bucket for the kitchen sink, and wash your fruit and veg in it. This water can then be used in the same way, as it is clean and free of soaps, detergents and nasties.
Diversionary tactics
Remember that a cheap black rubber funnel diverter may seem like a bargain, it may lead to tears. They have the unfortunate habit of back flowing, generally into your (rented) laundry!
Remember, many grey water (and rainwater) systems need to be installed by a licensed plumber. If you are renting you would need to consult your landlord to see if you can come to a mutually beneficial arrangement regarding grey water.
General water saving tips
Even if water is plentiful where you live at the moment, it is always useful to miminise its unnecessary use.
- Don’t water lawns - unless of course you have pets or small children who need a bit of time on the turf.
- Lawns can be really thirsty and many parts of Australia under water restrictions do not allow the watering of turf at any time.
- Laundry water will allow turf to survive, but remember, the irrigation has to be sub-surface!
- Group plants according to water requirements.
- Check if plants actually need a drink before irrigating. The best soil moisture tester of all is a finger.
- Add organic matter to the soil, and use mulch. This increases the water holding ability of the soil, and the mulch will reduce evaporation considerably.
- Weed... it's rewarding, and reduces competition for water.
- Water the roots, not the leaves.
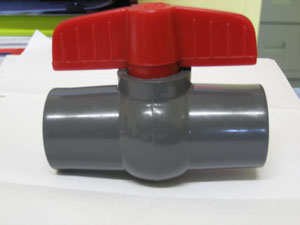
Building your bin
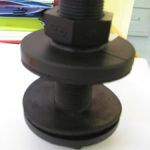 When you have your wheelie bin, buy a 20mm (3/4) tank adaptor (Picture at right), 20mm ball joint tap (Picture below left) and a 3/4 sprinkler adaptor (Picture below right). Then find a rectangular plastic seedling tray - most nurseries are generally happy to give them away or you might already have some).

Place the seedling tray upside down on the lid of the bin, and draw around the outside. Using a hacksaw or jigsaw, protective gloves and some fine motor skills, cut around the outline. It’s better to go too small rather than too big so that the seedling tray will sit snugly (the right way up) in the lid of the bin, and will act as a water filter.
Once this is done, lay the bin on its back, and on the front drill a hole as close to the base as possible. Make sure it's a snug fit for the threaded tank adapter. It needs to be snug to avoid leakage! Crawl inside the bin and fit the tank adapter, so that the long threaded section is to the outside of the bin. Screw this in tightly ... very important again to prevent water wastage. Once this has been fitted, stand the bin back up, and put the ball joint tap onto the thread of the tank adapter, and then screw the sprinkler adapter into the end of the tap.
A few tips:
You will not be able to wheel the bin when it is full, so don't even try. One litre of water ways one kilo, so a full bin can be upwards of 100 kilos. So think carefully about placement before allowing it to fill. Secondly, filtration is the key, so it would be a good idea to put some mesh inside the seedling tray at the top.
Unless you need to move the water uphill, you shouldn't need a pump. The "head pressure" in the bin should be sufficient to see the water disperse fairly well, either through a standard hose, porous hose or dripper. However, without a pump, when you're watering, you will notice that the water will disperse more rapidly close to the bin and begin to slow down as you move further from the bin. You can also fill buckets and watering cans from the bin and water by hand.
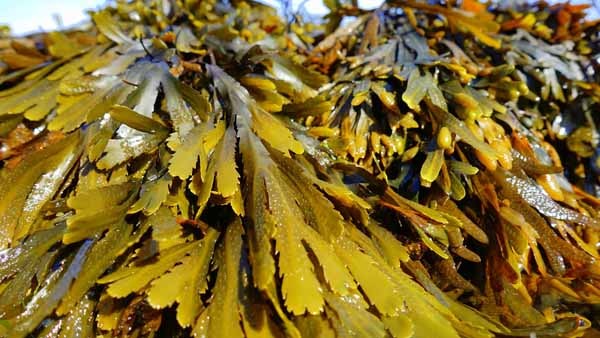
Seaweed as Fertiliser Pt. 2
Seaweed products are valuable sources of fertility for garden soil. Click on the image below for a video which is the second part of a Sustainable Gardening Australia lecture for SGA's Green Gardening Professionals by Dr Colin Young from fairdinkumfertilizers.com

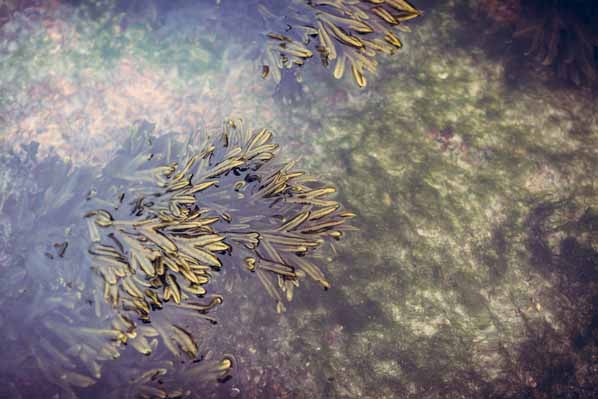
Seaweed as Fertiliser Pt. 1
Seaweed is a valuable source of minerals which are necessary for plant growth. Click on the image below for a video which is the first part of a Sustainable Gardening Australia lecture for SGA's Green Gardening Professionals by Dr Colin Young from fairdinkumfertilizers.com
Composting Methods our Subscribers Prefer
In October, 2017, we asked subscribers to our newsletter, Cuttings, to answer a number of questions in a survey about composting. Although the number of respondents was not high, some interesting insights have been gained.
There were 149 respondents out of the 4800 who opened the newsletter. Even though this was not a high percentage, the results provide some interesting insights.
What type of composting system do you use?
Plastic bins with either open or closed bases were the most popular with about 17% of respondents using one of these and almost equal numbers using a combination of two or more different composting methods. Close behind in popularity were worm farms, then tumblers and open heaps. Bokashi bins or bucket or various types of open cages were least used
What was the cost of your composting system?
Almost 50% of respondents had spent $50 or less. Twenty seven percent had spent $51-$100 while much fewer spent higher sums - a few of $300 or more.
How old is your composting system?
About 40% of respondents had been composting for 1–5 years, 34% for 5–10 years while 21 % had been composting for 10 years or more.
How easy is it to use your composting system?
For 70%, composting was very easy. Thirty six people provided comments on this question. The most frequent observations were difficulty of turning tumblers, especially when full, the need to turn the compost to get fast breakdown and problems getting the ratios of “green” to “brown” components right.
What do you like most about your composting system?
Analysing 130 comments can be done through a 'wordle' which yields a visual representation of the frequency with which words appear. Below is a wordle of the comments from which the words “garden” and “compost” have been removed because they overwhelmed the frequencies of the more interesting words.
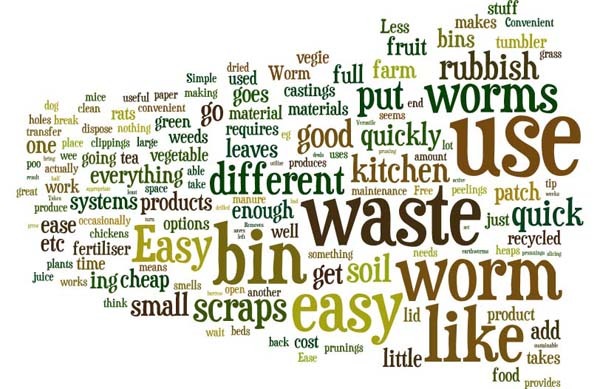 From looking at comments and the wordle the overall conclusion is that people liked their system and found it a great way to use household and garden waste productively. Worms were popular in either a worm farm or when found in any of the systems where waste material was in contact with the ground.
What do you like least about your composting system?
Again it was necessary to remove "compost" from the comments to create the wordle below. It is clear that many people found nothing to dislike!
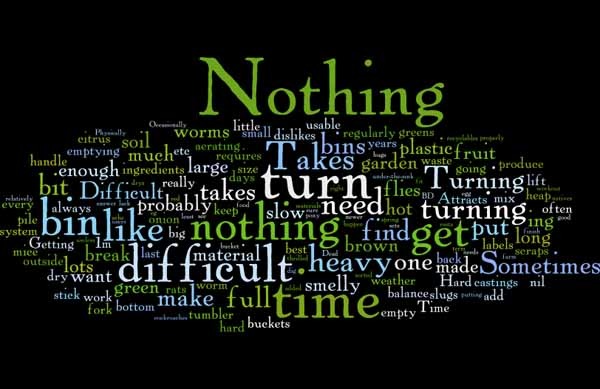
However, as noted in the earlier question, some found difficulties with turning tumblers since they became heavy when full. A number of respondents did not like the sometimes hard nature of the product when decomposition was completed. Many with open or closed systems thought that it took too much time for decomposition, especially in winter. And some complained about the physical work involved in turning the material in the open systems - although a few commented that it was a good way of getting fit.
Conclusions
Most problems were reported with open heaps or tumblers unless respondents thought that the physical work helped them keep fit. A problem with any system was smelliness if the right ratio of brown to green was not achieved.
So, if you're wondering which type of composting method to start using, some sort of closed or semi-closed system appears to be best – not tumblers - but some patience is required to get good quality compost. And, of course, worm farms!

Gardening for Biodiversity – from Bush Gardens to Gardening the Bush
An inspiring talk was given by Dr. Charles Meredith at SGA's Annual General Meeting recently. He is a highly respected ecologist with extensive experience in natural systems and conservation biology, is a trustee for the Trust for Nature and a councillor on the Victorian Environmental Assessment Council. He founded Biosis Research, Australia’s largest ecological and heritage consulting firm, from which he retired 5 years ago.
His talk discusses how biodiversity is under threat throughout the world for a range of reasons and at a range of scales, nowhere more so than in urban and peri-urban environments. Examples of losses over the last 50 years in Victoria set the scene. He addresses the need for active biodiversity management at larger scales and how an expanded concept of 'gardening' might be needed to achieve this. Then, examples of unexpected survival of biodiversity in greater Melbourne reveal how home and professional gardeners can contribute to the maintenance or even the improvement of local and regional biodiversity.
https://www.youtube.com/watch?v=sD-94Vto6z4

Growing Little Learners – The Benefits of Gardening with Children
We sometimes think of gardening as an adult activity, and sometimes especially for older people This can get reinforced when we give in to our children’s wishes to watch screens of some sort instead of being outdoors. But gardening is actually a wonderful way for children to have fun and, at the same time, gain important knowledge and skills.
Renowned Russian psychologist, Lev Vygotsky, introduced the theory of unstructured, open-ended play based learning to the educational and social world. He promised that it held untold benefits for children, including:
• The development of confidence and independence
• The development of resilience
• The development of problem-solving and critical thinking skills
It’s often difficult to find space in education to allow children the freedom to truly play. We face a very structured curriculum that leads our children, often quite quickly, through a series of skills that don’t often reflect their actual interests.
Offering children the chance to be involved in nature play, particularly in their own backyards, provides an opportunity for parents and caregivers to allow time and space for this wonderful learning to take place.
How can my Garden become a Classroom?
Any outdoor space that you have – be it a big backyard or an apartment balcony – is the perfect breeding ground for learning.
Children are born curious. They love to learn about new concepts and approach the natural world with wonder and awe. Allowing them space in your home to garden, care for plants, learn about sustainability and take on new projects will both tap into this natural sense of wonder and instil in them the importance of caring for their environment.
Applying Vygotskian theory means that you will provide the parameters for learning and then allow children to take over. They will become so immersed in their project, and so full of spontaneous joy at creating and exploring, that their little minds will happily forge connections to extend their learning beyond the school classroom.
What are some Garden Projects I can do with my Child?
These ideas will depend, of course, on the age of your children, the amount of space you have and your budget.
You could…
 • Design and construct a garden with your children.
• Research the best vegetables to grow in your climate, how to care for them and their seasonal growth patterns.
• Grow vegetables that you can eat as a family.
• Create a succulent garden.
• Get creative with recycling! Repurpose things like old plastic bottles to become hanging planters.
• Learn about garden care. Allow children to become the gatekeepers against weeds and other elements that might threaten the garden.
• Create a peaceful green space to encourage your children to spend time outdoors away from screens and connected to nature.
The possibilities are endless!
Promoting Entrepreneurship through Sustainability
Ingenuity, creativity and innovation are skills that will help your child. The ability to approach a situation, assess possibilities and create a positive outcome will help them not only in school but in life as well. Our world needs more ACTION instead of passive consumers – and this is where gardening can come into action.
Alex is 10 years old and has been gardening with his mother his whole life. They have created a seasonal garden that they enjoy eating from year-round. Alex and his mum have their own backyard chickens who supply an endless source of eggs and companionship.
Alex realised that many of his neighbours liked his garden but didn’t have time or knowledge to start their own. So Alex took matters into his own hands.
 Alex decided to grow seedlings into juvenile plants that he then potted. Once these plants were established (he typically chose things like tomato and basil), he offered them to his neighbours at a competitive price that was far cheaper than the big-name gardening stores they’d bought from before. His plants were healthy, hardy and of good quality.
Alex put a lot of effort into his small business. He did things like…
• Research plant care
• Communicate with his neighbours about what kinds of plants they would like
• Plan, adjust and rework his garden when necessary
• Care for his plants from infancy to maturity
• Budget his funds to make sure he could care for his plants and then make profit off their sale
 This simple, old-fashioned idea saw Alex connect his love of sustainability and nature to learning and the application of real-life skills. Rather than learn about these theories in a classroom, he got his hands dirty and saw this project through from start to finish. That’s the kind of application of knowledge that gardening with children can provide.
How to go about it
Speak to your own children about the importance of gardening and ask them if they have any projects they would like to try. Offer them as many nature play and natural learning experiences as possible. Show them the benefits of sustainability – from growing your own produce to recycling waste. Teaching our children to garden means we are teaching them how to grow, create and care. Which is exactly the kind of thinking our world so desperately needs.
This is a guest post from Louise Lavery, Families Magazine, a print and online resource for families with children aged 0-12.

Feeding Your Plants
Gardening is a bit like life really... the more you know, the more you know you don’t know. It can be so full of hits and misses, trials and errors, successes and failures... When it comes to how to help your plants grow there are so many possibilities – should I use compost, manures, worm castings, weed teas or commercial fertilisers and are solids better than liquids? Some gardeners swear by one or the other, but all possibly have their place at various times, so let’s look at them all.
It is this ever-evolving and seemingly endless supply of information that can make gardening a hobby that seems daunting and overwhelming to the newbies and brown thumbs amongst us. Fear of asking 'stupid questions' at garden centres or of our gardener friends can prevent us seeking out the information we need. And so many of us experience a string of failures in the patch before we have many successes. Some of the most commonly asked queries involve fertilising - essentially the "who, what, where, when and why" of feeding our flora.
Why do Plants Need a Feed?
All living organisms need food in order to remain healthy and happy. Plants are no exception. So generally speaking, over many thousands of years, plants evolved and adapted to the environments within which they were rooted. If they were stuck in impoverished soils, then the plants that survived were those that made do with less. Conversely, plants that grew in moist, loamy, nutrient rich soils (think Tasmania) gobbled up as many nutrients as they could, and now, when grown away from their natural environments, can need some serious feed! And, unless the plant is growing in its natural environment, and all plant waste products (fallen leaves, dead branches etc) are being returned to the soil, they are essentially removing nutrients from the soil without replacing them. So that’s where we come in, especially if we are attempting to grow “hungry” plants, like annuals and edibles.
So, where do we start? First, we need to understand the differences between fertilisers, soil amendments, soil conditioners, manures, mulches, compost or liquids. Fertilisers can be defined as substances containing nutrients essential for plant growth, and are generally available as either organic or inorganic (more on that shortly) and as either a solid or liquid.
Strictly speaking, soil conditioners are soil amendments that are added to soil to keep the soil itself in good shape, which in turn benefits our plants. They may or may not contain organic matter. They will alter the structure of the soil, improve its water and air content. All good things if you’re a plant! Examples of those which contain organic matter are bone meal, coffee grounds, coir and straw. An example of an inorganic soil conditioner is vermiculite (a mineral substance). Manure and compost may be regarded as soil conditioners, but manure contains significant amounts of plant nutrients which act as fertilizer when slowly released in the soil. Compost has much less nutrient content but is excellent at improving soil structure. And compost varies according to what has been used to make it - some gardeners who grow edibles successfully swear that they only ever use their home-made compost!
Home-made Fertilisers
If you have chickens, horses, cows or other grazing animals, you have a ready source of material which is both a fertilizer and soil conditioner. Remember, though, that some manures, like that from chickens and sheep, have high concentrations of nitrogen or other nutrients that may harm plants by “burning” their roots unless they are first composted or a “tea” is made from them by soaking small amounts in water. Another “safe” way to use these manures is to dig small amounts in to the soil well before planting.
Worm castings (the solids from a worm farm) are, in fact, worm manure and their nutrient content is ideal for adding directly to soil.
Commercially Available Fertilisers
 Go in to any garden centre, and you’ll notice that fertilisers come in many forms and in a multitude of brands. There are two main types:
- Inorganic, or artificial fertilisers that have been synthesised through a human manufacturing process
- Organic or natural fertilisers that have been manufactured from one or a combination of organic ingredients
From a chemical point of view there is little difference between the quality of any nutrient in an inorganic fertiliser (e.g. nitrogen) and that in an organically derived fertiliser. However, there are differences in the quantities of nutrients supplied and how freely available they are to the plants for growth.
 Fertilisers which release nutrients slowly are generally preferable for adding to soil. However, sometimes plants need a quick boost and a foliar feed is appropriate. This may be from a “tea” made from an organic fertilizer or a very dilute solution of a manufactured product.
Choosing Fertilisers
- Try to match the need to feed with the plant’s need for growth. Over-fertilisation can cause plants to produce lush green growth that can lead to a serious infestation of pests and diseases. This in turn means you have to manage these damaged plant parts - a waste of time and money!
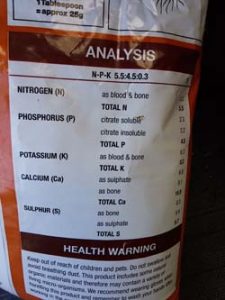 Check out the N:P:K rating of the fertiliser you want to purchase. This shows the amount of macro elements contained in the product i.e. Nitrogen (N): Phosphorus (P): Potassium (K). For example, the amount of nitrogen in organic fertilisers generally ranges from 1% to 9% of the total content but in artificial fertilisers it can range from 10% to 50%. Truly organic fertilisers usually have a low nutrient rating, e.g. 3:2:1 whereas manufactured fertilisers can be 24:7:18 depending on how they are formulated. There is no perfect formulation of nutrients that will cover all plants as different plants have different requirements. And even this will vary due to seasonal requirements such as flowering or fruiting. The trick is to ensure that adequate, but not excessive, levels of nutrients are available to maintain plant health and necessary vigour throughout the growing season and any periods of dormancy.
- When fertilising Australian natives that have low phosphorus tolerance, ensure that you select a fertiliser produced specifically for Aussie natives or use an organic fertiliser at half the recommended rate.
- Supplementary fertilising will be required when plants are grown in containers or pots. Plants in pots are grown in a ‘soil-less’ medium or potting mix. In Australia this is generally composed of pine bark chips of various sizes. However, unlike natural soils, pine bark offers very little in the way of nutrients. Most modern potting mixes come with enough fertiliser to last for the first six months but, thereafter, potted plants must be fertilised throughout the year to maintain plant growth.
It is important to only purchase fertiliser as needed since nutrients will be lost over time. Always store fertiliser in a cool, dry area, clearly labeled and dated. Small amounts of excess organic fertilisers can be added to compost heaps but adding artificial fertilisers is not recommended as they may damage the micro-organisms that perform the composting process.
How much and how often?
Why is it that we think plants need so much food. Do we assume plants need as much food as we do? Plants are not nearly as hungry as we think, and, quite often, we are killing our plants (and the wider environment) with kindness.
There is no simple answer to this. What kind of plants are you growing, what kind of soil are they growing in, what are you feeding them, what do you want them to do, how often do you irrigate, is there organic matter in your soil, do you have a never ending budget to purchase pre-packaged store bought fertilisers . .. the list goes on.
Think about the growth needs of the plant before you decide how much it needs to be fertilised. If it is a vegetable or flowering annual or a tree coming into fruit, then it is likely to require regular feeding. However, if you have a garden bed full of indigenous or native plants growing in a well structured healthy soil within the correct pH range, the need to add additional fertilisers is probably not necessary. In fact, by feeding, you could very well be killing them with love!

The Science of Composting
Many well-intentioned composters keep adding kitchen scraps to the compost bin and then wonder why they are left with a smelly rotting mess.
The science of composting is all about getting the carbon/nitrogen ratio of the contents correct. Follow the correct principles and you will create superb compost suitable for enriching soil.Read more