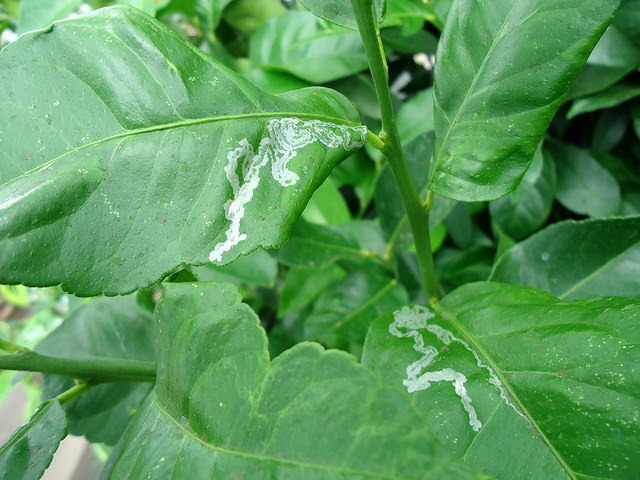
Citrus Leafminer
Describe yourself: I’m the tiny larvae of a beautiful silver moth, and am very rarely seen. That said, you can sure see my silvery trail of destruction, as I leave my squiggly tunnels all over the leaves of your favourite citrus trees!
Hobbies: Mama moth loves laying eggs on your fab citrus foliage, and can produce up to 15 generations of lovely leafmining larvae each year. Lovely larvae live to mine, and this produces some super squiggly silver tracks all over the leaves of your citrus
Likes: I adore citrus trees of all kinds, especially lemons, limes (native and exotic) and orange trees. I love laying eggs, especially on the midrib of the foliage of your favourite fruit trees, and knowing my beautiful larvae are growing big and strong inside your foliage. I especially like when all my babies make their silvery tracks on your leaves…..it makes a mother so proud! And I love to get started when there is fresh new foliage available.
Dislikes: Parasitic wasps and lacewings really bother me, as do a number of low environmental impact horticultural oils. Diligent gardeners who pull off and dump infested leaves into the bin also make me sad.
You’ll know you’ve met me when: The leaves of your citrus are covered in squiggly silver trails, and, if the infestation is pretty bad, the leaves may appear to curl and become distorted. These curled leaves allow my larvae to pupate and become grown ups....ready to fly and infest again!
Old School Control Methods: Really hideous chemicals registered for commercial growers only.
Breaking up ain’t hard to do… if:
- Remove all affected leaves as soon as you see them. This means inspecting new growth, especially in spring. Although moth numbers are low then, new growth, especially on young trees, is much more vulnerable. The mines are not as obvious as later in the season, but if you inspect trees closely and see about 10% of leaves with mines, the leaves should be removed. Place the removed foliage into a plastic bag and leave it out in the sun, or dispose of it in the bin. Do not compost these leaves, otherwise your compost bin may become a nursery for more leafminer!
- Encourage natural predators like lacewings and parasitic wasps to your garden by increasing your backyard biodiversity. Otherwise, consider purchasing some of these guys where all good bugs are sold!
- Spray with horticultural oil to deter mama moth from laying new eggs. The oil won't kill the larvae which is why it's important to inspect trees early in the season and remove any infested growth. Spray first thing in the morning to avoid spraying beneficial insects which are less active at this time. This also reduces the chance of burning foliage. Have a look at the Garden Product Guide - Safe for You 'n' Nature for a number of suitable low environmental impact products.
Banner image: Ana Keliikuli, from Scot Nelson, Flickr
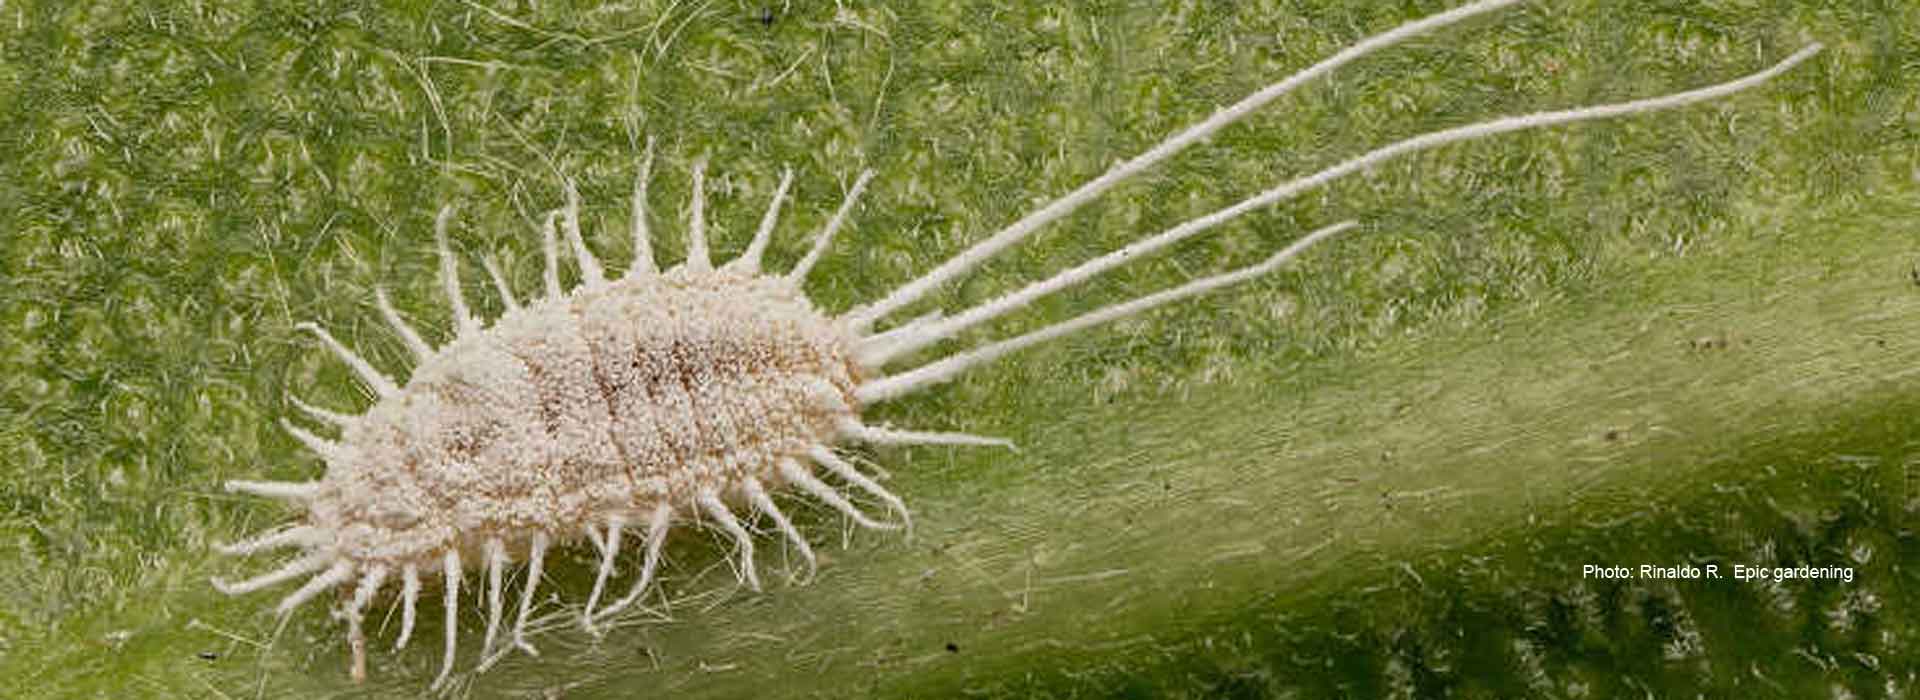
Mealybugs
Hi, my name is: Mealybug

Describe yourself: I'm about 4mm long, and I'm a real sweetie, covered in a lovely layer of white powder. Although I may look cuddly, I'm a really hard worker, and enjoy hanging out with my mates on the cool undersides of leaves and stems.
Hobbies: I love nothing more than sucking sap from leaves and stems! Exuding honeydew is a special talent, which encourages sooty mould. I also release toxic saliva that can seriously damage plants.
Likes: Citrus plants, orchids, ferns, loads of ornamental plants and shade houses. I like warm and humid weather... it just makes me want to breed! Oh, and I love ants, they really look out for me!
Dislikes: Being scrapped off a plant with a stick, home made veggie oil soap mixes or store bought alternatives. I really don't get on with parasitic wasps and Ladybirds.
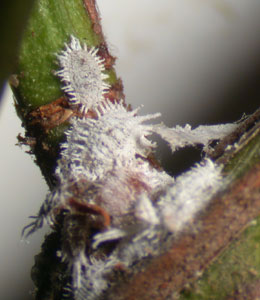
You'll know you've met me when: New growth on your plant looks weird and the plant has a sprinkling of white furry stuff on leaves. You can also see me and my mates hanging out along the veins of leaves and on stems.
Breaking up ain't hard to do... if you:
-
- Stop my ant friends from coming around by growing tansy or other ant repellent plants! Ants tend to our every need and protect us from garden bullies. Without their protection we are all alone in the world.
- Irritate me by putting a flattened square of aluminium foil around the base of plants to bounce light on the undersides of leaves.
- Spray me with a home made garlic or chilli soap. Or even a store bought insecticidal soap and target the undersides of the leaves.
- Spray your plants' leaves with water and knock me and my mates right off our perch!
- Pay your neighbours kids to come round and wipe me off with a stick!
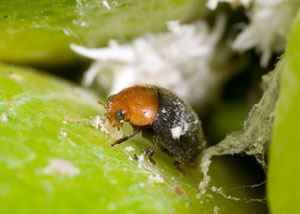
- Buy some Ladybirds or Parasitic Wasps, and release them onto the infected plants.
- Use plants that have a milky sap or furry leaves... we hate them!
- Dab us with rubbing alcohol or methylated spirits…..man, that burns (but it won't harm your plants).
Photographs:
Pic 1: Photo by Michael Masiuk woodypests.cas.psu.edu
Pic 2: http://wihort.uwex.edu
Pic 3: www.bugsforbugs.com.au Desc: Australian Native Ladybird... destroyers of mealybugs! and with permission of the photographer, Denis Crawford.
Produce in Pots
 Plants in pots... it’s hardly a new or revolutionary concept... I mean, we are all well acquainted with the potted Maidenhair fern in the bathroom, a dusty 'Parlour Palm' struggling for life in the corner of the office, or the ubiquitous 'Peace Lily' given as a gift when we can’t think of anything better. But what about productive plants in pots? Imagine a 'movable feast' in your inner city courtyard, providing a fair amount of the food you love to eat? A bounty of beautiful herbs out by the BBQ, or tonnes of tumbling tomatoes at your townhouse? Just about anyone has room for a few pots at their place, and we reckon you will be amazed by just how much produce you can grow in just about any space!
Gone to Pot – Getting Started
Planting a productive potted plot is no different to getting going in a garden – it’s all about planning, position, potting mix, patience and productivity.
Position
This is all about the best position, not just for your plants, but for you as well. Almost all edible plants will do best in a full sun spot, so spend a bit of time in your patch, and work out where the sun is at it’s most super! Remember, this will vary considerably from winter to summer... but the beauty of planting in pots means you can move them as required to catch the rays! Pop the pots somewhere convenient for you – the closer they are to the house, the more likely they are to be watered (very important) and eaten (also very important!). Make sure that the pots are not blocking access ways, are not sitting in wind tunnels, and are not in the firing line of dogs, cats and wayward balls.
If you just can’t get the right pot position, why not consider going up, rather than down? There is a massive range of tasty treats that can be grown in hanging and wall pots, and this is often an excellent solution for light starved courtyards, or those spaces dominated by our little fur babies (yes, dogs and cats are cute, but they can be a gardener's nightmare!). Turn the old Hills Hoist into a harvestable haven, or the side fence into a fresh food feast – they make excellent backyard features, and you’ll be the talk of the neighbourhood (in a good way)!
Planning
Containers look best when they're grouped together, with pots of all different shapes and sizes closely clustered. It has a greater visual impact, cuts down on watering, creates some mini biodiversity and means you don't have to walk so far to enjoy a plethora of plants. Group plants that require similar levels of watering together, bearing in mind that plants in terracotta pots will dry out a bit faster than others. We know that pots can be pricey (no-one works in horticulture for the money), but check out our Renters Guide To Sustainable Gardening for some great tips for procuring pots. The secret is to never let a pot pass you by... if you see a bargain (or even better, a freebie), grab it, you can always use it for something.
Potting Mix
As anyone who knows me will tell you, I have an unhealthy obsession with healthy soil (which is not a bad thing in itself, but does tend to make fairly boring dinner party conversation). When planting productive pots, the growing medium is incredibly important, but the hot tip here is NOT to use garden soil in pots! Healthy garden soil contains a fantastic mix of microbes, bacteria, fungi and worms... which are great in the garden, but generally don’t perform that well in containers. Garden soil in pots can often have significant drainage issues, and tends to go shabby pretty quickly. The secret to awesome pots is to use a certified organic potting mix, and thankfully, there are now plenty of them around. When opening bags of potting mix, it is important to be aware of the potential for harmful airborne critters to puff out of the bag and into your respiratory system, so consider wearing a mask, and wetting down the potting mix before handling.
Good organic potting mixes will break own over time, so you will need to refresh the pots with new potting mix every so often. Oh, and don’t forget to mulch the tops of all pots with a straw based, locally sourced mulch, to slow down water loss, and prevent weed infestation. As this stuff breaks down, your potting mix will be enriched with natural goodness, minimising the need for additional feeding, saving you both time and money.
Patience...
...is a virtue, so my mother tells me, but this is not always an easy thing to remember in the garden. Consider staggering the planting times of some of your edible favourites (that is, don’t plant 15 tomato plants at once), to prolong the harvest and therefore maximising the yield of your pots. Growing from seed is an excellent way to do this, and while it may be a slightly longer and more tedious process than using seedlings, the extended harvest and money saved may just make it worthwhile for you. Plus, you can often collect and save the seed from many herbs and vegies from one year to the next, which is a good thing for the back pocket, and the planet. Use heirloom varieties whenever possible to ensure the seeds will be viable.
Productivity
Edible gardening is all about maximising productivity, and this is especially important in small space and container gardens. The secret is to plant what you want to eat, and be familiar with plant families and Companion Planting. Depending on the size of your pot, you can often plant a number of different varieties of plant in the one container.
Here are a few suggestions for some winning containerised combinations! Use these as a guide, remembering, the bigger the pot with these the better. If your pots are a little small, use these combinations as suggested plantings for groups of pots... they’ll look great, and you’ll be amazed at just how many incredible edibles you’ll be able to fit into even the smallest space!
The Pasta Pot – One or two tomato plants at the back of the pot. Underplant these with some basil seedlings and a couple of marigolds. At the front of the pot, plant some trailing thyme, marjoram and / or oregano. These will soften the edge of the container, and mean that everything required for a perfect pasta or pizza is in one pot! Plant this pot in spring / summer.
The Stir Fry – Underneath a Kaffir or Tahitian lime in a pot, plant some pick and come again Asian Greens (like Tatsoi, Bok and Pak Choi), and pop in some slow bolt coriander as well. If you don’t have a lime tree, why not use some snow peas as the vertical planting instead? Grow these up a 'teepee', and underplant as above. Plant this pot as required in autumn / winter.
The Kickin’ Curry Container – For any lover of home made curries... this container is a cracker! In spring / summer, pop in an Eggplant (or two, if using the smaller Thai eggplants) at the back of the pot. These will need to be staked. Underplant with a Chilli, Spinach, Coriander, and a Curry plant or two, and you are set to whip up a super curry in a hurry. Try this around September. For a winter version replace the eggplant with cauliflower and the spinach with kale. Too easy and darned tasty!
The Season-All – This is a must have for any container gardener. A bay tree in a nice big pot forms an attractive (but somewhat slow growing) centrepiece, surrounded by rosemary (either standard or trailing), thyme, tarragon, parsley and marjoram. Once planted and established, you’ve got yourself an incredibly attractive, fairly drought tolerant, semi-permanent pot planting that will add interest both to the garden, and to your cooking! Plant in spring / summer... and enjoy for ages!!
The Hot-Hot-Hot Pot - In a nice big pot (think half wine barrel size), pop in a capsicum at the back of the pot (remembering it may need to be staked). Whack in a couple of trailing cherry tomatoes, a chilli or two (experiment with these, there are some real winners) and some marigolds for colour and companionship! If you are so inclined, whack in some chives, and you’ve got yourself an instant Mexican feast in a pot! Plant in spring / summer.
The Super Salad – This one is all about the lettuce, particularly the varieties that can be picked from continuously through their growing period. Lob in some Lettuce under a teepee of peas, and pop in some rocket, silverbeet (or spinach depending on the season) and some chives, and you’ve got yourself the fixings of a nice, green salad! Can be planted all year round, just keep the water up to this thirsty pot.
The BBC – Build a teepee, and plant a climbing bean or two. Underplant this by popping in a couple of cauliflower and broccoli seedlings, leaving about 30cm between them. Interplant with a sage or two, and some dill. These will enhance the flavour of the broccoli and cauliflower, and help keep Cabbage White Butterfly at bay. Plant between April and August.
The Happy Apple – Miniature or 'Ballerina' apple trees are fantastic in pots, and with the right pollinators nearby, they can be incredibly productive. Underplant these trees in pots with some nasturtium and chives, and you will have yourself a happy potted apple. Plant anytime.
The Hanging Garden – There are so many great varieties of herbs and vegies that will do well in hanging baskets, but here are a few of my tried and true favourites: Strawberries, Tomatoes (in particular the cherry and “pot tumbler” varieties), thyme, marjoram, oregano, prostrate rosemary, mint and chamomile.
While these suggestions are awesome (if I do say so myself), they are by no means the only combinations possible. Remembering the principles of backyard biodiversity and companion planting, you too can come up with your own cool containerised combination!

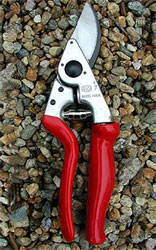
Cheap Tools are for Fools!
Like most people, I enjoy my gardening, but have to do so on a fairly tight budget (as they say, horticulture is a job you do for love, not money!). So, when it comes to garden tools, it used to be a case of 'the cheaper the better'. Not any more. I now buy the best I can afford, even if it means going without beer money for a week! Why? Well, there are a number of reasons, the first being that cheap garden tools just don't last, be they secateurs, shovels, shears, picks or loppers.
Why?
Longer lasting and money saving
Cheap, nasty cutting tools don't last, blunt quickly, are difficult to sharpen, rarely cut cleanly (thereby damaging plant tissue), and are more likely to injure you as you use excessive force to accomplish the job. I was replacing my cheap secateurs more often than I watered my pot plants - spending money, time, petrol and emitting carbon that I just couldn't afford. And don't even get me started on cheap shovels, mattocks and picks. In one afternoon alone I managed to bend the tines on a (new) fork, snap a shovel and axe handle, and crack the head of a mattock attempting to cultivate what was to become my veggie patch! Needless to say, I stopped buying cheap garden tools that day.
Environmental Impacts
The environmental impact of continually replacing cheap garden tools is astounding, and the main reason I now save up to buy the best tool I can. Consider the use of resources that go into the manufacture of most of the cheap, imported garden tools on the market, not too mention the (often) excessive packaging and transport costs. Embedded water, carbon emissions, and the significant contribution these broken tools make to landfill are reason enough to buy the best. So, while the initial outlay for some of these top of the range garden products can be a little daunting, consider the savings you are making in the long run. Good quality tools should last for years provided they are cared for.
Secateurs: Top quality secateurs (eg Felco) cut better, are easier to sharpen, are more comfortable to use, and easier to maintain. Look for handles with rubber shock absorbers and cushion to protect the wrist, toothed centre-nut for aligning the cutting and anvil blades easily and precisely for a clean, accurate cut. Remember to try the product out before you buy, and make sure it is the right size for your hands. Left handed gardeners should always choose left handed secateurs (eg Felco 9 and Felco 10).
 Forks: for turning and breaking up clumps of soil, and aerating compost, forks are fantastic. Look for a fork with the tines drawn from a single piece of carbon steel and the shafts are made from hardwood. D-shaped handles are generally regarded as the most comfortable.
Shovels: this has a scooped blade (as opposed to the flat blade on a spade), which makes it suitable for moving garden material such as sand and dirt. Choose a size to suit you - small is right for most women, and medium is fine for the average man.
Select the proper handle length for a garden shovel, with the length of shovel handle dependent on the height of the user. A standard shovel handle length is 28 to 29 inches long and made of wood or metal, with wood being the preferred option, due to weight and durability. Opt for the garden shovel with a D-type hilt or handle instead of a Y-type hilt that could split if used for heavy loads.

Spades: this has a flat blade and is used for digging, cutting edges and dividing plants. The critical thing with spades is to keep them sharp (bevel the back edge off using a bench grinder or sharpening stone). Buy a stainless steel bladed shovel or spade for a lighter weight, non-rusting option, although a carbon steel blade is still the best all-around blade.
Loppers, Choppers and all things garden: for all the other garden tools around, it is vital you select the right tool for the job, and buy the best you can afford. Wolf-Garten, a German company, manufactures a great range of top quality garden tools with interchangeable handles, effectively increasing the versatility and usability of each tool. While the initial outlay may be high, the environmental and dollar savings are significant in the long run.
Using a diamond sharpening stone on secateurs is on of the best things you can do, and will reduce user effort and damage to plant tissue by keeping blades sharp. Clean and sharpen secateurs and loppers, and be sure to check blades carefully for rust, particularly if you've discovered the secateurs under a pot or abandoned in a garden bed! Careful use of steel wool and oil should restore good quality cutting blades to use.
 If you buy the best quality tools you can afford and look after them, they will perform well for years. Don't leave them out in the rain! Look after timber handles with regular oiling (50% mineral turpentine and 50% raw linseed oil is best). Clean blades carefully and sharpen where necessary, and sand down rough splinters on wooden handles. To keep blades and the edges of spades and shovels sharp, use a bench grinder or a sharpening stone. Squirt some oil on saw blades and anything else that might rust, then rub the oil in with an old cloth. Oiling tool handles and blades is a great job for a rainy day.
Top quality garden tools such as shovels, forks, mattocks and picks should almost last a lifetime (Spear and Jackson offer a 10 year guarantee on their digging tools), are designed to reduce discomfort to the user, and makes the difference between a gardener that works daily in the garden and one that cannot get out of bed in the morning.
First class garden tools are both an excellent investment and an absolute pleasure to use by comparison with cheaper products. They are better for the environment, our garden, our health, and ultimately, our back pockets!

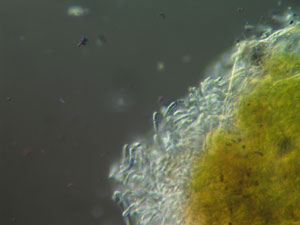
Black Spot of Rose

Hi, my name is: Black Spot of Rose
Describe yourself: Umm, my name pretty much says it all. I'm a black spot, kinda round with fringed margins and up to 12mm wide. I'm a fungus, and have been told I'm not that easy to love.
Hobbies: Hanging out on the upper surfaces of leaves, especially roses, making them look fully sick, and causing them to fall off!
Likes: Almost every type of rose, humidity, when you over fertilise your roses (oh yeah baby, I love that), shade and water lying around on leaves. I love really crowded gardens where there is no air movement.
Dislikes: Sun, well mulched garden beds, when you clean up fallen leaves, home made spray remedies (like milk sprays and bi-carb mixes), store bought good sprays I really don't like gardeners who monitor their plants all year round!
You'll know you've met me when: It's pretty obvious. Your leaves will be covered in irregular black spots, and the leaves will generally fall off! Cause I'm a fungus, I can drop my spores in the ground, and just keep infesting baby!
Breaking up ain't hard to do... if you:
- Mix fat-free milk with water in a 1:1 ratio and apply it using a spray bottle. Spray the solution directly onto the clean leaves of your roses. The milk-and-water solution coats the leaves and leads to the growth of an invisible fungus that frightens off black spot!
- To four litres of water, add 3 level teaspoons of bicarbonate of soda and a couple of good splashes of fish emulsion. Give it a good mix and spray it on weekly. Don't apply when it's hot. The Fish emulsion is very useful because it helps to make it stick. It also contains beneficial bacteria that have antifungal properties. And that's not all - the oils in fish emulsion will help to suffocate pests like mites/aphids/scale. You must use it weekly for it to be most effective.
- A deficiency of potassium makes roses more vulnerable to this disease so regularly add sulphate of potash in spring, summer and autumn.
- Seaweed sprayed onto the leaves changes the pH of the leaf surface making it less attractive to the fungal spores. It also strengthens the cell walls making it more difficult for the invading fungi.
- Lime sulphur can be used as a preventative fungicide on leafless roses in winter.
Images from:
Pic 1: www.mooseyscountrygarden.com
Pic 2: www.nt.gov.au Description: Black Spot of Rose under magnification... ugly hey?
Companion Planting
Once the realm of the hardcore, hippy, home gardener, companion planting is now an incredibly popular practice - from beginner gardeners right up to large-scale agriculture. But, despite its popularity (it is huge in Europe), companion planting is often misunderstood, misused and misrepresented as the "cure-all solution" to problems in the patch.
So what is companion planting? Essentially, it's a method of growing plants together, with the idea that they will assist each other in some way, like deterring pests, improving growth, enhancing flavour, attracting beneficial insects, fixing nitrogen, disrupting "patterns" and trap cropping. But, just as we have good neighbours, there are bad neighbours as well. Some plants really dislike each other, and shouldn't be planted in close quarters, lest one of them struggle or meet its untimely demise.
Mythbusters - Does it Actually Work?
Now, the "Big Question": does it work? Well, yes and no. There is a fairly limited amount of actual scientific information on companion planting, but it is safe to say that some combinations do seem to work, while others can be a bit hit and miss. Why? Well, for starters, companion planting is a northern hemisphere concept that works a treat up there, but not as well down here in Australia.
Secondly, it doesn't work so well because it isn't understood. We've all heard that basil and tomatoes should be planted together, but why? How many of each is required? Is one basil per tomato enough? Who benefits? What are we deterring? Does it enhance flavour? For years, I planted one basil plant next to each of my tomatoes, and guess what? Nothing happened. There was no discernable difference in taste. Nothing seemed to be encouraged or deterred. Nothing grew better or worse than it had before, there was simply no advantage, other than me not having to walk so far to make a pasta sauce!
 Do you know why? Because, for basil to successfully repel flies from tomatoes, an absolute shovel-load of basil is required in your patch. I'm talking several basil plants for each tomato, and even then it won't repel fruit fly. I love basil as much as the next gardener, but I don't love it that much, and, to be honest, I've never had an issue with flies on my tomatoes. But who knew this? And how many of us think that this is the quick fix for all our garden woes?
Get Your Fix - Companions that Work!
Well, companion planting CAN be the quick fix, and here's how: biodiversity! The best thing about companion planting is that it increases the biodiversity of your patch; that is, the variety of life forms in your garden. Some of the greatest companion plants in my garden are those which have nothing to do with my vegetable patch, but are the awesome locally native trees and shrubs I have planted about the place. Clever planning (if I do say so myself) has meant that my garden is never without blossom, and is therefore never without the array of critters that come with that: birds, pollinating insects (like butterflies, bees, and native wasps), reptiles, beetles and all sorts of helpful garden buddies.
By encouraging this assortment of good guys, my garden is almost completely without the bad guys, who never get a foothold in numbers that matter to me anyway! Remember, a lettuce leaf with a hole in it doesn't require chemical warfare, nor does it signal an attack of the dreaded munchies! So now that I've put you off companion planting all together, let me say that I reckon there are some combinations that really work, especially those that involve plants that have a fair odour to them. Also, there are definitely combinations that dislike each other, so I've made for you, dear readers, what is possibly the most comprehensive companion planting chart in the known universe.

Sustainable Gardening Australia presents:
The most comprehensive companion planting chart in the known universe (maybe)
| Plant | Good Neighbours | How it works | Bad Neighbours |
| Apple | Nasturtium, Chives | Nasturtium climbs tree and is said to repel codling moth | Potatoes |
| Apricot | Basil, Tansy, Asparagus | Basil and tansy are said to repel damaging insects | |
| Asparagus | Apricot, Basil, Chives, Comfrey, Lovage, Marjoram, Parsley, Tomatoes | Basil and Parsley are said to improve flavour. Onions and garlic release substances reducing growth. | Garlic, Onions |
| Balm (Lemon) | Tomatoes | Attracts bees, said to enhance flavour and growth | |
| Basil | Tomatoes | Basil said to repel flies and mosquitoes | |
| Beans (climbing) | Broccoli, Brussel Sprouts, Cabbage, Carrots, Cauliflower, Corn, Lettuce, Lovage, Majoram, Parsley | Beetroot, Chives, Garlic, Gladiolus, Onions, Sunflower | |
| Beetroot | Beans (bush), Broccoli, Brussel Sprouts, Cabbage, Cauliflower, Kohl Rabi, Lettuce, Lovage, Marjoram, Onion, Peas, Potato, Spinach, Silverbeet | Bad Neighbours roots release substances reducing growth | Beans (Climbing), Tomato |
| Borage | Squash, Strawberries, Tomato | Said to deter tomato worm and improve tomato flavour and yield. Said to increase strawberry yield. | |
| Brassicas (Incl: Broccoli, Cabbage, Cauliflower) | Beans, Beetroot, Carrots, Chamomile, Coriander, Cucumber, Dill, Lettuce, Lovage, Marjoram, Marigold (French), Mint, Nasturtium, Pea, Potato, Rosemary, Sage, Tansy, Thyme, Zinnias, Land Cress | Dill attracts a Cabbage White Butterfly controlling wasp. Nasturtium disguises and repels aphids. Sage repels the Cabbage White Butterfly. Zinnias attract ladybirds, which we love! Bad Neighbours' roots release substances reducing growth. Land cress attracts Cabbage White Butterfly which lays eggs - when larvae hatch and eat it they die. | Garlic, Rue, Strawberry |
| Capsicum, Chilli | Carrots, Onions, Tomato | ||
| Carrots | Beans, Chives, Coriander, Cucumber, Leeks, Lettuce, Lovage, Marjoram, Onion, Pea, Radish, Rosemary, Sage, Tomato | Bad Neighbours' roots release substances reducing growth | Dill, Celery |
| Celery | Cabbage, Chives, Dill, Dwarf Beans, Leek, Lovage, Majoram, Onion, Pea, Sage, Spinach, Tomato | Bad Neighbours' roots release substances reducing growth | Carrots, Parsnip, Potato |
| Chamomile | Cabbage, Onion | Deters flies and mosquitoes. Strengthens neighbouring plants | |
| Chives | Apples, Cucumbers, Lettuce, Peas | Prevents Apple Scab. Said to deter aphids | Beans |
| Cucumber | Basil, Beans, Borage, Broccoli, Brussel Sprouts, Cabbage, Carrot, Cauliflower, Corn, Dill, Kohl Rabi, Lettuce, Lovage, Marjoram, Nasturtium, Parsnip, Pea, Radish, Sunflower, Tansy | Bad Neighbours' roots release substances reducing growth | Potato, Sage, Strongly Aromatic Herbs |
| Dill | Brassicas (Incl: Broccoli, Cabbage, Cauliflower) | Dill attracts a Cabbage White Butterfly controlling wasp | |
| Eggplant | Beans, Spinach | ||
| Garlic | Apricot, Cherry, Mulberry, Parsnip, Peach, Pear, Raspberry, Rosemary, Rose | Deters aphids, especially from roses and raspberry. Repels Cabbage White Butterfly | Beans, Cabbage, Peas, Strawberry |
| Kohl Rabi | Beetroot, Onion | Beans, Tomato | |
| Leek | Carrot, Celery, Lovage, Majoram, Onion, Parsnip, Strawberry | Beans, Peas, Parsley | |
| Lettuce | Achillea, Beans, Beetroot, Cabbage, Carrot, Chervil, Coreopsis, Cucumber, Lovage, Marjoram, Marigold (French), Onion, Parsnip, Pea, Radish, Strawberry, Zinnia | Achillea, Coreopsis & Zinnia attract pollinators and offer shade for lettuce | Parsley |
| Marigolds (French) | Numerous vegetables, including tomato | Kills root knot nematodes and eel worm | |
| Melon | Radish, Sweet Corn | ||
| Mint | Cabbage, Tomato | Deters pests such as Cabbage White Butterfly, ants and fleas | |
| Nasturtium | Cabbages, Fruit Trees, Radishes, Zucchini | Flowers repel aphids and codling moth. Cabbage White Butterfly is attracted to this plant, and will seek it out over cabbages | |
| Onion | Beetroot, Broccoli, Cabbage, Carrot, Chamomile, Leeks, Lettuce, Lovage, Marjoram, Parsley, Parsnip, Silverbeet, Strawberry, Summer Savory, Tomato | Smell of onion said to deter numerous pests. Onions release substances reducing growth of Bad Neighbours | Asparagus, Beans, Gladioli, Peas |
| Parsley | Asparagus, Sweet Corn, Tomato | Said to improve flavour of asparagus and tomato | |
| Peas | Beans, Beetroot, Brussel Sprouts, Cabbage, Carrot, Cauliflower, Celery, Cucumber, Lettuce, Lovage, Marjoram, Parsnip, Potato, Radish, Sage, Squash, Sweet Corn | Bad Neighbours' roots release substances reducing growth. Sweet Corn has traditionally been used as "living stakes" for peas | Chives, Garlic, Onion, Shallots |
| Potato | Beans, Broccoli, Brussel Sprouts, Cabbage, Cauliflower, Corn, Eggplant, Horseradish, Lovage, Marjoram, Marigold (French), Nasturtium, Parsnip, Peas, Sweet Alyssum, Sweet Corn, Watermelon | Sweet Alyssum and Marigolds attract beneficials and suppress weeds. Potatoes release substances reducing growth of Bad Neighbours. Horseradish should be planted at the corners of the patch | Apple, Celery, Cherry, Cucumber, Pumpkin, Raspberry, Rosemary, Squash, Sunflower, Tomato |
| Pumpkin | Beans, Cabbage, Eggplant, Peas, Radish, Sweet Corn | Bad Neighbours' roots release substances reducing growth | Potato |
| Radish | Beans, Carrot, Chervil, Cucumber, Sweet Corn, Cucumber, Lettuce, Lovage, Marjoram, Nasturtium, Parsnip, Pea, Spinach, Sweet Corn | Radish is said to attract leaf miners from Spinach | Hyssop |
| Raspberry | Blackberries, Potato, Tomato | ||
| Rosemary | Beans, Cabbage, Carrot, Sage | ||
| Sage | Brassicas (Incl: Broccoli, Cabbage, Cauliflower), Carrot, Rosemary | Sage repels the Cabbage White Butterfly | Cucumber |
| Silverbeet | Beetroot, Cherry, Lavender, Lovage, Marjoram, Onion | Basil, Wormwood | |
| Spinach | Celery, Eggplant, Strawberries | ||
| Squash | Borage, Lovage, Marjoram, Nasturtium, Peas, Sunflower, Sweet Corn, Tansy | Potato | |
| Strawberry | Beans, Borage, Chives, Leek, Lettuce, Marigold (French), Onion, Pyrethrum, Sage, Spinach | Brassicas (Incl: Broccoli, Cabbage, Cauliflower), Brussel Sprouts, Garlic | |
| Sunflower | Apricots, Cucumbers, Squash | Beans, Potato | |
| Sweet Corn | Beans, Cucumbers, Lovage, Marjoram, Melon, Parsnip, Peas, Potato, Pumpkin, Radish, Squash, Zucchini | Sweet Corn has traditionally been used as "living stakes" for peas. Bad Neighbours' roots release substances reducing growth | Cabbage |
| Tomato | Asparagus, Basil, Celery, Borage, Broccoli, Brussel Sprouts, Cabbage, Carrot, Cauliflower, Celery, Chives, Dill, Gooseberry, Grape, Hyssop, Lovage, Marigold (French), Marjoram, Mint, Nasturtium, Onion, Parsley, Parsnip, Turnip | Marigolds said to repel white fly and root knot nematode. Bad Neighbours' roots release substances reducing growth | Apricots, Beetroot, Fennel, Kohl Rabi, Potato, Rosemary, Sweet Corn |
| Turnip | Cucumbers, Lettuce, Nasturtium, Peas, Tomato | ||
| Watermelon | Potato | ||
| Yarrow | Most aromatic herbs | When planted along pathways, is said to enhance essential oil production and herb flavour. | |
| Zucchini | Lovage, Marjoram, Nasturtium, Sweet Corn |
and...
a couple of general plants that make great companions for other reasons
- Basil helps repel flies and mosquitoes.
- Borage in the strawberry patch will increase the yield.
- Catnip repels fleas, ants and rodents.
- Caraway helps breakdown heavy soils.
- Chamomile deters flies and mosquitoes and gives strength to any plant growing nearby.
- Chives grown beneath apple trees will help to prevent apple scab; beneath roses will keep away aphids and blackspot.
- Elderberry a general insecticide, the leaves encourage compost fermentation, the flowers and berries make lovely wine!
- Fennel (not F. vulgare or F.officionale) repels flies, fleas and ants.
- French Marigold root secretions kill nematodes in the soil. Will repel white fly amongst tomatoes.
- Garlic helps keep aphids away from roses.
- Hyssop attracts cabbage white moth keeping brassicas free from infestation.
- Mint repels cabbage white moth. Dried and placed with clothes will repel clothes moth.
- Nasturtium secrete a mustard oil, which many insects find attractive and will seek out, particularly the cabbage white moth. Alternatively, the flowers repel aphids and the cucumber beetle. The climbing variety grown up apple trees will repel codling moth.
- Pyrethrum will repel bugs if grown around the vegetable garden.
- Rosemary repels carrot fly.
- Rue (Rutus, not Peganum) keeps cats and dogs off garden beds if planted round the borders.
- Sage protects cabbages from cabbage white moth.
- Tansy (Tanacetum, not Senecio) repels moths, flies and ants. Plant beneath peach trees to repel harmful flying insects. Tansy leaves assist compost fermentation.
- Wormwood (Artemesia, not Ambrosia) although it can inhibit the growth of plants near it, wormwood does repel moths, flies and fleas and keeps animals off the garden.
Information sources:
Bagnall, Lyn, Easy organic gardening and moon planting, published by Scribe Publications, VIC.
www.figtree.org.au.
Pictures
Companion Planting pic: Elaine Shallue (SGA)
Borage pic: Elaine Shallue (SGA)
Alyssum pic: Elaine Shallue (SGA)
Marigold pic: Elaine Shallue (SGA)
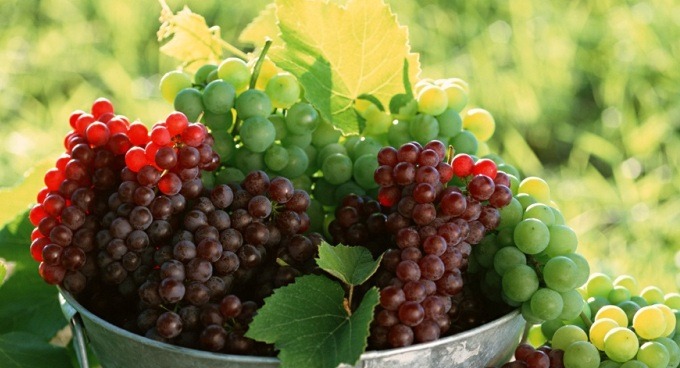
Grapes
There are a few contenders for the most popular variety of various fruits, but there is little competition about the most versatile. Grape vines provide us with fresh grapes, dried fruits, oils, juice and, best of all, wine! But the most exciting thing about grapes is how easy they are to grow at your place. For summer shade, winter sun and a bounty of fruit from February onwards, these deciduous perennial vines are a perfect planting in your patch.Read more
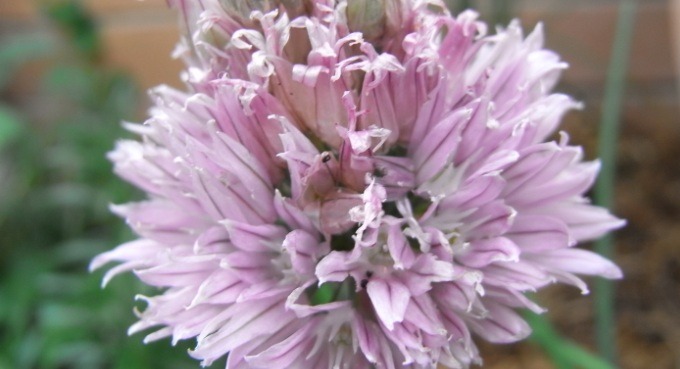
Chives
Allium schoenoprasum
Prized for the delightful onion or garlic flavour of their leaves, chives are a member of the onion family native to Europe, Asia and North America. Chives are perennial herbs that are much easier to grow than traditional onions and garlic, with the added benefit of not taking as long between planting and harvest time. Chives are ideal plants for pots, make attractive grass-like plants in herb beds and can be used as pest repellent plants as well.
Planting Time: September – March
Position: Full sun – part shade
Water Needs: Low
Difficulty: Easy
How Long: Any time is a good time for chives!
Both garlic and onion chives will thrive in a full sun to partially shaded position, provided they are protected from strong winds. When there is a dry period, water deeply to ensure the root system is well hydrated and mulch well to retain moisture. If planting in a pot, go for one at least 30cm wide as chives can form clumps of up to 50cm wide. To encourage continuous supply of leaves, cut off the flowers; they are edible too so toss them in a salad to dress it up.
Chives are definitely not needy and will thrive in just about any type of soil. A little bit of compost mixed through the soil prior to planting is ideal and if planting in a pot, go for an organic potting mix. Chives in pots should have their soil replaced every three years to ensure flavour and performance is top-notch!
For those of you who with limited garden space, chives can be easily grown in pots indoors. A bright and sunny position, good quality well drained potting mix and good pot drainage is all you need. During winter when light is poor, you may notice that the plant will not grow much and may even die back a bit, but should spring back to life with the return of brighter sun in spring. It’s advisable not to fertilize during winter.
Possibly the least demanding of all our herbs, chives are generally happy not to be fed at all. If growth seems a little slow, or you have been harvesting a great deal, give them a drink of compost tea. Do the same if re-potting, or dividing up large clumps.

Chives are fairly drought tolerant, although those grown in pots (especially terracotta) have a tendency to dry out fairly quickly. A drink once or twice a week is sufficient if chives are planted in a rich soil or potting mix and mulched well.
Harvest as needed throughout the life of your chives.
As well as being hardy, chives are an excellent companion plant in the vegie and flower patch. Said to repel aphids, many rose growers swear by garlic chives as companion plants. They are also said to prevent apple scab, but keep them away from your beans though.
Passionate home cooks recommend that chives be eaten fresh – much better flavour. Extra chives can be frozen by chopping up prewashed leaves into small pieces and freezing them in plastic containers, or in water in ice cube trays. There is no need to thaw pieces out before using.
Here are a couple of recipes to get you inspired:
Photos: Elaine Shallue & Mary Trigger
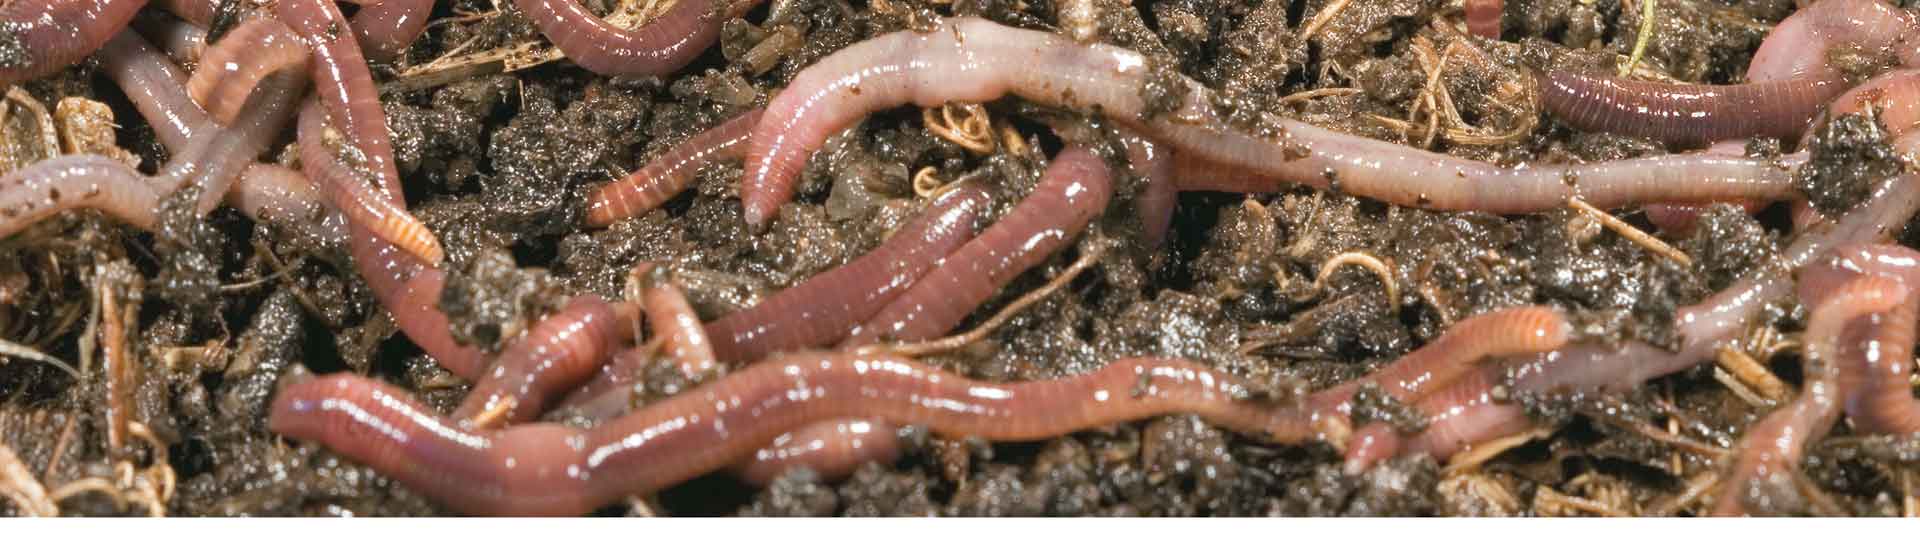
Worms and Worm Farms
So, most of us have had a pet of some sort over the course of our lives, our pets bring us joy, love, laughter, and good times. But imagine owning over 500 pets that never need to be walked, are happy to eat your scraps, provide you with amazing fertiliser AND help reduce your greenhouse gas emissions and carbon footprint! Sound too good to be true? Well, welcome to the wonderful world of worm farms – top little carbon crusaders and garbage gobblers who just happen to be awesome (and fairly low maintenance) pets!
Now, for those of you who feel a little squeamish at the thought of hundreds of worms wriggling away, lets dispel some myths for you. Firstly, despite the fact that worms munch away on our waste, they are actually pretty clean and their digestive system is so amazing it can destroy pathogens!
What is a worm farm and why would I want one?
Australian studies have shown that every one of us throws away about 180kg of compostable food and green waste every year. Whilst that may not not sound significant, when this sort of waste goes into landfill and breaks down anaerobically (without oxygen) a massive amount of methane is produced. Methane is a gas 21 times more damaging to the atmosphere than carbon dioxide. So, our 180kg of tossed food and green waste ends up creating over 800kgs of carbon emissions per year, which is bad karma for us and really bad news for the environment! By starting a worm farm and passing them our food waste each Aussie household can go a long way to reducing their carbon footprint, while pampering their plants with the wonderful worm wee (and poo) produced!
So how do we keep our worms?
We need to imitate the environment that worms inhabit naturally; cool, moist, dark spaces, and thankfully, this is not too hard to do. The best worm farms give the little wrigglers room to roam, while allowing us easy access to worm waste products (both the worm wee and vermicompost – the poo) as well as sufficient drainage so the worms don’t drown. Essentially, worm farms are made up of a couple of stackable boxes that provide different levels for different worm activity. Position is everything, so be sure to find a suitable spot for your worm, farm. Choose a spot that is not affected by extreme temperature fluctuations or gets too much direct sun. Some worm lovers even keep their little friends inside, with cool laundries often proving to be a great worm rearing locale.
There are a couple of ways you can go about setting up the worm farm, whether using the low cost make-it-yourself polystyrene box method, or purchasing a ready made worm farm from your local garden centre. Whichever accommodation you choose, the bedding material is of utmost importance. Worm bedding should consist of mainly carbon-based materials and the easiest is shredded newspaper. Mix it together with some aged (not fresh) cow manure or compost and then lightly sprinkle it all with some fresh water. Don't wet it too much - just enough to dampen the contents. This should all be prepared before you put the worms in!
Make Your Own Worm Farm
Step 1. Grab a couple of polystyrene fruit boxes from the local fruit and vegie shop or market. Most places are more than happy to let you take as many as you want, so hunt around and grab a couple with lids.
Step 2. Punch some holes in the bottom of one of the boxes with a screwdriver. This will become the “top box” in the worm farm. Line the inside base of this box with mesh or insect screening, to stop the worms falling through the holes.
STEP 3. In the box without holes (the bottom box), punch a hole and put a small length of hose or a tap as close to the base as possible, to collect the precious worm wee. Place the top box (the one with all the holes in the base) onto the bottom box, and you’re half way there!
STEP 4. Now add the bedding material (shredded newspaper and aged compost or manure) into the top box and lightly dampen the contents. The box should be about ¼ full of the bedding material.
STEP 5. Head off and buy some worms. Ordinary garden worms or earthworms are not suitable for worm farms and will die. Worms are sold in boxes of 500 or 1000, this is the best way to get your farm going. A thousand worms are ideal for a DIY worm farm. These types of worms are generally Reds, Tigers or Blues and are often just sold as composting worms. Pop the worms in the top box, they will soon wriggle down into the bedding.
STEP 6. Cover the worm bed with newspaper or a piece of hessian to help maintain a nice constant temperature and moisture level in the bedding material. Place the lid of the box on the top.
STEP 7. What a worm wants! Let the worms settle for a couple of days, then add some food waste to the top box, under the hessian. These scraps could include things such as:

- Kitchen scraps like leftovers (cooked vegetables and stewed fruit leftovers),
- Fruit peelings (avoid citrus fruits - the worms find their smell too strong),
- Grass clippings (lightly sprinkled),
- Autumn leaves (small amounts)
- Paper, cereal packets, pizza boxes, junk-mail, (all torn up and soaked in water beforehand)
- Tea-bags, coffee grinds, tea and coffee dregs
- Hair clippings and vacuum cleaner dust
- Vegetable scraps and peelings (avoid onion)
- Crushed egg shells (these are excellent to help maintain the pH of the bedding)
- Aged manures
Do the worms a favour and chop this stuff up before you put it in the worm farm...afterall, worms don’t have teeth, so the easier it is for them to digest the waste, the happier the worm farm will be!
STEP 8. Enjoy your results
What makes worms squirm?
Worms are fairly low maintenance pets, but they are not no-maintenance. Don’t forget about them and ensure that their bedding material doesn’t dry out, this makes them very unhappy. The presence of ants in the farm is a sure indication that the moisture levels are too low, add some soft vegies and a bit of water. Overfeeding is a common issue too. The secret is small amounts of food more regularly and in different spots. If there is too much food in the farm, it will start to rot, making life unpleasant for your worms. Avoid putting meat and dairy products into the farm, whilst the worms will eat these foods, it can attract vermin, including mice and rats.
Worm Wee
After a few weeks, worm wee will begin to collect in the bottom box, this stuff is liquid gold! Some of the best fertiliser around, worm wee is a lovely dark colour and needs to be diluted with water before use, ideally to about the colour of tea. This can then be applied to just about any type of plant. Worm Wee is particularly great in the edible patch.
Vermicast – The Poo That Worms Do
Vermicast has got to be one of the greatest fertilisers ever. But be careful, it’s strong and needs to be used fairly sparingly! In your home worm farm, vermicast will collect in the top bin and it does need to be cleaned out every so often. To do this, carefully remove a small amount from the worm bedding. Mound it up into a cone shape. Any worms present will wriggle away from the light and collect in the centre of the vermicast and remaining bedding. Take the cone of vermicast away and put the worms back in to the farm. Then sprinkle the worm poo around your plants and lightly water it in.
The Wily Worms What Ifs
Every now and then, we can run into issues with our slimy little rubbish munchers, so here is a list of FAQ’s for you
How much will my worms eat?
This depends on how many worms you have, but grown up worms can eat half their body weight in food each day (most of which is converted to fertiliser and wee).
When should I water, and how much?
Sprinkle a bit of water into the worm farm every couple of weeks, as this will speed up the worm wee production, and keep the bedding moist.
I think my farm, has too many worms!
Think again! Worms self regulate their numbers, based on food supply and space, so your worm farm will never be over-populated.
Can I put worm farm worms in the garden?
Compost worms need moist, dark, damp situations in which to survive and thrive, so unless your soil is rich, damp and covered in a nice layer of mulch, don’t bother.
All the worms are hanging out in the lid – why?
Generally, this is a response to too much water. The worms are just trying to move to higher ground so they don’t drown. If your farm is out in the weather it may be collecting rain; if not, you are adding too much water in the farm.
All my worms died last summer!
Like all of us, worms are able to tolerate a fair range of temperatures, generally from about 10 – 30 degrees Celsius. When the Aussie summer kicks in, we are subject to some really hot days, often well over 30 degrees, which makes both us and the worms unhappy. In this type of weather, consider moving the system into a shady, cool position. Take the lid off and hose down the system (making sure the tap is turned on to allow the liquid to drain out).
There are flies or maggots in the farm!
Tiny little vinegar flies are occasionally present in worm farms (and compost bins) and are absolutely nothing to worry about. If larger flies or maggots are present, it is generally a sign that food (especially meat) is rotting rather than being eaten by your worms. Avoid meat in worm farms, and make sure you are not over-feeding your new pets. If maggots do turn up, get rid of them by placing a piece of bread soaked in milk on the surface of the farm and remove after a couple of days.
My worm farm stinks!
This will only happen if there is decomposing food and a build up of waste in the farm. The best thing to do in this situation is to stop feeding the worms for a while, add a handful of garden lime to the top bed and lightly aerate the bedding. This should allow the worms more room to move and a happier home. Start feeding them again when the farm is free of smells.
Enjoy your worms, they really are a gardener’s best friend, and they do make great pets!

Using Your Excess Lemons
There are two real loves in my life... gardening and food (I hope my partner and parents aren’t reading this!), and I am always chuffed when I am able to combine the two. I was talking recently to my non-horticulturally minded brother, who remarked that his lemon tree was absolutely heaving with fantastic fruit, and I had an idea: "Why not share some of my secrets for coping with the cracking cornucopia of citrus?". So here they are, for your lemon-loving pleasure!
Preserved Lemons
A staple ingredient in Moroccan cooking, preserved lemons are dead simple to make at home, and are a great way to use some of your home harvest. Remember, it is generally the skin of preserved lemons that is used in cooking, rather than the flesh, so the thicker the skin of your home grown lemons, the better this recipe will be.
Cut the lemons in quarters, add a pinch of salt, and then cram as many lemon quarters as you can into a sterilised glass preserving jar. Pop a few of your favourite spices in as well; those tried and tested in my house include cinnamon sticks, cloves, cardamon seeds, all spice and peppercorns. Now add a cup of salt, and pour a cup of lemon juice on top (making sure all the lemons are covered). Pop on the lid, seal well, label and date, and then whack it into the fridge for six weeks...it’s that easy.
Lemon Curd
An absolute family fave, lemon curd is a winner, and a great way to use some of those left over lemons. Oh, and if you’re a creative type (this is where I fall down), lemon curd in pretty jars with lovely labels make great gifts!
Makes
1 1/2 cups
Ingredients
2 eggs, plus 2 egg yolks
3/4 cup (165g) caster sugar
1/3 cup (80g) chilled unsalted butter
Zest and juice of 2 lemons
Method
Whisk whole eggs, yolks and sugar in a saucepan until smooth, then place pan over a low heat. Add the butter, juice and zest and whisk continuously until thickened. Strain through a sieve into a sterilised jar. Lemon curd keeps, covered, in the fridge for 2 weeks.
Lemon Curd recipe from www.taste.com.au
Easy-Peasy Lemon Cordial
Another “must-do” with your load of lemons, this cordial is a staple in our house, and a fantastic “mixer” for a massive variety of cocktail combinations! As they say, "If life gives you lemons, make fabulous cocktails"...or something like that!
Makes
About 4 litres
Ingredients
6 large lemons
20 g tartaric acid
20g citric acid
1 kg sugar
2 L boiling water
Method
Put sugar, citric acid and tartaric acid into a large bowl (or very clean bucket!). Grate rinds of all 6 lemons over and then add strained lemon juice from the same 6 naked lemons. Pour boiling water over the whole lot and mix well. Bottle and seal.
Getting involved in a Local Food Swap
Ok, so it’s not edible, but sustainable local food swaps are a sure recipe to get to know your neighbours, and reduce food miles, consumerism, waste and the damaging environmental impacts of certain types of agriculture and food production. From leaning over the fence and giving a bag of lemons to the neighbours, joining a local gardening group, and attending free fruit and veggie swaps at your local community house/farmers market, there are a million ways you can connect with community and turn your load of lemons into a sack of spinach!
Picture: Mary Trigger (SGA)

Blossom End Rot
Hi, my name is: Blossom End Rot
Describe yourself: Firstly, let me just say that I am not a disease, a fungus, a virus or any of that! I am a disorder... got that! I live at the blossom end of fruits, and appear brown, tough and sunken. I look water soaked, and honey, you ain't seen nothing yet!
Hobbies: Spreading the love... all over your fruit, especially tomatoes, capsicums, eggplants, watermelons and zucchinis! Destroying your crop!
Likes: People who don't water properly, like, you know when you water and then don't water for like two weeks and come back and water again? I love that! I love gardens that are waaaayyyy over-fertilised with nitrogen and potassium, really acidic soils and calcium deficiencies!
Dislikes: Good pH, good watering practices, mulches, wind breaks to stop plants drying out, soil with great water holding capacity.
You'll know you've met me when: Oh sugar, you'll know. If one end of your fruit looks revolting, brown and kind squishy... you've met me! Oh, and if there is little hairs on it, that's still me, but I have bought one of my fungal friends along!
Old School Control Methods: Dumping truckloads of chelated calcium into the garden.
Breaking up ain't hard to do... if you
- Protect crops with suitable windbreaks.
- If the soil pH is below 5.5, add lime before planting.
- If the soil drains poorly, apply gypsum (calcium sulphate).
- On light sandy soils, apply organic matter such as poultry manure before planting, to increase the moisture-holding ability of the soil and reduce water stress in hot weather.
- Follow a well-balanced fertiliser program. Apply low applications of fertilisers frequently to limit their salting effect.
- On sandy soils with high levels of salt, increase watering to leach salts.
- Water plants adequately, especially at fruiting. Apply more water on hot days.
- Mulch!!!!!!
Picture: Elaine Shallue (SGA)

Irrigation in an Arid Nation
Australia is the driest inhabited continent on Earth and despite the fact that we are surrounded by water, there is precious little of the stuff to splash around, especially in the garden. Loads of places are already under some fairly serious water restrictions, many of which impact on the way we water our gardens, and it is unlikely that this will change in the near future. Even if your part of Australia is not affected by water restrictions at the moment, we all need to water smarter, for the good of the planet. By following the points below, you should be able to continue growing gorgeous gardens despite limited water resources.
1. Water where it's needed – the roots!
Watering the leaves of plants is a water wasting exercise. All this will do is encourage fungi and mildews, so it's definitely best avoided! Plants take up water through their roots, so direct the water there, using a large droplet trigger nozzle, watering can, bucket or, better still, a subsurface irrigation system.
Now, before you panic, throw your hands up in the air and declare an irrigation system 'too hard', let us assure you that it is not nearly as complex as it sounds, and it will end up reducing your water usage significantly. In fact, some studies have shown that by using an appropriate drip system instead of a sprinkler or hose, gardeners can save reduce the amount of water used in their garden by up to 75%. That’s an astonishing saving, and the planet (and your water bill) will be grateful for!
So, how do we do it? Well, these types of systems, using either a pre-fabricated dripline, drippers or porous “weeping” hose are generally best installed before the garden is planted out, although they can be laid in an existing garden (just be careful not to tread on your precious plants or disturb shallow roots). To install, check out our handy tips in the factsheet Sub-surface Irrigation Systems.
After installing, check to see that the system is working, and, if all is well, cover the drip line lightly with soil and then mulch. A mate of mine tells his clients to top up their mulch when they can see the dripline, and I reckon this is a pretty good plan, as the time it takes your mulch to break down will vary depending on the type of mulch used, and the situation. I tend to do a fairly thorough check of my dripline system before I replenish my mulch early each summer, just to ensure everything is working as it should be.
Add a timer to take the guesswork out of watering, but remember to turn off the system when it’s raining. Better still, add a soil moisture sensor to the irrigation system to completely eliminate unnecessary watering! Couldn’t be easier, and while it may seem a bit of work to set up, the time, money and water savings make it well worthwhile. Don’t be a drip, install a sustainable subsurface irrigation system!
2. Water in the morning
The earlier in the day you water your plants, the happier they will be. A morning drink allows the plants to take up water before the day heats up. It minimises the devastating effect of the hot midday sun, keeps the soil cooler, avoids wet soil as the day time temperature cools and is a better idea all round! Of course, check local water restrictions before watering – many of these allocate specific times and days to garden watering.
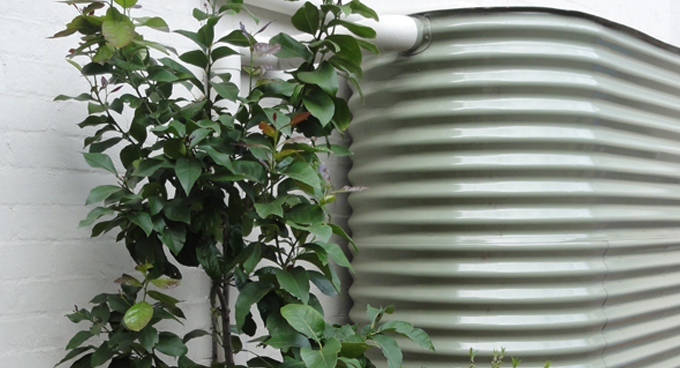
3. Think about alternate sources of water
This ties in with the water smarter philosophy – we can all minimise the amount of quality drinking water (also known as potable water) we splash about the garden. Collect shower warm-up water in a bucket and give this to the thirstiest plants as required. Consider the installation of a rainwater tank, even if it is a small one just for the vegie patch. Don't know where to start? Check out our Sustainable Shoppers Guide to Tanks here.

4. Test the soil before you water
Don't just water for the sake of watering, even if it is your allocated watering day! Test the soil with your finger before hopping on the hose – if your finger has soil stuck to it, the soil is damp and probably doesn't need a drink. If it's dry, water it! This is especially important in cooler months, where watering can lead to root rots, fungi, mildews and very cold soil. Don’t kill your plants with love – and just because it is your allocated watering day, doesn’t mean you HAVE to water., Consider the installation of a soil moisture sensor, it takes the guess work out of knowing when to water, and is especially handy if you have an installed drip irrigation system.
5. Group plants according to their water needs
Plants, just like people, have different water needs. So, save yourself time, effort and money (replacing dead plants) and group your plants according to thirstiness.
Banner image: CSIRO, CC BY 3.0, https://commons.wikimedia.org/w/index.php?curid=35439750
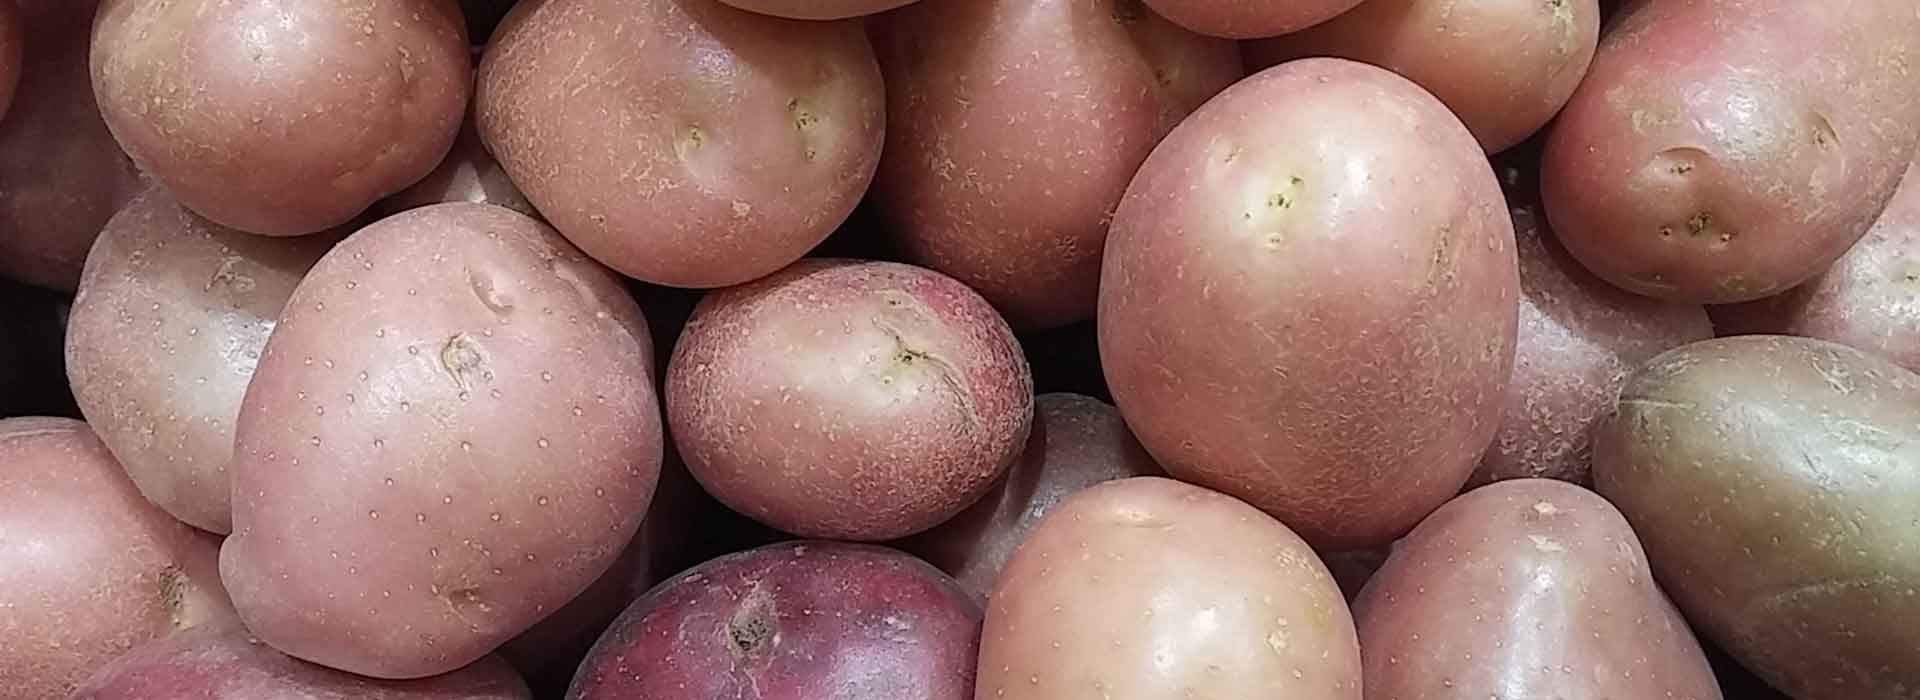
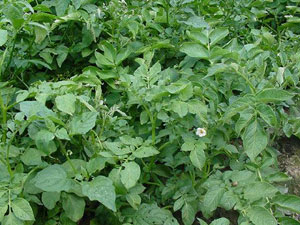
Potatoes
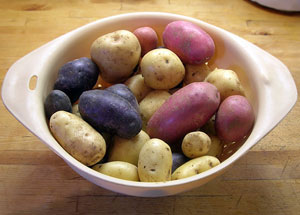
The humble spud... is there any vegetable more versatile than these tasty tubers? Grown around the world, spuds are the only vegetable to have had a year dedicated to them (2008 was the International Year of the Potato) owing to their importance as a food crop in combating world hunger. So stave off hunger in your household and stick in some spuds!
Planting Schedule
Warm Areas: March - August (try planting in the cooler months, so harvest can be completed by December)
Temperate Areas: September - February
Cool to Cold Areas: September - February
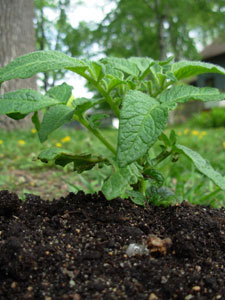
Position, Position, Position!
Despite outward appearances, spuds can be, well, a bit fussy. For a start, they can take up a fair bit of room, and are a bit slow growing, so consider giving them a place of their own. Many folk grow their potatoes in a raised, no-dig garden bed, or a custom designed potato patch.

Remember your Nana growing her spuds in a stack of old tyres? Great in theory, but there can be some issues with this - used tyres have the potential to harbour some problematic heavy metals (like cadmium and friends), which potatoes are super efficient at absorbing. Now, I like my heavy metal as much as the next person, but I prefer it in my music, not my mash! A better option is grabbing a few polystyrene fruit boxes, cut the bottom out of them, stack them up (three high is great) and away you grow (see the "Hot Tip" for more on this!).
Our fussy spuds need a full sun position, top notch drainage, and must not be planted where Chilis, capsicums, tomatoes or eggplants have been planted in the last few years.
Talking Dirty
Spuds need rich soil, chock full of organic matter, and some well-rotted cow poo. Like my Saturday afternoon six-pack, spud soil has to be well-drained, so I reckon a no-dig system is the way to go. So, here's how to do it: mix compost with your aged cow poo and some straw, and lay this to a depth of 15 - 20cm in you potato patch, and water it in. Lay out your seed potatoes, leaving about 25cm between each, and cover these guys up with about 15cm of the same mix.
When the little green shoots begin to peak through this mix, put in another 15cm of your compost, cow poo and straw mix on top. Keep repeating this through the growing season until you have achieved a total depth of about 60cm. This gives your spuds the space to grow, and prevents the tubers getting "cooked" or over-heating. Potatoes grown in this beaut mix will be tastier than you ever imagined! Spuds need a soil pH of about 5.5 - 6 for top notch, scab-free growth.
Feeling Seedy
Top notch potatoes are grown from what is known as "seed" potatoes, which are virus-free spud tubers which have formed "eyes". Generally, putting a shooting supermarket spud (found in the back of the cupboard) into your Yummy Yard will not result in anything even remotely edible, so head to you local garden centre and buy the "real deal". Certified seed potatoes are best if you can track them down, as this ensures they are disease free.
Seed potatoes about the size of chicken eggs are good to go as is, whereas the bigger boys can be cut into large chunks that contain a couple of good-looking eyes. Seed potatoes should be exposed to light for about a week prior to planting, as this toughens them up, greens their skin and gives the eyes an opportunity to shoot.
Feed Me!
Like me, spuds need a decent feed, and have a pretty big appetite. Organic matter (the compost and cow-poo we talked about earlier) are essential, as is a bit of seaweed tea at planting time. I tend to give mine a diluted seaweed tea when they flower, but, with good soil preparation, that's all they need. The more organic matter in their well-drained patch, the better.
What about the Water?
Just like me, spuds aren't huge water drinkers, and need very little irrigation over their lifetime. In fact, over-watering and poor drainage are responsible for loads of potato pests, so hold back on the H2O. As always in our Yummy Yards, say no to grey water. My hot tip here is to wet down the different layers of mix (see "Talking Dirty") when you "hill" them up, as this will pretty much do the watering for you.
Are We There Yet?
Like all root vegetables (and life I suppose) timing is everything! Depending on the variety of spud you plant, your harvesting time can vary from 12 to 20 weeks. I know this is pretty broad, but, when you notice the leaves beginning to yellow (the lower ones first), your spuds are ready to harvest. Harvesting just as the lower leaves change colour will give you new (or chat) potatoes, whereas late season spuds are harvested after their top foliage has died off. It's best to harvest new spuds on a meal to meal basis, so ferret around in the soil for the largest tubers and collect, leaving the remainder to "grow old gracefully".
Old or late season spuds are best stored in the soil, but, because I can never remember where they are, I prefer to rip them all up at maturity. You know they are ready to be harvested and stored when their skin feels firm and doesn't rub off. Store your spuds in a cool, dark place, with the dirt on, and avoid exposing them to light. Spuds exposed to light will turn pretty green, and should definitely not be eaten... they are related to nightshades after all!
Pests and the Rest
Spuds can have a fair range of issues, most of which can be avoided with good planning. Free-draining soil will prevent soggy spuds, whilst good crop rotation will see nematodes and other nasties avoided. Checking the soil pH and avoiding alkaline soils will prevent potato scab, and a bit of seaweed tea at planting and flowering time will do wonders. For the best start in life, buy certified disease-free seed spuds when available, and, for the love of the Garden Gods, don't overwater!!
Hot Tip
Polystyrene fruit containers with the bottoms removed make top notch potato patches, but they can look pretty ordinary. Why not get the kids (or grandkids, or big kids at heart) to wow you with their creative flair and paint them? This can create a unique, functional, funky and full-on sustainable potato patch that costs very little and is perfect for the job. I reckon three is the magic number here, with the layers added as your spuds grow up.
Eat Me
One Pot Potatoes
Garlicky and potatoey and oh so delicious and simple! Just throw it in the pot and walk away:
1kg Potatoes
1/3 cup veg oil
3/4 cup water or stock
4 tbsp Tomato paste
6 cloves of garlic
1 tsp Salt
1 tbsp Paprika
1 cup home grown parsley
Method
Chop potatoes into small cubes. Place in a heatproof saucepan or casserole dish.
Add the rest of the ingredients.
Bake in covered dish for 1 hour. Check after about 45 minutes.
This dish can also be cooked on the stove top or in a slow cooker. You may need to check it regularly and stir it occasionally if cooked in this way.
This dish matches well with roasted meats or accompanies Lebanese dishes. The herbs can also be varied and tailored to your accompanying dish. e.g. try adding some home grown oregano or rosemary.
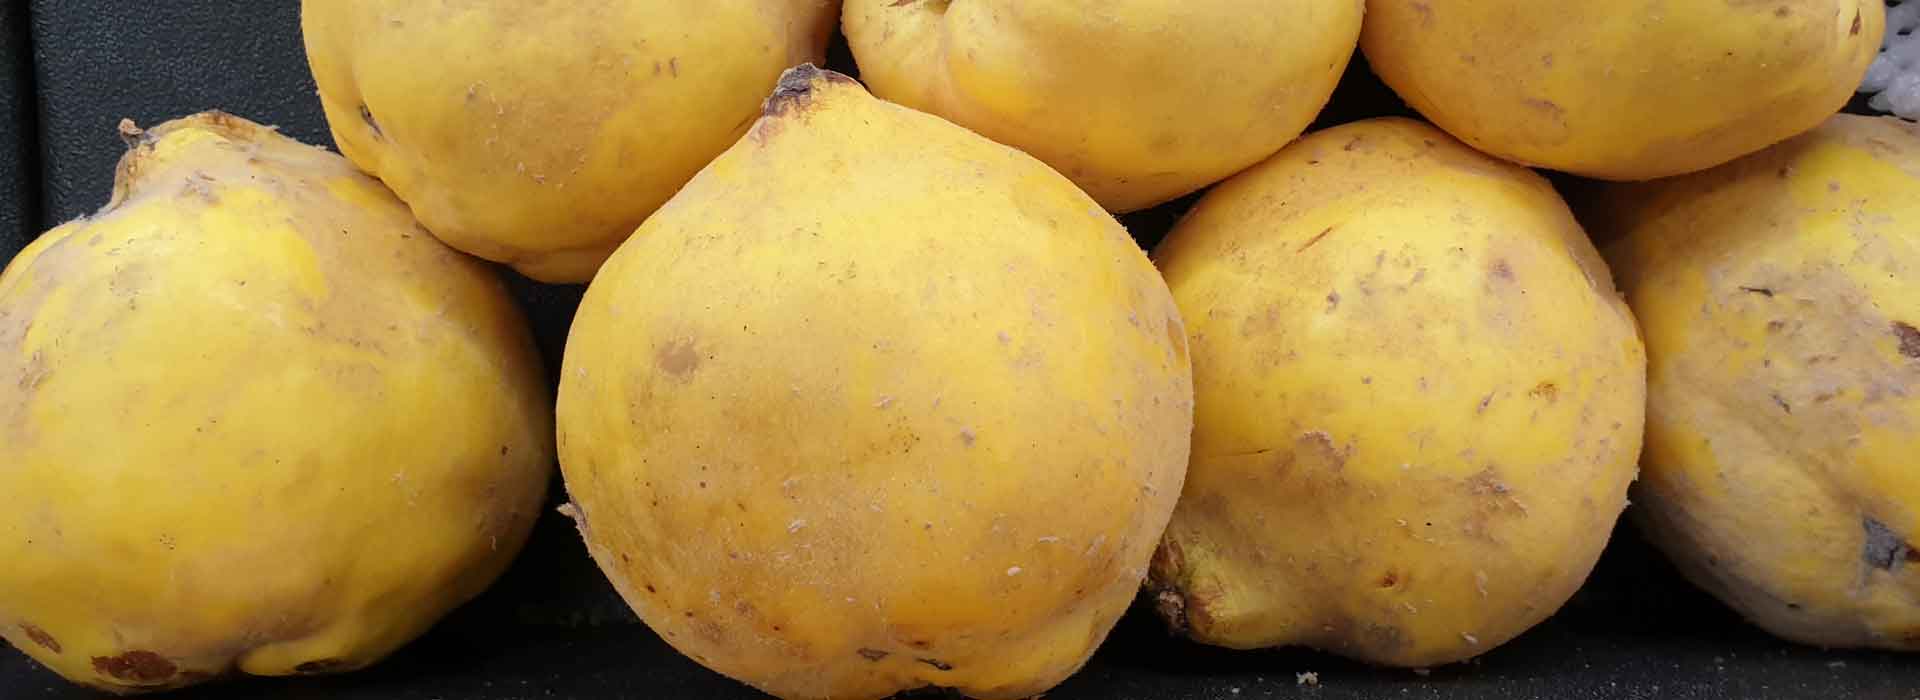
Quince
Quince – the fatter, uglier sister of the pear has come back into vogue in the last few years, thanks to a number of gourmet cooks and their delicious jams, pastes and desserts. It must be pointed out at this stage that uncooked quinces straight from the tree a darned near inedible…tough, stringy and a bit tart (a bit like my Aunty Beryl). To truly enjoy a quince, one must stew, cook, poach or slowly simmer the fruit for as long as possible, until the flesh changes to a stunning ruby red.
The quince (or Cydonia oblonga to those of us in the know) is a gorgeous deciduous tree growing to a respectable 4m x 4m in most residential settings. When thinking about a quince (which I am sure we all do often) it is important to remember that these trees are generally very long lived, and don’t take to kindly to being shifted, so plan your position well. A tree in the right spot will reward you with amazing, ancient-looking gnarled branches – a fabulous feature with or without the fruit!
The foliage is a stunner as well, with the green, heart-shaped leaves having a lighter, slightly furry underside. The beauty of growing a quince in the colder areas of Australia is that they can put on quite a show as the leaves colour through autumn. Oh, and they don’t mind periods of dry either…could this be the perfect plant?
Full sun is the order of the day for your quince, and, in our part of the world, protect these guys from frosts, as they just don’t like it and it can harm fruit set. Quinces adore a soil that has a fair bit of organic matter incorporated, so on our soils, grab some compost and prepare the hole before planting. A bit of a feed once or twice a year with some compost, aged manures or blood and bone is all a quince will need.
Pruning of quinces is much the same as for other deciduous fruit trees (think pears, apples etc) and the earlier in the quinces life you can establish a shape, the better. Pruning should be minimized as the quince gets older, as they fruit on the current season’s growth, and constant pruning may see a severe lack of fruity goodness.
If you are thinking of acquiring a quince, here is the quincessential guide to the varieties readily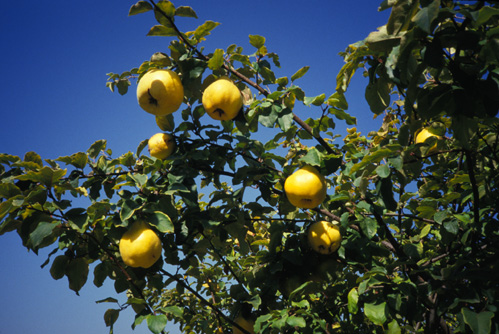 available at many nurseries:
Smyrna: This Turkish delight bears very large, golden yellow pear-shaped fruit on an attractive large shrub/small tree. The foliage is also quite large and very attractive. Cooked, Smyrna fruit is highly fragrant and quite firm, making it a great choice for pastes. A very popular quince with lovely flowers.
Champion: Born in the USA, this quince resembles a fat pear, the fruit a greenish yellow changing to golden when ripe. The colour of this fruit when cooked is amazing, the flesh tender, and the flavour milder than some other quince varieties.
Angers: An attractive, smaller tree (to around 2.5m), Angers is a French type Quince. The fruit is flavoursome, although a bit harder than some other varieties, but cooks well. One BIG advantage of this little tree is that the fruit stores for longer than most.
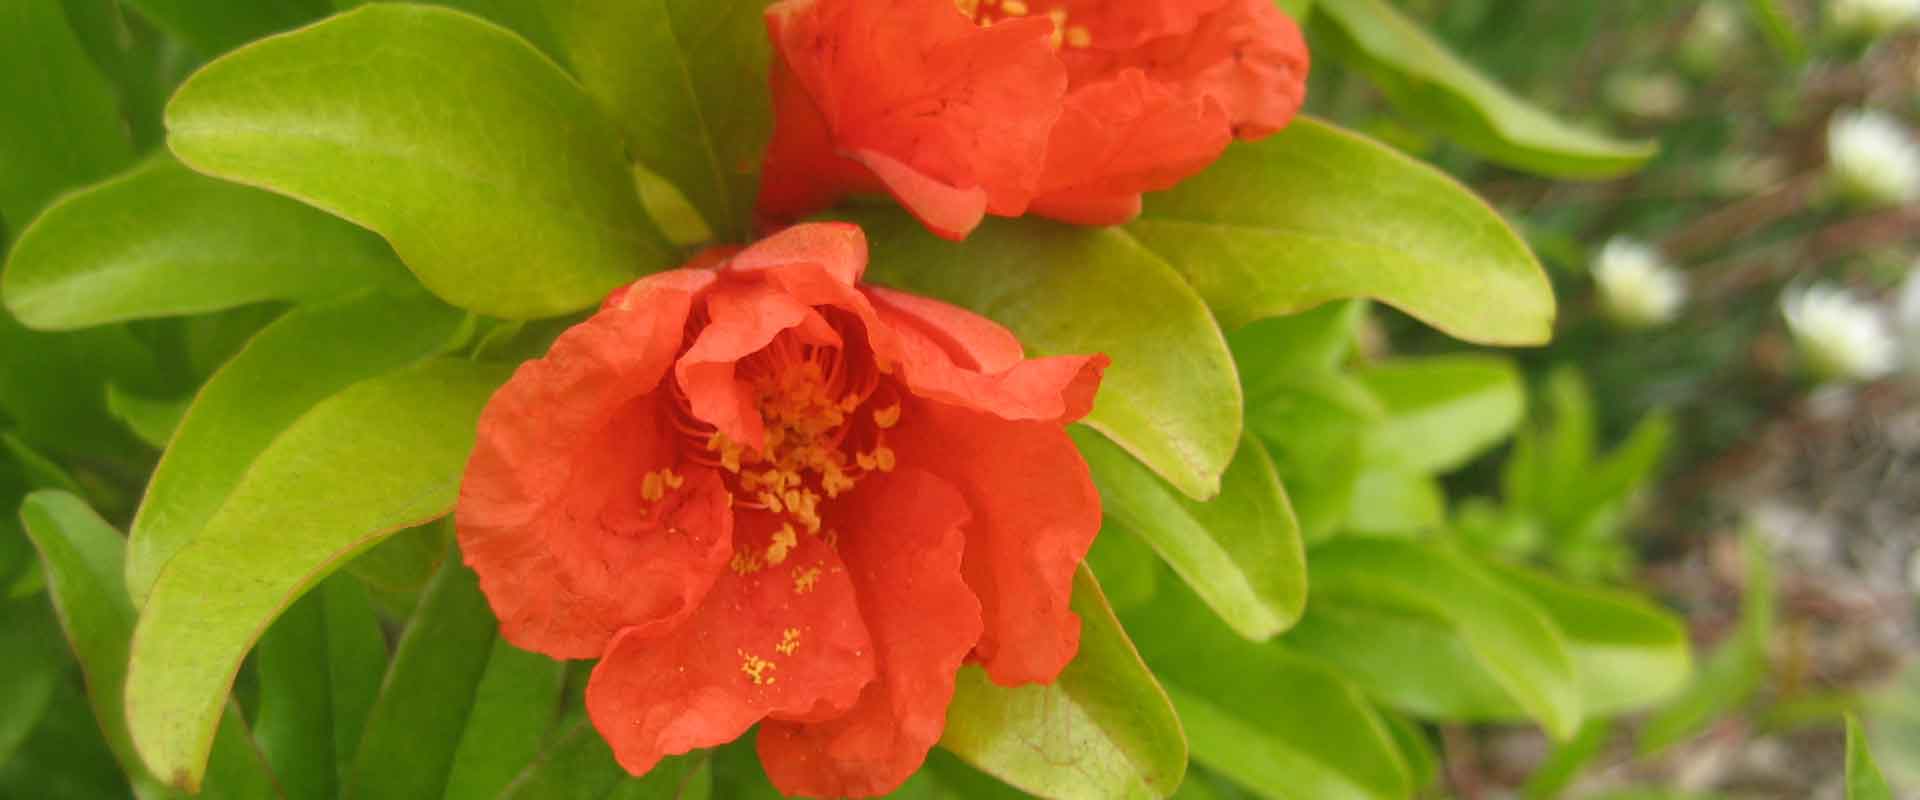
Pomegranates
If you are after some fodder for your next pub trivia night, this factsheet on pomegranates has it in droves. One of the oldest cultivated fruit trees in the world, the pomegranate has appeared in Greek mythology and hymns dating back to the 7th century BC – a feat not matched by any other berry or fruit. In fact, there are some schools of thought that suggest the pomegranate was in fact the “forbidden fruit” in the Bible, rather than the humble apple. Either way, the pomegranate is a backyard beauty, and a must have in your “Garden of Eden”.
The fruit of the pomegranate is incredibly attractive, but the real winner here is the fleshy seeds inside. Tart, citrusy and incredibly juicy, pomegranate seeds have suddenly become hip again, and have appeared in dishes and desserts from Masterchef to Michelin starred restaurants.
Originating from Persia, Afghanistan and thereabouts, the cultivated pomegranate (Punica granatum) translates as “seeded apple”, but is in fact a true berry...and a tough one at that. A deciduous tree growing to around 5m x 4m, with an attractive, somewhat shrubby habit, the pomegranate will tolerate a range of soils, from lovely and loamy to tough and clayey. Seriously, these things are so easy to grow that everyone should have a go.
Pop your pomegranate in a warm sunny spot where you can enjoy the gorgeous, glossy spring/summer foliage as it changes from red to apple green with the seasons. As long as the tree is protected from any spring frosts it should be fairly trouble-free; pomegranates are extremely cold tolerant and love a hot, dry summer – perfect for growing in your part of the world! In fact, I reckon pomegranates are pretty good in almost all parts of Australia.
Water is important for pomegranates, so prevent from drying out over spring – it will improve growth and fruit set in the long run. Water for the rest of the year can be fairly limited – they don’t need too much, especially not in heavier clay soils.
Don’t be afraid to prune your pomegranates, and this is best done over winter. The idea is to clear out the middle of the tree a bit to prevent over-crowding. Remember though that pomegranates bear their fruit on mature wood, so don’t go too silly with the secateurs.
Oh, if you live in an area that is susceptible to Queensland fruit fly, think about enacting a control program, as these little pests LOVE a pomegranate.
Pomegranates are ready to harvest in autumn to winter, and the secret here is to grab the biggest, brightest fruits first. If picked at the right time, pomegranates can be stored successfully for a couple of months in a dark, cool place or the fridge.
Variety is the spice of life, so, if you are in the hunt for some delicious pomegranates, try these out for size:
Wonderful – Possibly the most popular pomegranate in the world, Wonderful is, simply put, wonderful! Beautiful, medium to large, deep red fruit is borne on a vigourous, attractive tree. The seeds are juicy, sweet, fragrant, and perfect for juicing, eating fresh, and bunging in a recipe.
Gulosha azerbaijani – Ugly fruit, but the flavour of the seeds is something else! This variety produces medium to large sized, slightly elongated fruit with a pinkish hue, but the internal seeds are deep red, large and very juicy.
Gulosha rosavaya – From Russia with love comes this perfect pomegranate – light pink, large sized fruit bears masses of sweet, juicy, slightly acidic seeds that are truly divine.
Elche – A fab little fruit from Spain, Elche produces lovely pink fruit, the seeds of which are bursting with juice. May not be as cold tolerant as other varieties, but give it a go in a warmer spot.
Ben Hur – Purporting to grow fruit to 1.2kg, Ben Hur is a newer variety of Australian bred pomegranate with fruit resembling cricket balls. The seeds are reportedly juicy, sweet and flavoursome...give it a go at your place!
Pictures
Pomegranate flower pic: Elaine Shallue (SGA)
