So, most of us have had a pet of some sort over the course of our lives, our pets bring us joy, love, laughter, and good times. But imagine owning over 500 pets that never need to be walked, are happy to eat your scraps, provide you with amazing fertiliser AND help reduce your greenhouse gas emissions and carbon footprint! Sound too good to be true? Well, welcome to the wonderful world of worm farms – top little carbon crusaders and garbage gobblers who just happen to be awesome (and fairly low maintenance) pets!
Now, for those of you who feel a little squeamish at the thought of hundreds of worms wriggling away, lets dispel some myths for you. Firstly, despite the fact that worms munch away on our waste, they are actually pretty clean and their digestive system is so amazing it can destroy pathogens!
What is a worm farm and why would I want one?
Australian studies have shown that every one of us throws away about 180kg of compostable food and green waste every year. Whilst that may not not sound significant, when this sort of waste goes into landfill and breaks down anaerobically (without oxygen) a massive amount of methane is produced. Methane is a gas 21 times more damaging to the atmosphere than carbon dioxide. So, our 180kg of tossed food and green waste ends up creating over 800kgs of carbon emissions per year, which is bad karma for us and really bad news for the environment! By starting a worm farm and passing them our food waste each Aussie household can go a long way to reducing their carbon footprint, while pampering their plants with the wonderful worm wee (and poo) produced!
So how do we keep our worms?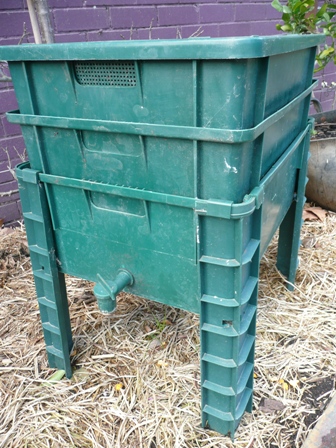
We need to imitate the environment that worms inhabit naturally; cool, moist, dark spaces, and thankfully, this is not too hard to do. The best worm farms give the little wrigglers room to roam, while allowing us easy access to worm waste products (both the worm wee and vermicompost – the poo) as well as sufficient drainage so the worms don’t drown. Essentially, worm farms are made up of a couple of stackable boxes that provide different levels for different worm activity. Position is everything, so be sure to find a suitable spot for your worm, farm. Choose a spot that is not affected by extreme temperature fluctuations or gets too much direct sun. Some worm lovers even keep their little friends inside, with cool laundries often proving to be a great worm rearing locale.
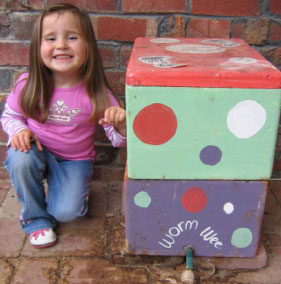
There are a couple of ways you can go about setting up the worm farm, whether using the low cost make-it-yourself polystyrene box method, or purchasing a ready made worm farm from your local garden centre. Whichever accommodation you choose, the bedding material is of utmost importance. Worm bedding should consist of mainly carbon-based materials and the easiest is shredded newspaper. Mix it together with some aged (not fresh) cow manure or compost and then lightly sprinkle it all with some fresh water. Don’t wet it too much – just enough to dampen the contents. This should all be prepared before you put the worms in!
Make Your Own Worm Farm
Step 1. Grab a couple of polystyrene fruit boxes from the local fruit and vegie shop or market. Most places are more than happy to let you take as many as you want, so hunt around and grab a couple with lids.
Step 2. Punch some holes in the bottom of one of the boxes with a screwdriver. This will become the “top box” in the worm farm. Line the inside base of this box with mesh or insect screening, to stop the worms falling through the holes.
STEP 3. In the box without holes (the bottom box), punch a hole and put a small length of hose or a tap as close to the base as possible, to collect the precious worm wee. Place the top box (the one with all the holes in the base) onto the bottom box, and you’re half way there!
STEP 4. Now add the bedding material (shredded newspaper and aged compost or manure) into the top box and lightly dampen the contents. The box should be about ¼ full of the bedding material.
STEP 5. Head off and buy some worms. Ordinary garden worms or earthworms are not suitable for worm farms and will die. Worms are sold in boxes of 500 or 1000, this is the best way to get your farm going. A thousand worms are ideal for a DIY worm farm. These types of worms are generally Reds, Tigers or Blues and are often just sold as composting worms. Pop the worms in the top box, they will soon wriggle down into the bedding.
STEP 6. Cover the worm bed with newspaper or a piece of hessian to help maintain a nice constant temperature and moisture level in the bedding material. Place the lid of the box on the top.
STEP 7. What a worm wants! Let the worms settle for a couple of days, then add some food waste to the top box, under the hessian. These scraps could include things such as:
 Kitchen scraps like leftovers (cooked vegetables and stewed fruit leftovers),
- Fruit peelings (avoid citrus fruits – the worms find their smell too strong),
- Grass clippings (lightly sprinkled),
- Autumn leaves (small amounts)
- Paper, cereal packets, pizza boxes, junk-mail, (all torn up and soaked in water beforehand)
- Tea-bags, coffee grinds, tea and coffee dregs
- Hair clippings and vacuum cleaner dust
- Vegetable scraps and peelings (avoid onion)
- Crushed egg shells (these are excellent to help maintain the pH of the bedding)
- Aged manures
Do the worms a favour and chop this stuff up before you put it in the worm farm…afterall, worms don’t have teeth, so the easier it is for them to digest the waste, the happier the worm farm will be!
STEP 8. Enjoy your results
What makes worms squirm?
Worms are fairly low maintenance pets, but they are not no-maintenance. Don’t forget about them and ensure that their bedding material doesn’t dry out, this makes them very unhappy. The presence of ants in the farm is a sure indication that the moisture levels are too low, add some soft vegies and a bit of water. Overfeeding is a common issue too. The secret is small amounts of food more regularly and in different spots. If there is too much food in the farm, it will start to rot, making life unpleasant for your worms. Avoid putting meat and dairy products into the farm, whilst the worms will eat these foods, it can attract vermin, including mice and rats.
Worm Wee
After a few weeks, worm wee will begin to collect in the bottom box, this stuff is liquid gold! Some of the best fertiliser around, worm wee is a lovely dark colour and needs to be diluted with water before use, ideally to about the colour of tea. This can then be applied to just about any type of plant. Worm Wee is particularly great in the edible patch.
Vermicast – The Poo That Worms Do
Vermicast has got to be one of the greatest fertilisers ever. But be careful, it’s strong and needs to be used fairly sparingly! In your home worm farm, vermicast will collect in the top bin and it does need to be cleaned out every so often. To do this, carefully remove a small amount from the worm bedding. Mound it up into a cone shape. Any worms present will wriggle away from the light and collect in the centre of the vermicast and remaining bedding. Take the cone of vermicast away and put the worms back in to the farm. Then sprinkle the worm poo around your plants and lightly water it in.
The Wily Worms What Ifs
Every now and then, we can run into issues with our slimy little rubbish munchers, so here is a list of FAQ’s for you
How much will my worms eat?
This depends on how many worms you have, but grown up worms can eat half their body weight in food each day (most of which is converted to fertiliser and wee).
When should I water, and how much?
Sprinkle a bit of water into the worm farm every couple of weeks, as this will speed up the worm wee production, and keep the bedding moist.
I think my farm, has too many worms!
Think again! Worms self regulate their numbers, based on food supply and space, so your worm farm will never be over-populated.
Can I put worm farm worms in the garden?
Compost worms need moist, dark, damp situations in which to survive and thrive, so unless your soil is rich, damp and covered in a nice layer of mulch, don’t bother.
All the worms are hanging out in the lid – why?
Generally, this is a response to too much water. The worms are just trying to move to higher ground so they don’t drown. If your farm is out in the weather it may be collecting rain; if not, you are adding too much water in the farm.
All my worms died last summer!
Like all of us, worms are able to tolerate a fair range of temperatures, generally from about 10 – 30 degrees Celsius. When the Aussie summer kicks in, we are subject to some really hot days, often well over 30 degrees, which makes both us and the worms unhappy. In this type of weather, consider moving the system into a shady, cool position. Take the lid off and hose down the system (making sure the tap is turned on to allow the liquid to drain out).
There are flies or maggots in the farm!
Tiny little vinegar flies are occasionally present in worm farms (and compost bins) and are absolutely nothing to worry about. If larger flies or maggots are present, it is generally a sign that food (especially meat) is rotting rather than being eaten by your worms. Avoid meat in worm farms, and make sure you are not over-feeding your new pets. If maggots do turn up, get rid of them by placing a piece of bread soaked in milk on the surface of the farm and remove after a couple of days.
My worm farm stinks!
This will only happen if there is decomposing food and a build up of waste in the farm. The best thing to do in this situation is to stop feeding the worms for a while, add a handful of garden lime to the top bed and lightly aerate the bedding. This should allow the worms more room to move and a happier home. Start feeding them again when the farm is free of smells.
Enjoy your worms, they really are a gardener’s best friend, and they do make great pets!
Related Articles:
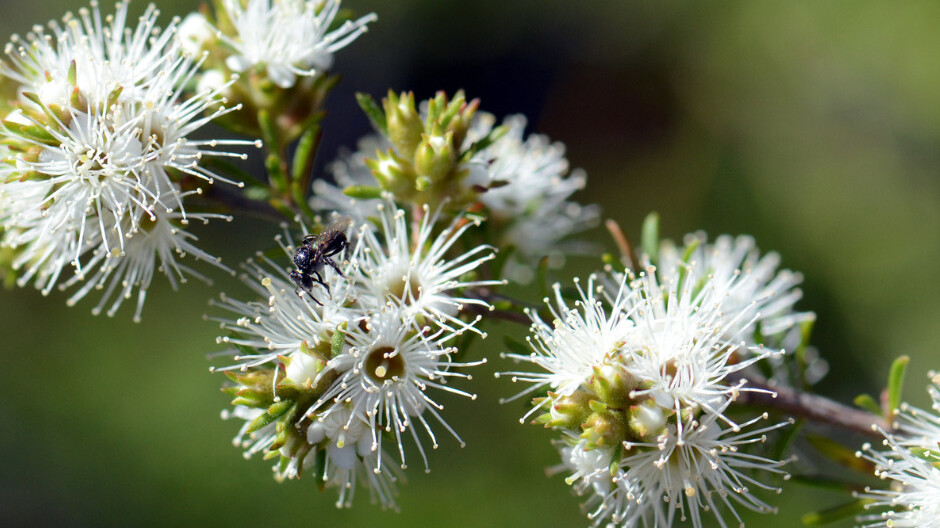
Wildflower gardens – What’s the buzz about?
In the quest for sustainable and environmentally conscious practices, gardening enthusiasts and nature lovers alike are turning to a time-tested…

The Importance of building soil health for a biodeverse, productive garden
Creating a thriving garden that not only sustains itself but also contributes to the broader ecosystem requires more than just sunlight and water.…
