Nettles - Friend or Foe
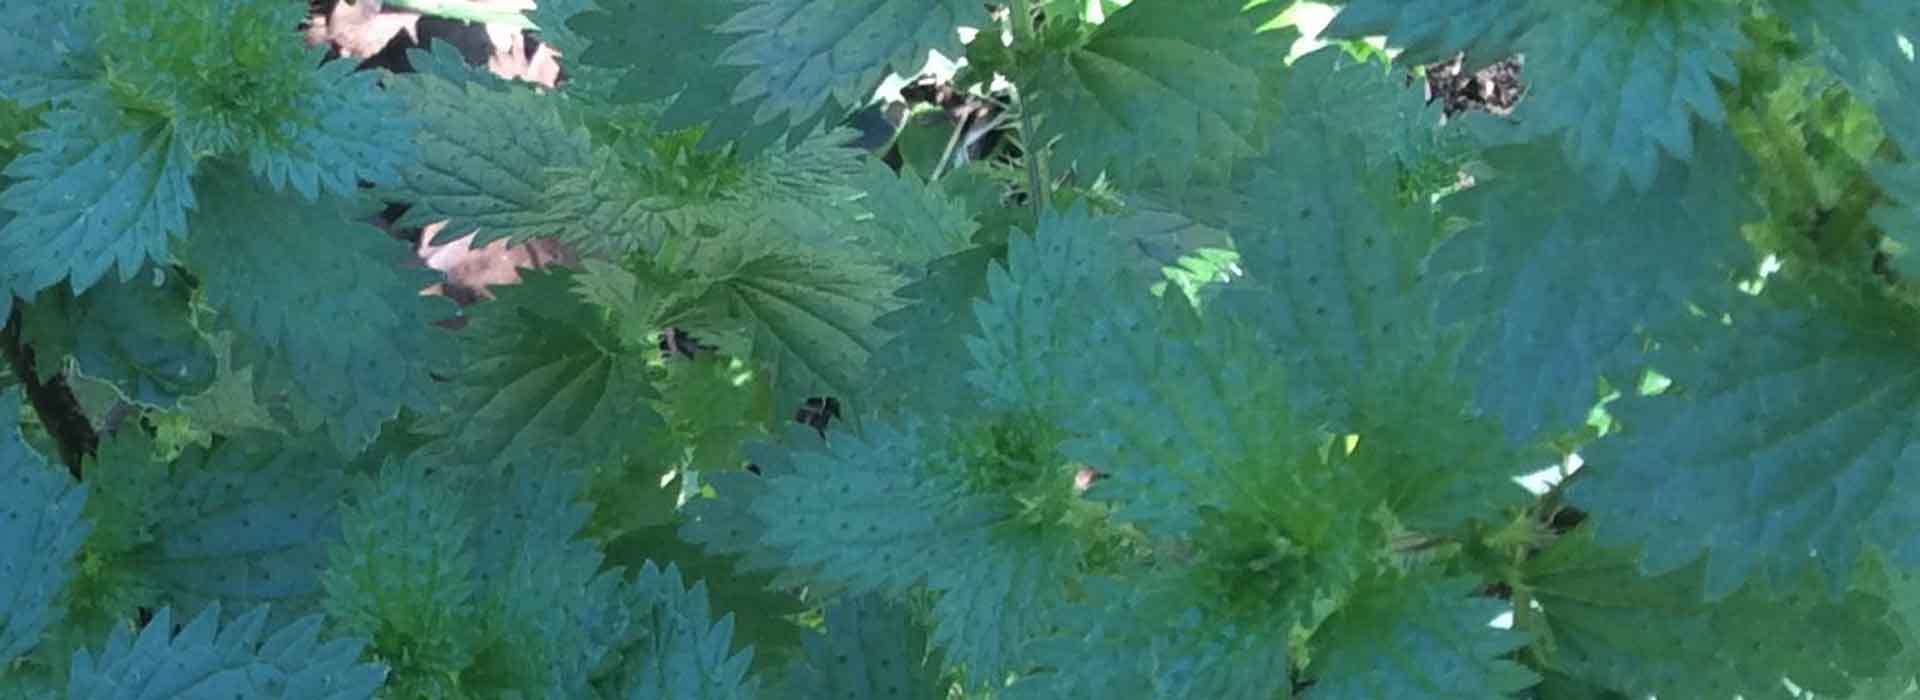
The hairy, dark green, finely toothed leaves are a real sign of winter. Although it is regarded as a weed by many and needs to be prevented from becoming invasive, I love this much maligned plant. It feeds the soil, plants, compost, hens and the humans in this household. It is an important component of my garden, and as Judith Collins says, it is valuable in any organic garden. This is because nettle is so nutritious, and beneficial to plant and human health.
Nettle is easily identified by the sting associated with its name, Stinging Nettle - and this sting is part of the reason why so few people grow and use it. Urtica dioica, U.urens and U.incise are the three most common forms of stinging nettle. The sting comes from the fluid in the small barb like hairs growing on the face of the leaves and the stem. It is a painful sting but will usually go away after a few minutes. More instant relief can be given by rubbing the juice of the nettle plants itself on the affected part, but doing this may involve a few more stings. The most common remedy is the leaf of the dock plant- which naturally grows quite near the nettle. According to folk tales one should also say the following charm while rubbing the leaf slowly over the sting,
“Nettle in dock out
Dock rub nettle out” 1
This charm may have been a mnemonic helping us to remember which plant actually alleviated the pain!
While the botanical name of the plant Urtica derives from the Latin root, uro - to burn, its common name nettle comes from the Anglo Saxon word noedle, or needle, pertaining to its use as thread and cloth. Fibres from the nettle plant were a very common thread in Germany and Scandinavian countries up to the beginning of the last century. Nettle was used to make anything from clothes, linen, sails and even sheets. Nowadays we have forgotten many of the uses of this plant but only a few centuries ago, nettle was considered one of the most important fibres along with flax and hemp2. So those who like to experiment with eco-fashion could consider a nettle dress! Nettle can produce green and yellow dyes.
An Ideal Companion Plant
Nettle really is a phenomenal plant. Judith Collins author of the highly recommended, Companion Gardening in Australia (working with Mother Nature) lists stinging nettle as her favourite companion plant. She states “it improves the health of fruit trees and vegetables generally.” 3 It can be used as a companion plant in the vegetable garden, and is also an invaluable plant in the making of compost tea as it contains an abundance of iron, copper, phosphorous, and potassium.
Nettle tea for the garden
Fill ½- 3/4 of a large bucket with nettle leaves
Fill the rest of the bucket with water
Leave to stand for 1 week
Dilute 1 part nettle mix to 10 parts water
This nettle tea can be given readily to any of your plants. The benefit of nettle and other “compost teas” is that the vitamins and minerals are readily available to the plants. It feeds the soil while giving a really quick boost to plants since nutrients can be absorbed almost immediately.
Nettle tea is also recommended for you and me! It is a nourishing and nurturing tonic for the entire system4. With all the iron it contains, it is also a useful drink for menstruating women, and Susan Weed (yes that is her name) recommends nettle tea for all menopausal women. 5 So what are you waiting for, go and grab yourself a cup of nettle tea.
It really is a matter of gathering a large bunch of leaves and flowers (if present) using gloves of course. Place leaves in a plunger or pot and pour boiling water over and infuse for 5 minutes. Simple!
Nettle has quite a mild taste and can be mixed with other more aromatic leaves if you prefer. Given the goodness of the plant I also cook with nettles. One of my favourite recipes, Nettle and Buckwheat pancakes comes from the Stephanie Alexander Kitchen Garden Program at my children’s school, East Bentleigh Primary. This is an easy recipe you can make with the kids, and the pancakes are still delicious with maple syrup or any of your favourite pancake toppings but will be packed with the benefits of nettle including chlorophyll, proteins, Vitamins A, C and D, and of course all the minerals already mentioned above.
Nettle and Buckwheat Pancakes
1-1.5 cups of nettle leaves
I cup plain flour (can substitute gluten free flour)
6 tablespoons of buckwheat flour
1 tsp salt
3 eggs
3 cups milk
60 g butter melted and cooled
Half fill a saucepan with lightly salted water and bring to the boil.
Using tongs - drop in nettle leaves and swish for a minute
Drain nettles , and squeeze out excess moisture
Chop roughly
Sift flours and salt into a bowl
Lightly whisk together egg, milk and 40 g of butter
Make a well in the centre and tip in milk mixture
Using a whisk mix mixture together to form a batter
Stir in chopped nettle and leave to stand for 20 minutes
Heat a crepe pan over medium heat and brush its base with butter
Using a ladle tip in 2 tbps of crepe batter and swirl to cover base of pan.
Leave for a minute till lightly browned then flip over
Cook for 30 sec to a minute and then slide off pan.
Continue with rest of batter
Spread with desired topping and eat!
Thankfully, the use of nettle in culinary dishes is gaining in popularity. Mrs Grieves’, masterful A Modern Herbal, notes that nettle ‘is one of the few wild plants still gathered each spring as a wild herb by country folk’. She provides recipes for Nettle Pudding, Nettle Beer and Spring Greens. Another great recipe, Nettle Soup is adapted from Vegetable Love and is a simple yet delicious meal6. Please note, when cooking with them, you need to plunge the leaves in boiling water for a minute to remove the sting.
Nettle Soup
2 tbsp butter with dash of olive oil
120 grams of nettle leaves
½ cup of water
3 medium sized potatoes- peeled and diced
1.5 quality stock cubes or stock of your choice!
salt and pepper
Melt the butter and oil in a pot. Add the nettles and cook stirring for 5 mins
Add 1/2 cup of water- and simmer for 10 mins
Add potatoes and stock bring to a boil
Simmer for 10 minutes or until potatoes are soft.
Add salt and pepper to taste
Blend in a food mill, or blender
Serve hot
Growing Conditions
 Nettle prefers deep loamy soils and if you want nettles for making cloth, such conditions are really important. I have found nettles will grow and self-seed in my generally poor and sandy soils. But the plants are definitely happiest when I pop them into the veggie patch with sun and rich soil. Do be mindful that these plants can spread, and it is advised not to let them go to seed or grow them in a pot - I generally keep mine under control by regularly cutting back the plants for use in my cooking, gardening, and tea or by transplanting or pulling it out. This season I transplanted some seedlings next to the broccoli and cabbages. And this broccoli has much more vigour than the two plants without nettle.
References
- In Mrs Grieves, A Modern Herbal, Tiger Books, 2005.
- Mrs Grieves, ibid.
- Judith Collings, Companion Gardening in Australia, Lothian books, 2005.
- Nettles are considered by herbalists as one of the best general tonic for the whole body, as they are so full of goodness.eg David Hoffman, Susan Weed, Mrs Grieves.
- Susan Weed, www.susanweed.com
- Barbara Kafka, Vegetable Love, Artisan Books, 2005.
Text and photos: Sarah Miller
Sarah Miller runs women’s dance and drumming circles and is a keen gardener, and community activist. She is co-founder of the Bentleigh Farmers’ Market and is passionate about local produce.

Chamomile - a pretty and useful herb
After hours working in the garden it’s great to sit back and relax with a cup of tea. It’s even better if you have grown the tea yourself. One of my favourite teas is chamomile- especially my home grown, home dried tea. It’s much sweeter and less musty than some of the shop bought teas I have tried. And it’s really easy to grow and harvest.
Originally I purchased some German Chamomile (Matricaria chamomilla) seeds from Diggers club and following the instructions I scattered the seeds over my vegie patch, sprinkled some soil over the top and gently watered them in. The seeds were sown in a sunny spot early in Spring and came up fairly quickly. In the first year I did harvest some flowers, but importantly I let many of the flowers go to seed, and since that first abundant harvest I have self- sown plants cropping up every year. So my only job is to transplant the seedlings. Although, I do like to leave some of the plants where they grow, trusting that they grow in suitable spots. Chamomile is noted as being a beneficial companion to many plants. It is also a great plant for paths and lawns, as it benefits from being walked on!
Transplanting is a simple matter of gently digging in and around the plants, being careful to avoid damaging the roots and transplanting them to a prepared hole. I tend to do this when the plants are small, around 5 cm high but this year my husband even transplanted some of the chamomile that was flowering- and that too transplanted very well. It is a very hardy plant but I do recommend using Seasol – or another gentle fertiliser on all transplants. It really eases their transition.
This Spring I had another abundant harvest, so on a warm morning when the flowers were open wide, and dry I began to harvest the flower heads. While I may have had upwards of 20 plants, I probably only harvested from 6 of the biggest plants. Chamomile is a small plant 50 cm x 20 cm with a showy profusion of flowers. 4-6 plants grown in a sunny spot is enough to make at least 60 cups of tea (using two teaspoons per person, one for the pot and one for you!)
The easiest way to 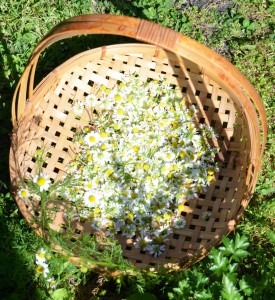 harvest the heads, is to simply rake your fingers through the flowers and gently tug as you go, pulling off the flower heads. They come off very easily, and it doesn’t matter if you have a few bits of stem. You harvest the whole head. My crops were so abundant it hardly looked as if I had taken any flowers at all. And importantly- harvesting the heads encourages another flush of flowers- giving you the opportunity to take a second batch of flower heads later on. I suggest you do this.
Having collected a whole basket full of heads I simply placed some butchers paper underneath the basket and left it to sit in my laundry for 2 weeks. You can use a specially designed drying rack, or a splatter screen (the kind you use when frying oil!) but I find my shallow cane basket words very well. The laundry has lots of fresh air (with louvered windows for drying clothes) and is fairly light- it’s a north facing laundry- although no direct sunlight was shining on the flower heads. I give them a little shake every couple of days to make sure there is no moisture, and to ensure they are drying evenly. When fully dried I simply store the chamomile in a glass airtight jar. Some people do recommend a caddy, as tea is generally affected by light, heat and humidity.
Chamomile is a very beneficial herb known to be relaxing, carminative (relaxes the stomach and support digestion) and anti- inflammatory. It is also said to be good for skin conditions, and is suitable for children. I brew a teaspoon of dried flower heads per person, with an additional one for the pot. It is best to let it brew for 3-5 minutes to allow the plant to do its magic! So as well as having a pleasant taste and fragrance, chamomile will help you relax and sleep- just what you need after a day in the garden.
Harvesting your own tea is also beneficial to the health of the planet. It comes without any food miles, packaging, and pesticide use. Whereas bought tea is usually transported for many kilometres, often from overseas as there are few local tea producers. Loose leaf tea usually comes packaged in a single box, with an additional sealed packet. Tea bags also come in a box, with an additional sealed package, and then each tea bag has its own seal, the individual teabag, plus a string, a tag, and a staple. That is a whole lot of packaging, which means, more energy and water to produce it, more greenhouse gases and more waste. You might think that waste for tea bags is minimal, but along with the cardboard, and the plastic packaging, there are the tea bags themselves. Many people assume tea bags can be composted but this isn’t necessarily so. Tea bags these days are often made from nylon! Not something you want in the compost.
Whereas with your home grown tea leaves, you know the only energy used is your own, and there is no packaging waste and no food miles. And best of all, when you have finished your pot, you can throw the flowers/leaves directly on the garden or put it in your compost. While some of the nutrients will have been taken up by you, the loose leaf tea will still have many nutritional benefits for you garden. And with chamomile, they are considerable. It is recommended for you compost heap as it sweetens it with calcium and potassium, or throw the leaves around the base of a tired looking tree, and just like you it will be replenished with a good cup of chamomile tea.…
