
Winter Washing of Fruit Trees
Although it may look like there is not much happening with your fruit trees over winter, the microscopic world of fungi is making plans, strategically laying in wait in the cracks and crevices of your trees until the weather warms up. The most prevalent fungus is Peach Leaf Curl, causing the disfigurement of leaves, and sometimes the fruit, on your peach, nectarine, apricots and even almonds. However there are many other fungal problems that may occur and winter spraying is a good way to help reduce the incidence of fungal problems.
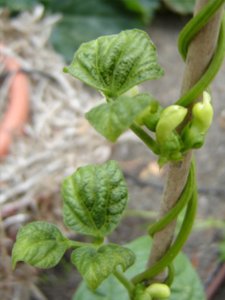
 Peach Leaf Curl will cause the lovely new growth on your trees to appear blistered and puckered and in severe cases it can cause pimples on fruit and premature fruit drop. In the cool moist weather of early spring the fungus will multiply and if the cycle is not broken your trees will continue to be infested year after year.
Other fungal diseases that may be dormant on stone fruit include Shot Hole, Freckle Spot, Rust and Powdery Mildew.
There are several things you can do to minimise the spread of Peach Leaf Curl and other fungal diseases in the garden.
Practise good garden hygiene. Pick up fallen leaves from the ground and avoid putting them in your compost. Remove damaged or rotten fruit and keep the tree pruned to an open vase shape to increase air circulation.
Plant your tree into well prepared soil in the right position with plenty of sun and good air circulation. Keep up a regular fertilising and watering schedule.
Spray your trees during winter with a low impact fungicide. ‘Winter-washing’ helps to kill off any spores and can greatly reduce the incidence of Peach Leaf Curl and other fungal problems.
Winter Washing
The best spray to use is either copper oxychloride or lime sulphur sprayed in alternate years. The first spray should be in late autumn at leaf fall just before the tree enters its dormancy. Spray again at bud swell or bud burst in late winter or early spring. Once the leaves have opened out it is too late to spray for Peach Leaf Curl and many other fungal diseases. Safe and effective spraying can only be done at the end of the following summer.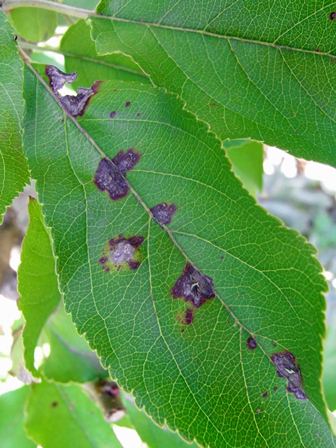
When spraying fruit trees, be aware of the potential impact that ‘spray drift’ may have on surrounding vegetation, soil micro-organisms, pets and humans. Spraying is usually done to the point of ‘run-off’, where the spray liquid has completely covered the tree surface and runs off on to the ground. It may be prudent to lay spray sheets down so non-targeted areas are being protected.
Only make up enough spray for the job at hand to avoid the problem of having to dispose of excessive amounts of unused spray.
Spraying may not be 100% effective so be vigilant over summer and remove any leaves showing signs of fungal disease as soon as they appear.
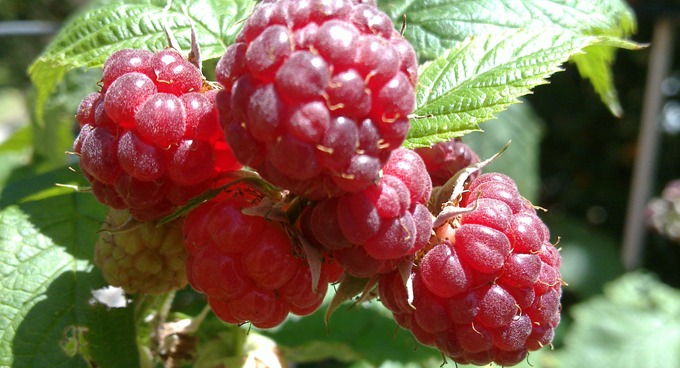
Raspberries
If you can grow apples you can grow raspberries, and why wouldn’t you? The sweet juicy fruit is delectable when picked ripe and warm from the canes, truly placing the taste of the sun on your tongue. Nutritionally dense and a fantastic snack for kids, raspberries require a small amount of preparation and ongoing care which will yield great results.

Asparagus
Imagine crisp green asparagus spears poking up like gremlin fingers through the dewy soil, ready for you to snap off and crunch. Winter is the time to plant asparagus crowns, which are simply the roots of a dormant asparagus plant. At other times of the year you may plant asparagus seedlings, however, the advantage of crowns is that they are already two years old and will produce spears for harvest much earlier than a seedling. Purchase three or four crowns for a family. Crowns are normally male, as the female plants are less vigorous and produce a red berry.
Position
Asparagus is quite easily grown and when established, will continue to produce for 15-20 years, so it is important to allocate it its own bed, where it will not be disturbed by the comings and goings of short lived annual crops. It must also be kept weed free and well mulched with pea straw or Lucerne mulch.
A sunny position, preferably free from strong winds and potential competition from trees should be chosen for the permanent placing of the plants.
Preparation and Planting
Asparagus does best in a rich friable soil that has lots of organic matter added to it. Ideally, the bed should be raised and of an area large enough to allow the asparagus crowns to be planted 40 cm apart. You need to work compost and manure into the soil so you are adding about one third compost and cow manure to two thirds soil.
Create a trench about 30 cm wide by 20cm deep, making a mounded ridge in the bottom of the trench. Place the asparagus crowns on the ridge and spread the roots out down either side. Cover roots with soil until under about 5cm of soil, leaving the crown at the soil surface.
Harvesting
To promote a vigorous, healthy and long-lasting root system it is important that you do not harvest any spears during the first year. Let the asparagus grow without harvest and it will produce a ‘fern’, which may be pruned back to the ground in winter after it has yellowed.
In the second year you may harvest no more than half of the spears, leaving any that are less than 1cm in diameter. As the plant matures you will be able to harvest about 80 per cent of spears over a 10 week period. Expect to harvest spears every 2-3 days during the peak growing season, beginning in early spring.
On-going Care
Once you have finished your harvest, allow the fern to mature until they turn quite yellow and remove them in winter. Cut them back right to the ground. Apply a generous cover of compost or well-rotted cow manure.
Keep asparagus well watered in summer, and weed free year round.
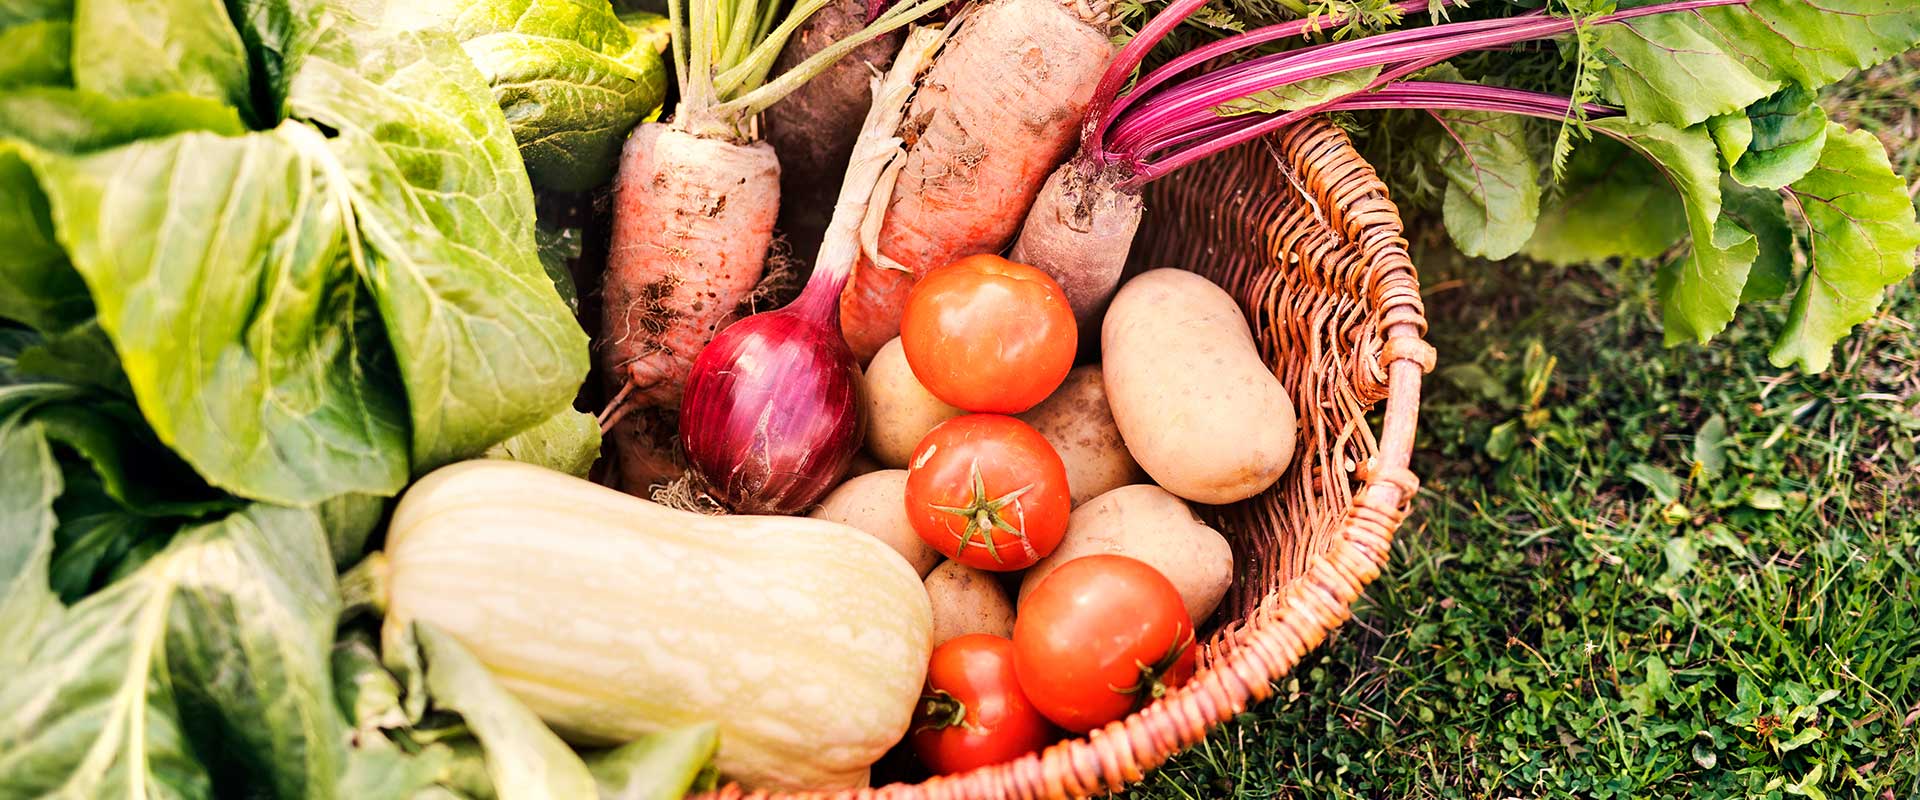
Growing Summer Veggies From Seed
If you love growing your own vegetables over summer then you’ll be pleased to know that many of them are easily grown from seed. The most popular vegetables such as tomatoes, cucumber, pumpkin, zucchini, beans and corn are great for beginners and there are many advantages to choosing seeds over seedlings.
Seeds are much cheaper than seedlings and will generally last a couple of years if stored correctly, as long as the use-by date is still current.
Choosing seeds instead of seedlings has a great environmental benefit. Seedlings are heavy to transport and use a lot of plastic, water and embodied energy in their production, whereas seeds are light, easy to transport and use minimal packaging.
You also have a much greater choice if you grow from seed, as only a small selection of the most popular vegetable varieties are produced as seedlings. You are not limited to what is available at the local nursery but can also take advantage of mail-order seed companies.
If you prefer to grow organic produce, choose seeds, as most seedlings aren’t produced organically, whereas there is a large range of organic seeds available.
If you grow open-pollinated, non-hybrid seed then you can save your own seed from year to year and cut out the middleman all together. Seed saving is a delight all of it own!
Growing from seed means that you can save space in the garden by propagating many plants close together, in a separate area first, rather than having to make room in the garden. Having your seedlings growing in a protected, sheltered area makes it easier to protect them from the cold and also from insects, snails and slugs. It allows you to get your plants growing strongly, ready for planting once the soil temperature has increased and they are more resilient to attack.
Propagating some vegetables first also means that, if you are pressed for time, you can simply check your seedlings for watering, rather than the garden beds, as your seeds and emerging seedlings will require more frequent attention than the established vegetables.
What do I need to seed?
Collect a few items first, before getting started. Seeds can be grown in egg cartons, toilet rolls or newspaper pots (see www.abc.net.au/gardening/factsheets/paper-pots/9431122). You can also propagate them in washed second hand punnets or seedling trays. If you are using toilet rolls snip at frequent intervals around the base and then fold in to create a bottom.
You also need a growing medium and seed raising mix or potting mix is fine. Potting mix can be a bit coarse so sift if necessary to get the big bits out.
You need a place to put the seeds once you have sown them. A warm, sheltered spot away from frost is best. This can be on the veranda, a sunny windowsill or under a cold frame or plastic cover.
Be careful not to disturb the seeds with watering so use a very fine rose on your watering can or a spray bottle.
Are you direct or indirect? To sow direct means to plant the seed straight into the garden bed. This is normally done for larger seeds or very fine seed that does not like to be disturbed, such as carrots or onions. Beans can be sown directly, for example, as they are large, easily spaced out and they germinate easily. The instructions on the back of the seed packet will tell you whether to sow direct or indirect.
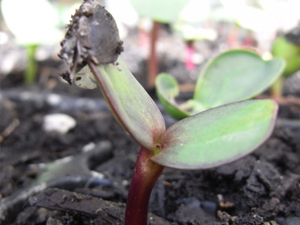
Pricking out
The term pricking out means to gently move the new seedlings into a larger pot, and is done if the seedlings have been propagated in a punnet or tray rather than individually. Use a chopstick or similar item to lever the seedlings out from below, being careful not to pull on the leaves or stalk. This is generally done once the seedling has the first true leaves or is about an inch long. Place into a larger pot prepared with potting mix and firm the soil around the roots gently. It is much better to plant deeply at this stage, especially with tomatoes, as the seedling may fall over if it is too shallow and tomatoes will develop roots along the stem.
If you have grown your seeds individually in compostable pots, such as toilet rolls or jiffy pots, then you can simply plant them straight into the garden once they are large enough and the weather has become warmer.
