Creating Community through Gardening
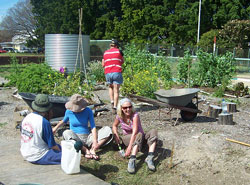
Right in the centre of the city of Newcastle in New South Wales is a community garden with a twist. Fig Tree Community Garden doesn't have individual allotments. It's one big garden where anyone and everyone are invited to get involved and enjoy the rewards of the harvest.
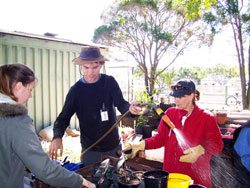
Craig Manhood, one of the main instigators of Fig Tree (pictured right, centre), explains how the garden came about.
'We advertised in the local Landcare newsletter, inviting interested people to a working bee at the Morrow Park Bowling Club, where the garden was initially established. Unfortunately we had to relocate the garden after the Bowling Club closed, but it offered us an opportunity to learn from the mistakes made in setting up the original garden. We conducted a workshop with about 25 of the regular volunteers from Morrow Park and identified our goals and set some priorities,' Craig says.
The garden was then relocated 500 metres away to its current site at the Croatian Wickham Sports Club.
A number of organizations got behind Fig Tree too, including Newcastle City Council, Hunter TAFE, Hunter Water, and of course the Croation Wickham Sports Club. Fig Tree also established strong practical links with other organizations, such as Links to Learning, Toogoolawa School, Migrant Resource Centre, TAFE Outreach and Baptist Community Services.
The new site is alongside a busy street, but in what Craig describes as an 'interesting experiment', they left the garden unfenced.

'It seems that if something is fenced off, people think there must be something worth stealing inside,' he says. 'The result is we've had no theft at all. In fact, some produce goes to seed because people aren't inclined to help themselves.'
The new site has been established for 14 months now, and is continually gathering momentum.
'Work for the dole people helped out a lot,' Craig says. 'They are responsible for much of the infrastructure, such as the nursery work space and the cubby house in the children's play area.'
Bill Robertson, who has also been an integral member of Fig Tree, says that the garden offers people a way to connect with each other in a way that suits them.
'People come in and help out the way they want to. They can garden, build, work on the mosaic - however they want to work, we're not prescriptive,' Bill says.
Fig Tree has recently applied for a grant to establish an International Kitchen, which could include a wood-fired pizza oven and stone barbecue. With people from different nationalities visiting and working at Fig Tree, the variety of herbs and vegetables has increased dramatically and the interest in different nationalities' food.
'It's not just different foods,' says Bill, 'we're also experimenting with companion planting with these different plants.' Needless to say, Fig Tree gardening follows organic principles.
The community they have established is a tribute to true multiculturalism in Australia, but even more so is the atmosphere of Fig Tree, which Bill sums up eloquently.
'Fig Tree gives people a space in which to breath in a very supportive environment.'
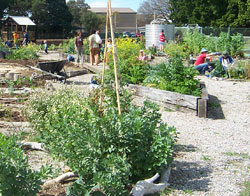
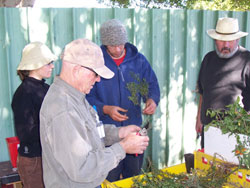
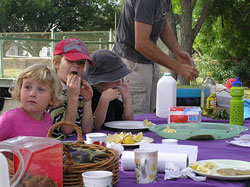
Photographs are courtesy of Fig Tree and provide a glimpse of the people and the garden they have created.
Diane Cummins' Garden
Location: East Doncaster, Victoria
Sustainable Gardening’s 2005 Award Winner
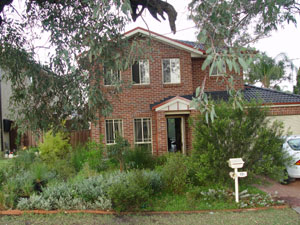
Diane Cummins’ garden in East Doncaster, Victoria was awarded the Middle Yarra 2005 Sustainable Residential Garden Award (shared with a garden from Montmorency) recently, for the second year in a row.
The Sustainable Gardening Award is a regional initiative of Banyule, Manningham and Nillumbik Councils with support from Sustainable Gardening Australia.
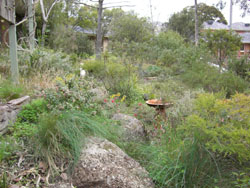
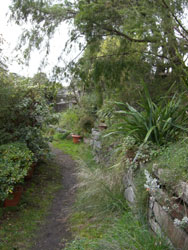
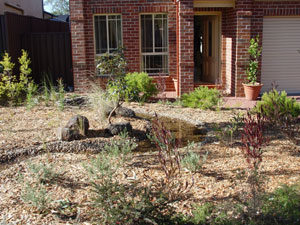
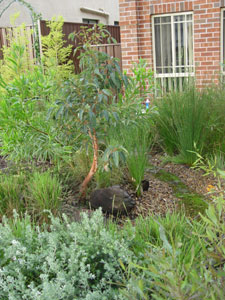
SGA featured this garden when it won the 2004 award but Diane has added a few more beds since our last visit and the plants have grown too. Seen here is the front garden, now starting to look very well established, although there are still plenty of immature shrubs and trees that will grow much bigger.
There’s close to ten years’ work in this garden, gradually evolving from a garden with numerous exotic plants to one with mostly natives. Diane is keen to point out, though, that she still has a mix of both.
‘I just want to show that you can still have a mix of plants. I still have some azaleas around the front,’ Diane says, ‘but they don’t get any special treatment. When exotics die, they are replaced with indigenous plants.’
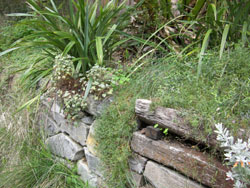
Diane’s brother, environmental writer William Lines, has generously assisted with the restructure. He has done much of the major work over the years, replacing sleeper retaining walls, building the stone walls (from local Warrandyte stone), and installing rainwater tanks.
| There are two rainwater tanks, one large galvanized iron and one smaller plastic one, and although she confesses to having to use some mains water on the garden, the tanks have considerably reduced Diane’s reliance on this source.‘I still use some mains water because of the vegetable garden,’ she explains, ‘but the tanks really help.’
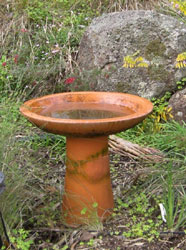
Water features prominently in the garden too. There are numerous bird baths dotted around, which attract (along with the garden) quite a variety of birds. |
 |
| In the previous garden tour, Diane lamented that no frogs had taken up residence in her garden. However, she struck it lucky recently when a woman offered her tadpoles from a swimming pool that was being pulled out. Diane now has frogs! | 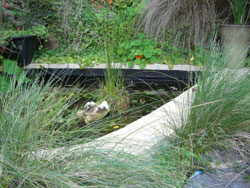 |
| Diane’s garden not only features lots of local indigenous plants, she also has a healthy and expansive vegetable garden and fruit trees (including a Macadamia and a grafted Avocado, which are looking robust and healthy). | 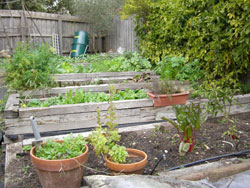 |
| The garden is well mulched and Diane is also an avid composter. She has a worm farm and a Tumbleweed Compost Maker.‘This is a great compost system,’ she says. ‘It’s easy to turn and because it’s sealed there’s no problem with vermin.’ | 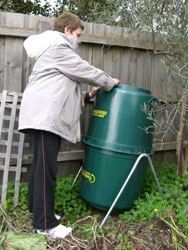 |
| Diane also has chickens, which dispose of kitchen scraps in return for eggs.Everyone will have an opportunity to visit Diane’s garden, as it has been accepted into the Australian Open Garden Scheme and will be open on the weekend of 31 March/ 1 April 2007. | 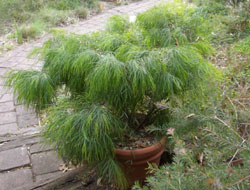 |
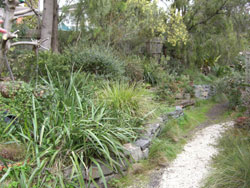
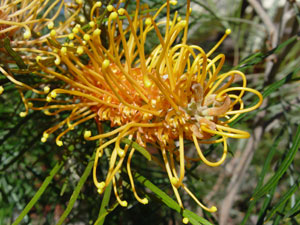
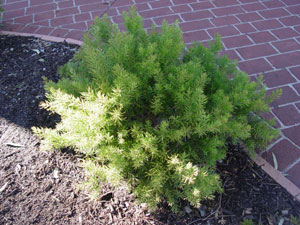
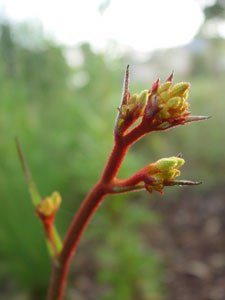
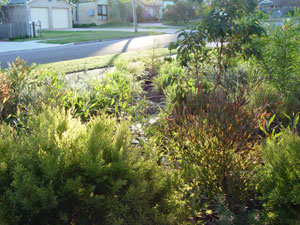
| It’s an eclectic plant collection, featuring native and indigenous plants. There’s several types of grasses, including Themeda triandra (Kangaroo Grass), Epacris, a variety of grevilleas, banksias (shown here is Banksia ericifolia), eucalypts, eremophilas, Alyogyne, and correas (shown here is Correa ‘Fat Fred’), to name but a few. There are several Acacia cognata ‘Green Mist’ in pots near the front entrance, which are starting to look very elegant. | 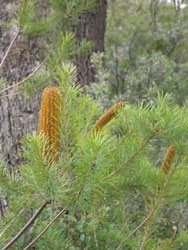 |

Dave Smith's Garden
Location: West Sydney, NSW
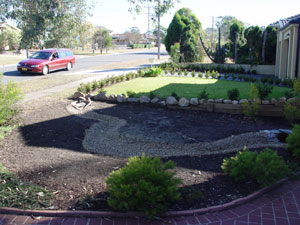
From this...
|
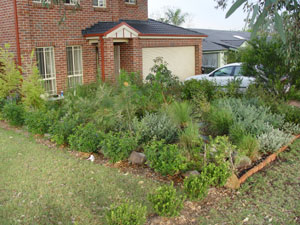
... to this
|
| Dave Smith has provided a fantastic record of how he transformed his South-West Sydney front yard into a beautiful native garden complete with streambed. Dave has provided species lists and a complete costing on the real life garden make over made by an inspirational gardener with a vision and strong back muscles! Here's how Dave did it... | |
 |
I live in Hammondville a suburb approximately 30km WSW from the Sydney CBD. The native vegetation in this area is characterised by heavy clay soils, extremes in temperature and low humidity. Last summer the maximum temperature recorded was 42.6 c and the winter minimum was -5.2 c. In these conditions and with the current Sydney water restrictions, maintaining a green lawn year round is impractical if not impossible. |
| So what to do? I gave it a year after I bought the house in April 2003 to establish a green lawn and gave up in the Autumn of 2004 in frustration. So I spent a week of my holidays digging up the grass and turned the soil to a depth of about 20 cm adding gypsum and sand to break up the clay and assist drainage. I then bought 7 cubic metres of native organic mix which covered my approx. 30msq front garden to a depth of about 30 cm. This new soil was mixed with the existing soil, gypsum and sand with a pitch fork. A back-breaking, but extremely satisfying experience.
Next task was to install the native stream. |
 |
 |
I dug a trough in the new bed that was to become the water course, down to the clay bed, about 60cm. A hole for the reservoir which would contain the pump was dug to a depth of 1.5m and a commercial pond liner was placed in the hole. A layer of slate was cemented around the rim of the reservoir. The pump was installed and the pipe to the head of the water course was buried under the new soil. The pipe at the head of the stream was inserted into a sandstone mound to provide a cascading effect. The course of the stream was laid with a double layer of brickies plastic which was then overlaid with cement. This was subsequently painted with two coats of water proof pond paint and finally Nepean river pebbles were placed on the river bed. |
| Costs: 7 cubic of garden mix = $ 400.00 Pump = $ 240.00 10m Ag Pipe = $ 60.00Liners = $ 80.00 Cement Sand etc = $ 80.00 8L Pond Liner Paint = $ 140.00 Slate = $ 100.00 TOTAL = $ 1100.00 |
 |
What to plant?Natives of course, that would tolerate hot summers and cold winters. Secondly I wanted a variety of foliage colours. I chose Dodonaea (red) and Westringea (silver) for accents. For two feature plants I selected a grafted Eucalyptus ficifolia (Red Flowering Gum) and a Xanthorrhoea (Black Boy). I also planted native tussock grass (Poa) and native reeds (Juncus) that thrived for the edge of the water course. |
|
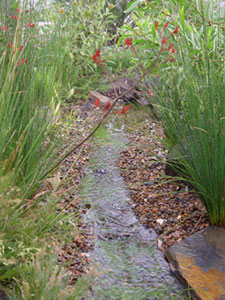 |
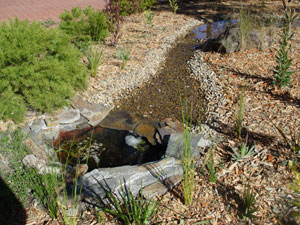
Red flowering kangaroo paw (Anigozanthus) add colour to the mesmerising sight of Juncus lining the stream. The kangaroo paw is probably planted beyond the edge of the pond liner so that it doesn't get too wet. In the background, Myoporum Parvifolium creeps from the edge of the stream and over the rocks. A yellow-flowering Grevillea 'Orange Marmalade' towers above it. |
| The streambed looks natural because of its realistic shape and Dave's use of natural stone to line it. It looks like it belongs in the garden though because it is surrounded by plants that you'd find growing near streams in the wild. Acacia fimbriata softens the stream edge on the left. Its weeping foliage puts the very upright habit of the Juncus reeds into stark relief. | 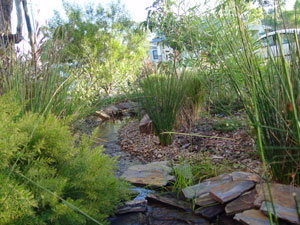 |
 |
A row of Callistemon 'Endeavour' will screen Dave's house from the neighbours to the left. The needle-like forliage of Grevillea 'Honey Gem' looks beautiful even without its orange-yellow flowers. The Westringeas on the right are of two different types; W. fruticosa at the back and the white/green variegated W. 'Smokey' to the front. |
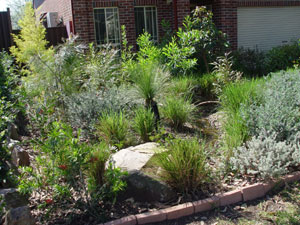
| The purple Dodonaea purpuraea foliage seems to brighten the greens of the Acacia fimbriata in the foreground and the Poa labillardieri lining the stream. The extra water these grasses get from the stream makes them look much more lush than they do in dry landscapes, where they also survive, but don't tend to thrive like this. | 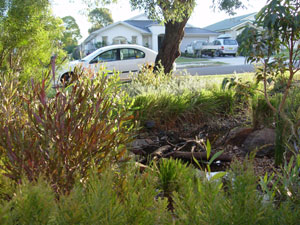 |
 |
The silver foliage of the Westringea plants contrasts beautifully with the purple leaves of the Dodonaea. The grasses are Poa labillardieri and the red flowers in the foreground belong to Grevillea rosmarinifolia. |
| The rest of the garden was planted out with the plants listed below and were purchased from the Rockdale Community Nursery which I highly recommend on three counts. It employs intellectually disabled staff, it provides a high quality of both root stock (which I prefer) and mature plants and it is remarkably cheap.
Grevilleas - 'Superb', 'Moonlight', 'Gaudi Chaudii', 'Carpet Queen', 'Honey Gem', 'Ivanhoe', 'Bronze Rambler', 'Orange Marmalade', longistyla, obtusifolia and rosmarinifolia. Acacias - longifolia, elongata and fimbriata Westrinigea - fruticosa and 'Smokey'. Banksias - sereata, integrifolia, obtusifolia and 'Giant Candles'. Anigozanthus - Red and yellow kangaroo paw. Callistemon - 'Endeavour', 'King's Park Special' and rigidus. As well as Hardenbergia violacea (which look spectacular winding amongst the Westringea), and selected varieties of Melaleucas. TOTAL COST OF PLANTS - $ 900.00 |
|
| Hardenbergia violacea ---> | 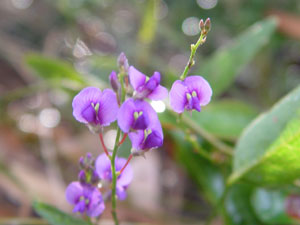 |
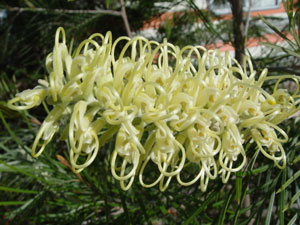 |
<--- Grevillea 'Moonlight' |
| Grevillea longistyla ---> | 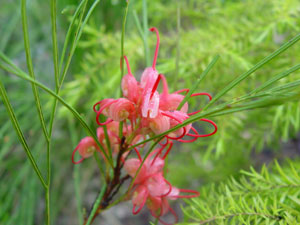 |
 |
<--- Grevillea 'Honey Gem' |
| Grevillea rosmarinifolia ---> | 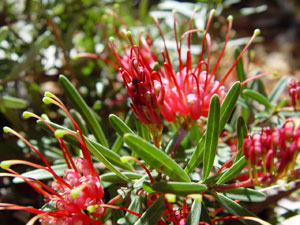 |
 |
<--- Acacia fimbriata |
| Callistemon rigidus ---> | 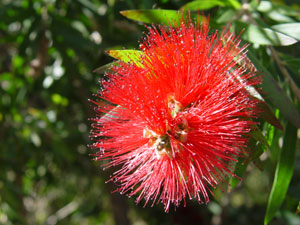 |
 |
<--- Anigothanthus spp. |
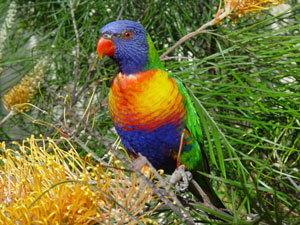
| The garden is now a low maintenance pleasure which after a year needs to be watered during the hottest periods only once or twice a month as opposed to three or four times a week for the horrid lawn. It has attracted native birds which are spectacular as can be seen in the attached photographs of scaly-breasted lorikeets, rainbow lorikeets and native miners all of which were taken in the garden sucking on my grevilleas. | 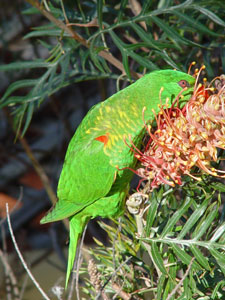 |
 |
Mulch is not a problem as after the initial two cubic of Euco mulch was laid, all I do is sweep up the leaves from the two magnificent eucalypts I have growing out the front of the property to maintain a healthy layer of mulch. I clean out the reservoir and pump monthly and use the 125 litres of water to irrigate the plants. |
| With a bit of planning, quite a lot of manual labour and some foresight, my natural low maintenance and sustainable garden is hopefully enjoyed by all who view it for about 2 grand.
Dave Smith |
 |
 |
If you would like any further details Dave is happy to be contacted on the following email address: gangof5@bigpond.net.au |
One last shot...Dave's fave view of his wonderful garden. |
 |

We Will Rebuild – Gardening After Bushfires Part 2

How We Will Re-Build
Construction of Vegie Gardens in Fire Affected Areas
Planting edible gardens directly into the soil and ash currently present in these fire-impacted areas would be, without question, a somewhat fruitless exercise. It is highly unlikely that anything would grow, due to the seriously altered nature of the soil, and the offending ash. Also, due to the potential for contamination of these soils, growing edible annuals directly into this soil may present serious health issues, for both the plants, and those who consume them! It seems then, that the answer, with regards to the question of vegie garden construction, is not to go down, but to go up!
1. When rebuilding property, it is important to minimise the negative impact of heavy machinery, building activities (including painters and brickies) and the like on the soil, and the sites of future gardens. Instead, dedicate specific 'pathways' for machinery to move along, and ensure rubble, rubbish, and debris is disposed of in a designated area and not just dumped through the garden. Ensure brickies and painters do not rinse their gear out in an area you have set aside for a garden... the soil has been through enough, lets at least give it a fighting chance!
2. Select a suitable location for your garden... for a productive patch, the more sun the better. Be realistic about size, you can also get bigger later on... this is not going to be an easy process, and our mantra here is 'from little things big things grow'. Peg or mark out this site. A patch about 1m to 1.5m wide is ideal, as it allows access to all sides of the patch.
3. Remove any large debris from the sight. Remember, much of this may be potentially nasty contaminants, so wearing protective gear and a dust mask is an excellent idea.

4. Remove ash from garden site. This is imperative, as the hydrophobic nature of the ash has the potential to turn a raised, no dig garden bed into a gigantic self watering pot, where water is unable to penetrate and move away, resulting in the untimely death of anything planted. Ash is notoriously difficult to rake out when dry (but much harder to do when it is wet), so consider using a flat blade shovel, and skimming the ash off the surface, as you would strip paint from a wall. Place this ash into a sealed receptacle (metal would be best, like a 44-gallon drum) and move to one side until a suitable disposal method can be devised (we’ll keep you posted). A small amount of ash may remain, and, if it has the appearance of icing on a cake, use a nail rake or similar to “scruff” this into the soil. Again, protective gear is a must here, especially the dust mask.
5. While you’re scruffing the soil, consider adding gypsum and organic matter (such as compost diverted from the waste stream) to the top 15cm of soil. While we are building up in raised beds, this process will help the soil below regain nutrients, structure, and much needed life. The planet will ultimately benefit, and while this can be hard work, we need to dig a little so we don’t have to dig again!
6. Layout and construct your garden edging. The minimum height for a working patch is 30cm, but the higher you can go the better, and, based on the poor quality of the soil in-situ, double the recommended (60cm plus) would be ideal. Chose sustainable, low environmental impact materials, avoiding unsustainable timbers and, if building a vegetable patch, the use of CCA Treated Pine is not recommended. Consider the use of galvanised tank surrounds, eWood panels (recycled printer cartridges), or ACQ Treated Pine. (ACQ is the Kidsafe type of Treated Pine. It is more expensive, but is treated with Copper instead of Arsenic and Chrome like standard Treated Pine... especially important to consider when you are growing food in it!)
7. Place a layer of newspaper or cardboard on the ground to a depth of 5-6mm. Ensure any glossy magazine segments are removed, as well as packing tape and staples.
8. Utilise a locally sourced straw based mulch, like pea straw or lucerne for the next layer, and lay this to a depth of about 10 – 15cm. Wet down lightly.
9. On top of this straw mulch, lay about 15cm of organic compost, with some well-rotted cow manure mixed through. Avoid using horse manure, and ensure any manure used is pulverised and aged. Wet down lightly.
10. Follow this with another layer of locally sourced straw mulch, again to a depth of 10 – 12cm. Wet down.
11. Add another layer of compost/manure mix, and don’t be afraid to 'overfill' the bed... the compost, manure and straw mulch will break down and settle, meaning the level will drop over the next week. Wet down and walk away.
12. After allowing the bed to settle for a week, commence planting out, either with seeds or seedlings. Water in these seedlings, and mulch well with a straw based mulch, to a depth of 6cm. Keep mulch well away from the stems of young plants.

Now all that is left is the on-going maintenance of the garden, a process that can be shared and enjoyed by many, as can the fruits (and veggies) of your labours.
Bushfires have ripped the heart out of so very many communities, but the strength and courage of these ordinary Australians will see towns rebuilt, livelihoods restored, and the affected begin to grow and heal. There is an old adage that states “more grows in the garden than the gardener sows”, and, in these amazing communities, with their incredible strength and resilience, the building of gardens, the sowing of seed and the arrival of green in this blackened landscape will represent and mean so much more than we could ever imagine.
We Will Rebuild – Gardening After Bushfires
Bushfires are regular event in our fire-prone country. Unfortunately, communities are sometimes devastated and, sadly, these tragic events sometimes lead to significant loss of human life, as well as loss of livestock, livelihoods, remnant bushland, wildlife and property. In true Australian spirit, fire-ravaged communities promise to rebuild, from the ground up. Part of this re-building process is, of course, the re-planting and re-greening of these affected places. From the regeneration of natural bushland, the restoration of public parks and amenity gardens, the re-establishment of community gardens and the very personal task of renewing home gardens and veggie patches, this process plays an important part in helping these stricken communities to recover.
Rising From the Ashes – The Role of Sustainable Gardening in Bushfire Recovery
It is highly likely that the restoration of gardens in fire affected areas is the last thing on the minds of most Australians at that time, and with good reason. But gardens certainly have a role to play in bushfire recovery in the longer term, on both an individual, and a community scale. Gardens have long been regarded as places of healing, of contemplation, of meditation and of remembrance. Gardens have the ability to alleviate stress, to soothe, to calm, and to rejuvenate or restore mental and emotional health. Communities will, as they rebuild, need to connect with these spaces of remembrance, reflection and quiet contemplation.
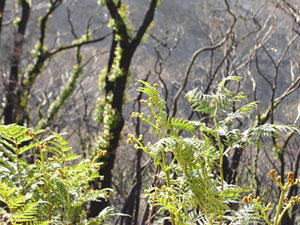
The restoration of gardens on a small scale, in the home environment, has the added benefit of a “return to normality” after a traumatic event. The first burst of seeds through the soil is symbolic, not just of a “re-birthing”, but as a sign of hope, of life rising from devastation, a sharp and welcome contrast of living green on black. As Paul Kelly, that most famous of Australian songsmiths has told us, “from little things, big things grow”, and the sowing of new gardens is a representation of hope and optimism, for individuals and entire communities.
Soil and Vegetation after fires – What to expect
The unprecedented intensity and temperature of these particular fires, coupled with long term drought and the unlikely occurrence of decent rain in the short term means that setting up gardens in affected areas may be more difficult than usual. The temperature of the bushfires reaches, at times, 1200ºc. The effect of this type of high intensity fire on property, vegetation and utilities, is readily apparent but what about the damage to the soil? After all, soil is the building block of life, the foundation of all required to nurture new life.
Soil is a living, breathing entity, teaming with essential life forms eg fungi, worms, microbes, insects and much more besides. Healthy soil is a porous mixture of minerals, air, water, organic matter, including leaf litter, tree roots, humus (broken down organic matter) and plant material. All fires, regardless of intensity, alter the structure and behaviour of soil, but, in many cases, the impacts are short lived and the surrounding ecosystems recover rapidly. However, this is not always the case as in the 2009 Victorian bushfires. In such extreme temperatures and severity of the fires, coupled with the low soil moisture content, the amount of vegetation affected and the pre- and post fire conditions, soils in the areas impacted are severely damaged, and will take some time to recover. Add to this the extreme amount of ash then present on the surface of the soil, much of which is probably contaminated, and landholders in this area face a tough slog to revegetate and commence growing again.
So, what can fire affected areas expect from their soil? The short answer is not much, at least not for a fair while. The most obvious and significant issue immediately apparent is the volume of ash coating the soil surface. In some areas, it has been reported that the ash is in excess of 30cm deep. Wood ash is, in small amounts, beneficial for gardens and soil, with the recommended dosage being a shovel full per metre square. Ash is generally utilised as a liming agent, due to it’s high alkalinity, and is also a beneficial source of potassium, calcium and magnesium. However, such large volumes of ash exceeds any recommended maximum, and the temperature of the bushfires will have rendered this ash almost completely useless.
Ash also has another unfavourable characteristic, in that, due to its small particle size, it will repel water, and thereby act as a barrier to rain and any other irrigation from permeating the soil. Known as hydrophobicity, this water repellent characteristic of ash, coupled with the existing hydrophobic nature of many drought-affected soils, leaves landholders despondent for some time.
Ash is also incredibly light, and easily shifted in light as well as gusty winds. This was been evidenced by much of Victoria on the 3rd March 2009 when extreme winds saw much of the state covered in what appeared to be fine dust. This was, in large part, due to dispersing ash from the bushfire areas. Heavy rains (although needed) would see much of the ash in these areas become a sludge, moving amoeba-like down slopes, and coming to rest in dams, waterways and low lying areas. Landholders attempting to protect water resources in these areas need to consider the construction of “ash barriers”. These are low net-like constructions erected around water ways, especially those that connect to larger water courses, or those that are used to supply water to stock. Ash generally contains a high level of potassium and as such, has the potential to turn a pristine dam into a blue-green algal nightmare. In addition water for livestock should be kept as free from ash contaminants as possible.
So, is the solution to send in machinery, and scoop away the voluminous quantities of ash to give our soil a fighting chance? And, if so where will this ash end up, as much of it, especially from built areas is potentially contaminated with all manner of nasties. Asbestos is the most obvious contaminant, but consider the less obvious “baddies”. The popularity of treated pine in gardenscapes, for edging, surrounds and play equipment has never been greater, and it’s termite-resistant properties make it an excellent choice for bush areas. However, it is these very properties that can provide contaminants in soils and ash. Treated pine, also used by the construction industry, is generally impregnated with a potent mix of copper, chromium and arsenic (CCA)….all of which then lie inherent in the ashes of damaged landscapes.
So what to do with the ash? In the short term the answer may be nothing. There is the potential for some areas to recover naturally, especially as seed and leaf litter become embedded in the ash over the following few months. Allowing as natural a recovery as possible is ideal, with the exception being areas that are to be utilized as vegetable gardens. In small areas, ash removal can be done, after taking some practical and sensible precautions. DO NOT ATTEMPT to remove any surface ash without wearing appropriate protective equipment. Long sleeved clothing, gloves and a good quality face mask are all absolutely essential. Choose a still day (not windy) and advise all others not involved in the ash clearing operation to stay well clear, particularly children, animals and those with respiratory conditions. Then carefully scrape up the cold ash (but not the soil beneath), and place in large 44-gallon drums with lids. This is probably the best short-term solution for small spaces, including residences, schools and community gardens. For larger properties... I am still waiting for the light bulb to go on. If anyone has any suggestions for this, as wild as they may seem, please let us know.
Part of the healing process that communities need is the process of re-building and re-connecting. Establishing gardens, be they private, school or community, will be part of this process of re-connecting and of finding a way to work in harmony once again with the Earth.
The Rediscovery of the Maya Nut
A good news story from New Scientist magazine, 27 May 2006

Two thousand years ago, the Mayans planted millions of nut trees in their central American rainforests and it became their staple food. Today the trees are chopped down to make room for fields of corn that produce far less food.
Just over five years ago a visiting doctor discovered the true worth of the Maya nut while working as a biologist in Guatemala. Erika Vohman, from The Equilibrium Fund, initially worked with the UN Development Programme saving traditional crops and helping Guatemalan communities become more independent.
Her first project was for a village called La Benedicion. The people were economic refugees but had recently been given land under Guatemala’s land reform program. When Erika arrived the people hadn’t started planting crops. In fact they had no houses and were hungry.
Erika taught the women about the Maya nut and that’s what the community lived on for the next three months. Today, all the families in that village collect the nuts for their daily diet and for sale. They have planted new trees too.
A grant from the Global Environment Fund allowed the village to train other villages about the Maya nut.
‘I reckon we have trained 400 to 500 villages now, maybe more; villages now train each other, so it’s hard to keep track,’ says Erika Vohman. ‘The women are thunderstruck to discover they can eat stuff that they have always just walked over.’
The curious aspect is how knowledge of the nut was lost. Erika explains that in some places it was remembered only as famine food and there are old stories about how Mexican outsiders introduced corn and the locals simply stopped eating the nut.
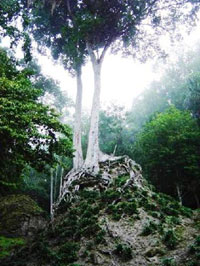
The Maya nut tree is the largest tree in the rainforest, growing up to 45 metres tall. The nuts are eaten dried as they are, or are ground into flour. In some areas, the locals are making and selling Maya nut products like cookies.
Erika Vohman now goes wherever there is extreme poverty and Maya nut trees. Unfortunately, logging and farming now means that the remaining trees are in remote areas. She is now campaigning to make the Maya nut tree a protected species, which should happen in Nicaragua by November.
‘It is hard for some people to imagine that a large tree growing in the wild is cultivated. But that is way the May nut tree is: an ancient cultivated crop.’ Erika says. ‘Hopefully, we have rediscovered it just in time.’
Erika Vohman’s work on the Maya nut was for the Equilibrium Fund. It recently won the prestigious St Andrews Prize for the Environment, which earned the Fund $50,000. The money is to be spent on new programs in Bosawas, Mosquitia Nicaragua, the Rio San Juan Biosphere Reserve on the border of Nicaragua and Costa Rica, and Montes Azules Biosphere Reserve in Chiapas, Mexico. All threatened regions with high densities of Maya Nut trees.
More Information (courtesy of Wikipedia, wikipedia.org/wiki/Brosimum_alicastrum)
Family: Moraceae (mulberry Family)
Botanic Name: Brosimum alicastrum
Common Names: Maya nut tree, also called ramon, ojoche, ujuxte or masica.
Maya Nut is extremely high in fibre, calcium, potassium, folic acid, iron, zinc, protein and vitamins A, E, C and B. The fresh seeds can be cooked and eaten or can be set out to dry in the sun to roast and eat later. Stewed the nut tastes like mashed potato, roasted it tastes like chocolate or coffee and can be prepared in numerous other dishes.
No information on growing the nut in Australia was found via web search, but if it were it would only suit tropical climates. If anyone has any experience or further information, please let SGA know.
All photos courtesy of the Equilibrium Fund website.

Tree Fern Harvesting
Most garden plants are propagated in nurseries, but some can be harvested from the bush:
- Grass trees Xanthorrhoea spp.
- Tree ferns Dicksonia spp.
- Native orchids Dendrobium, Pterostylis etc.
- Stag & Elk ferns Platycerium spp.
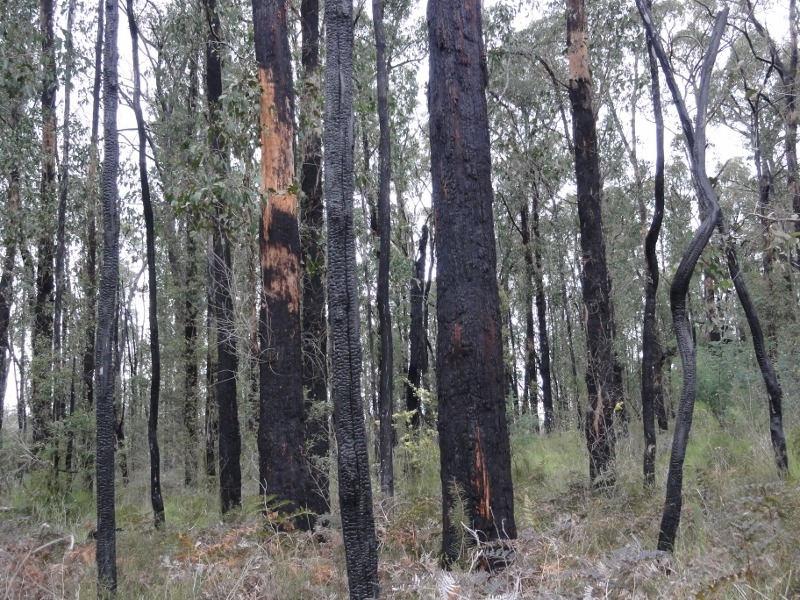
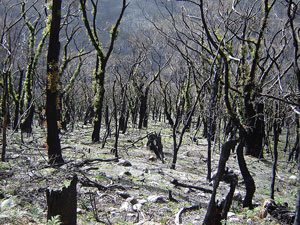
The most common source of these plants is clear-felled logging coups. Native trees are harvested along with grass trees, ferns and orchids. This process often leaves a scene of devastation. What was once a healthy forest, supporting an entire plant and animal ecosystem is reduced to burnt wasteland.
The cultivation of tree ferns is encouraged as an alternative to wild harvesting, so when you visit a nursery please ask for seed-grown or spore-grown plants and avoid adding to the destruction. Also look for a tag which shows that the tree fern has been legally harvested or grown.
Victoria
According to the Victorian Tree-Fern Management Plan harvesting of Dicksonia antarctica from either private or public land requires a permit under the Flora Fauna Guarantee Act. Key points are:
- Harvesting from private land may also require a permit from the local council.
- Sites to be harvested must be inspected by an appropriate officer.
- In all cases, the tree ferns must be tagged to show they have been legally harvested and the tag maintained up to the point of sale.
- Salvage harvesting from public land is only permitted if it complies with a Forest Coupe Plan.
The lack of a fee for tagging, along with insufficient monitoring and enforcement contribute to continuation of an illegal trade in tree ferns harvested without compliance with regulations.

Tasmania
Only Dicksonia antarctica maybe harvested under strict regulation (for details see the Tree Fern Management Plan.
Some key points are:
- Legal harvesting requires that the tree ferns are tagged right through to retail sale
- Harvesting is permitted if part of a Forest Practices Plan under certain conditions
- Harvesting should only occur as salvage from wet forests, which are to be clear felled, burnt and converted to agriculture, existing plantations or to be cleared for another land use. Given the high mortality rate (Fern Society of Vic estimates about half) of tree ferns in domestic gardens, the concept of salvage is largely redundant.
- Harvesting from private land is permitted under limited circumstances.
Most Dicksonia antarctica ferns harvested in Tasmania are transported to Victoria.
Fees for tree fern tags
Fees fund:
- Administration of the tree fern system
- Database and record keeping
- Monitoring
- Enforcement
- Research into options for sustainable tree fern harvesting.
Benefits of Tree Fern Harvesting Regulations
The tree fern regulation outlined in this plan has a number of benefits:
- Regulation is kept as simple as possible and fits into existing legislation.
- It enables an export industry to be established using a forest product, which will be salvage harvested.
- Utilises a product that is currently being wasted/destroyed in the current high level of plantation establishment.
- Landowners are likely to be paid (royalty) for the actual numbers of tree ferns harvested as each tree fern will require a tag.
- Illegal tree fern harvesting should be significantly reduced.
- Tag fees should fund the regulation and monitoring as well as a research fund which can be used to investigate sustainable tree fern harvesting to enable a long term export industry.
New South Wales
The tree ferns Dicksonia antarctica and Cyathea species are protected but may be harvested from the wild under government licence and must be tagged. Grower-produced material must also be tagged.
Banner image: GFDL 1.2, https://commons.wikimedia.org/w/index.php?curid=201008

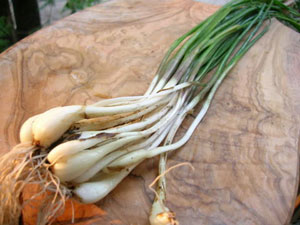
Onions

The Allium genus comprises many species. Some, such as onions, have edible leaves and bulbs and are considered to be vegetables, whilst others, such as garlic and chives, are thought of as herbs.
Onions have been cultivated since the time of ancient Egyptians and are a good winter crop for the home gardener. Whether they are called onion, spring onion, scallion or shallot (pictured below left) tends to vary in different parts of Australia.
Growing
There are many onion varieties and for best results the appropriate one needs to be chosen for different climatic zones (check the back of the seed packet). Early onions may be sown from February to May in warm northern areas of Australia.
In Sydney onions may be sown from March to May or for mid-season varieties, sow in June or July. In the cold southern areas, onions can be sown progressively from April to September.
Onions may bolt (go to seed) if they are not planted at the appropriate time of the season. They prefer to grow in a sunny, open position with well drained soil.
Onion seed can be sown in beds or punnets and transplanted when the seedlings are 10cm or so high. They should be planted 10-15cm apart in rows 20 to 30cm apart. They are laid on the ground and the roots are just covered with soil. They will right themselves in a few days.
Alternatively seeds may be sprinkled thinly into a narrow furrow, covered lightly and watered gently. They will emerge in around 2 weeks and should be thinned. A bed that was well prepared with organic matter and manure will not require further fertilising.
Harvesting
The onions will be ready to harvest in six to eight months. They are ready when the leaves dry and fall over. After they are pulled out they should be left in the sun for a few days. When the skin is quite dry the top is screwed off and the roots rubbed off. They are then stored in wire baskets or mesh bags in a cool dry place.

The early varieties such as 'Early Barletta' and 'Hunter River White' do not store as well as later varieties. Barletta may be lifted at 70 days for pickling or left to mature as a salad onion (pictured here).
'Sweet Red' is a mid season variety which stores reasonably. 'Brown Spanish' (pictured at top) keeps very well and may be planted late. 'Borettana Yellow' is a late variety which may be pickled or used as a salad onion.
Other salad onions are 'Spring Onion' or 'Shallot Bunching Onion' which can be sown directly from spring through to autumn. It is not usual to thin them as they may be harvested from eight to twelve weeks. For repeat harvesting sow more every four weeks. They may be grown in containers.
The tree onion and potato onion are grown from small sets of bulblets planted in autumn. Both form bulbs below ground, and the tree onion also forms bulbs at the top of the stem.
Pest and disease problems
Onion failure may be caused by growing a variety not suited to the climate (check the packet). Downy mildew occurs in damp conditions. It is difficult to control but a copper based spray may help.
White rot (Sclerotium cepivorum) may be a problem controlled by using fungicides at sowing time but it is almost impossible to eliminate. Crop rotation will help but, if the problem is identified, don't grow any alliums in that soil again for at least ten years. It is a major disease in south Queensland.
Onion thrip (Thrips tabaci) is a pest which also is very difficult to control if present. See our information sheet on Thrip.
Other uses
Onions are a good companion plant. Grown around the garden they repel pests. They contain sulphur which is a strong disinfectant. In the past it was used to heal gun shot wounds and during World War 1, sphagnum moss was soaked in garlic juice as a wound dressing. Garlic may prevent Peach Leaf Curl and Black Spot of Rose. It is said they should not be planted near corn or beans.
Information sources:
Yates Garden Guide, 42nd Edition, 2006, published by Harper Collins Publishers
Blazey, C., The Australian Fruit and Vegetable Garden, 2006, published by The Diggers Club.
Department of Primary Industries Queensland, 1994, Disease of Vegetable Crops.
Kirton, M., 2003, Dig - Modern Australian Gardening, published by Murdoch Books.

Mushrooms
The mushroom is no vegetable. It's the fruiting body of a fungus. At the top end of fungus food are truffles, a fruiting body that doesn't emerge from the ground as regular mushrooms and toadstools do. Truffles are attached to tree roots, as the fungus grows in association with specific plants. The most widely grown tree for truffle farming is hazelnut, as then two crops can be enjoyed for the set-up of one.
Truffles are grown successfully in Australia. In particular, there are two significant farms: Perigord Truffles of Tasmania (www.perigord.com.au) and The Wine & Truffle Co. (www.wineandtruffle.com.au) in Western Australia. Visit their websites for more insight into growing this amazingly ugly, yet amazingly delicious fungus.
Regular mushrooms are much more delicate in flavour, but still delicious and versatile. Mini mushroom farms are available from most garden centres and they produce quite a lot of mushrooms over a period of time, as long as conditions are right.
Home gardeners have always grown mushrooms but these commercial kits make it a lot easier.
And these mini farms get around the problem of seasonality (to a certain extent) and the problem of correct identification. It can be difficult telling the difference between the culinary fungus and their inedible and often poisonous relatives, toadstools.
The main fungus part or 'body' is not the mushroom itself; it's actually mycelium (my-seel-ium), which is seen as webs of hair-like filaments through soil and compost etc.
Right Conditions
The mushroom farm comes inoculated with spores. All it needs is for you to create the right conditions for mycelium growth which will soon be followed by the fruit forming. Mushrooms can be picked at any size desired - from little buttons through to flat open ones.
They require high humidity and the ideal temperature range of between 15 and 18 degrees C. Contrary to popular myth, mushrooms don't require absolute darkness. In fact, a well shaded situation with still, fresh air is best.
The farm will come with a bag of peat, which is used as a casing layer. This is spread over the top of the inoculated compost. The top layer is kept damp but not wet and within 10 to 15 days mycelium will cover the surface. The mushrooms are first seen is 'little pin heads'.
You should get a crop every 10 days or so for about three months. Flushes of mushrooms take longer in cooler weather. Eventually, no mushrooms will appear for several weeks and it can be assumed that the farm is exhausted (unless the temperature has been too cool).
There will be more detailed instructions with the mushroom farm, and it is advisable to read and follow them to get the most out of the farm.
The finished farm's compost can be dug into vegetable gardens or put into the compost bin. It's very nutritious but can be quite alkaline.
Nutrition
Mushrooms, incidentally, are rich in lots of important nutrients, especially the B group vitamins (B2, B3 and B5), making them an important food for people who don't eat meat. They are also a source of vitamin D, and potassium, copper, and other minerals.
Information source:
Yates Garden Guide, 42nd Edition, 2006, published by Harper Collins Publishers.

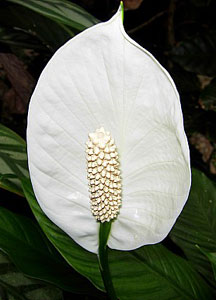
Spathiphyllum (Peace Lily)
Indoor plants are generally easy care plants that for one reason or another we kill on a regular basis. They are worth persisting with, though; because the best of them remove toxins from the air.
Often known only by its common name of Peace Lily, there are many cultivars of Spathiphyllum which are essentially quite similar. Some claim to have larger leaves, glossier leaves, longer lasting leaves, better flowers and other attributes, but apart from one that produces a green flower and another that has variegated leaves, they all produce white flowers.
Spathiphyllum is a native of South America and the Indo-Malaysian archipelago. It's a member of the Araceae or arum Family, which also includes Anthurium and Philodendron.
Care
Spathiphyllum is ideal for the darker spots in the house, as its light requirements are quite low. In fact, do not put this plant in full sunlight - it won't like it!

Most indoor plants are killed by either too much water, too little water or too much fertiliser and Spathiphyllum is no different.
Only water plants when they are drying out. The best method for testing if your indoor plant needs water is to stick your finger in the soil to check!
Do not allow the potting media to totally dry out as this can quickly cause plant wilting and death. However, there are plenty of stories of Spathiphyllum's quite remarkable ability to bounce back from being totally wilted and near-death, simply by soaking the pot in a bucket of water.
Its fertiliser requirements are quite low. Weakened solutions of liquid fertiliser (follow the instructions for indoor plants) can be applied a couple of times per year when it is actively growing.
If leaf tips start to brown, it can be a sure sign of over-fertilising (or under-watering).
Regular spraying of foliage with a mist of water will keep the humidity a bit higher around the plant, which is important in the dry conditions of airconditioned environments.
Old, dead leaves should be removed.
Pests & Diseases
Without natural predators around, all house plants can be susceptible to insect problems. Spathiphyllum can be susceptible to Mealybugs, Black Scale, and Thrips (refer to the relevant information page for control measures).
These problems may have actually begun in the greenhouse and been imported with the plant into your home. It's always a good idea to check plants for insects prior to purchase.
It can be susceptible to some fungal diseases, but if you take particular care not to over-water plants, Spathiphyllum should remain disease free.
Clean Air
Simply place desktop sized Spathiphyllum near computers, to help clean up those volatile chemicals.
Note too that Spathiphyllum is mildly toxic to humans and animals when ingested (so don't eat it!).
Image sources::
Flower Council of UK
University of Florida
Wikipedia
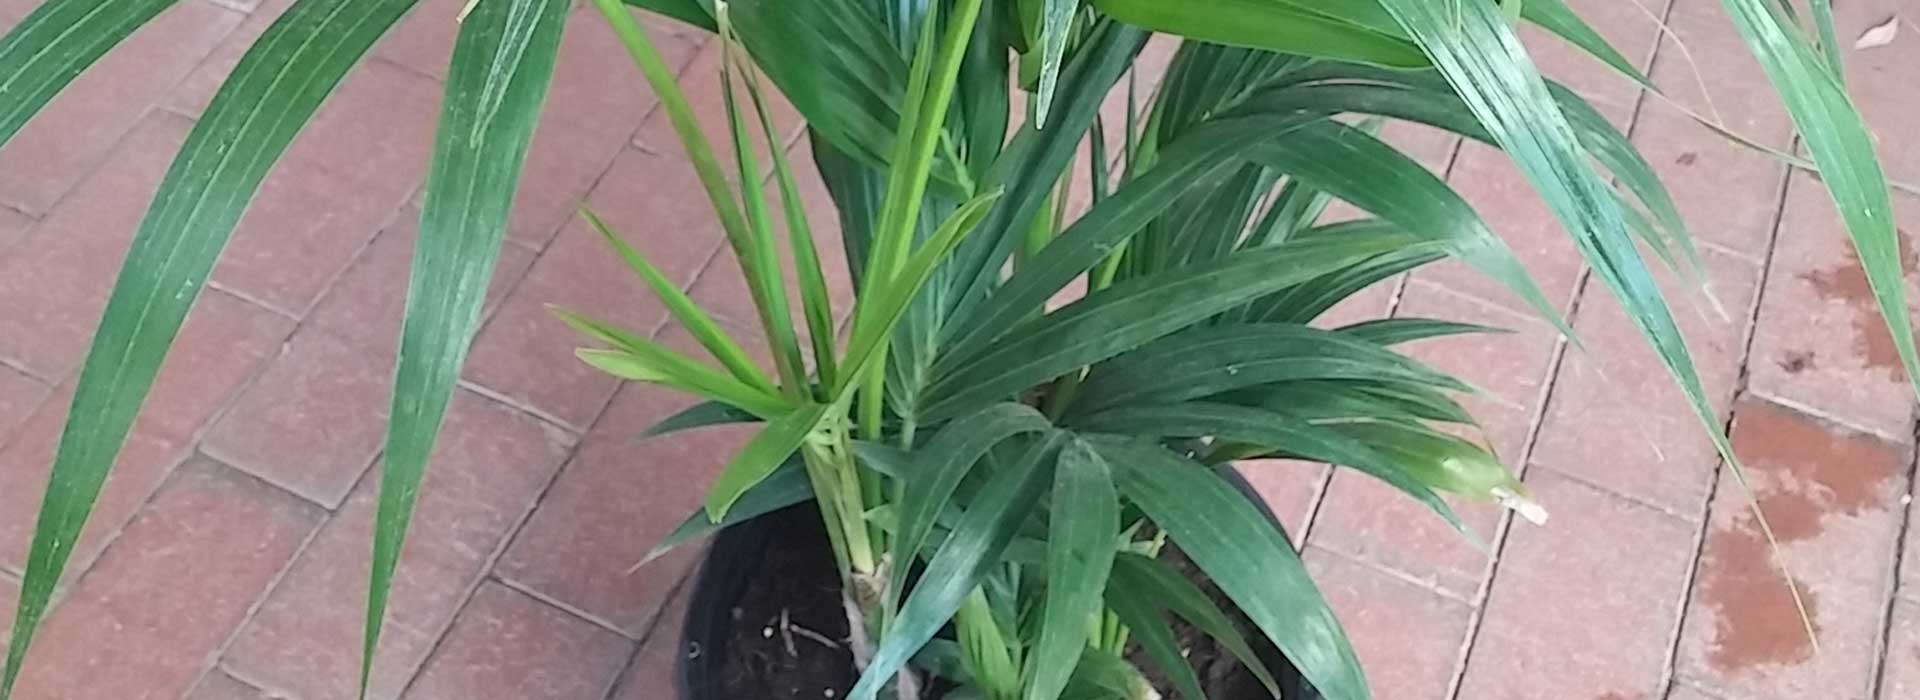
Howea forsteriana (Kentia Palm)

There are only two howeas and they are both native to Lord Howe Island. The Kentia Palm is called Thatch Palm on the island because of its use in this way.
Kentia Palms were the iconic parlour palms of the Victorian era. They are very graceful plants with a single, smooth trunk and feathery fronds on long, smooth stalks. The flowers are small and fleshy and are borne on long arching spikes which grow up under the fronds and mature as small red fruit.
They were named after a father and son, Johann Reinhold Forster and Georg Forster, naturalists who sailed on Cook's second voyage to the Pacific. The Forsters got the opportunity to sail with Cook after Joseph Banks withdrew from the expedition.
Growing conditions
Kentia palms are long lived plants. They tolerate low light, dry atmosphere and draughts - the perfect indoor plant!
Spraying with warm water may prevent the tips of the leaves from browning. They prefer a stable temperature and a minimum of 10°C. If the light is poor it is best not to have them in too warm an environment.
They should not be in bright sunlight. Kentia palms may be kept in the same pot for years as long as the potting mix contains some humus and is well drained.
Pest and disease problems
They are susceptible to Mealybugs, mites and Scale. Wolverton (see information sources) gives a recipe for a non-toxic spray:
2 teaspoons (10ml) vegetable oil
1/8 teaspoon (0.6ml) washing up liquid
230ml warm tap water
Shake vigorously in a spray bottle and spray the leaves.
Kentia Palm may succumb to Phytophthora in low light and very moist conditions.
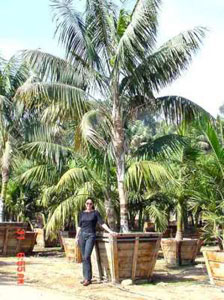
Kentia Palm grows into a substantial palm in the right conditions. This image is courtesy of www.justpalmtrees.com, a US company that buys unwanted palms from homeowners (not in Australia!)
Information sources::
500 Popular Indoor Plants for Australian Gardeners, 1999 Random House.
Wolverton, B C, 1996, Eco-friendly House Plants, Orion Publishing.
Stephanie Alexander Kitchen Garden Foundation

One of the greatest pleasures as a gardening parent is getting the children involved in gardening, especially produce gardening. Watching them devour fresh and super-nutritious vegetables straight from the garden, when they would otherwise spend half an hour pushing the same vegetables around their plate while screwing up their noses, is a delight!
With a growing epidemic of obesity amongst Australian children, encouraging a taste for fresh fruit and vegetables has to be seen as an imperative as much as a simple pleasure.
Acclaimed Australian chef Stephanie Alexander (pictured here) has taken her concern to the front-line - primary schools. The Stephanie Alexander Kitchen Garden Foundation was established with the aim of developing life-long healthier and happier eating habits in a new generation of Australians by engaging them in growing, harvesting, preparing and sharing delicious and healthy food at primary school.
Beginnings
The Kitchen Garden Program began in July 2001 at Collingwood College in inner Melbourne. Each week 120 children across Grades 3 to 6 spend forty minutes in an extensive vegetable garden (600 square metres), which they have helped design, build and maintain on the school grounds according to organic gardening principles. They also spend one and a half hours each week in a revamped home-economics kitchen preparing and sharing a wonderful variety of meals created from their produce. The project employs two part-time specialist staff; a gardener and a cook.
There are two unique factors about the Kitchen Garden at Collingwood College. The first is the intrinsic link between the garden, the kitchen and the table. The emphasis is on learning about food and about eating it. No part of the program can exist without the other. The second is the project is embedded in the curriculum. It is a compulsory part of the school's program for four years of a child's life.

Establishing the garden and equipping the kitchen cost approximately $20 000, with a proportion of goods (additional produce, equipment, professional services etc) being donated. Not to mention the numerous hours invested by talented, hard working parents and staff.
Schools Involved
There are now 27 Kitchen Garden Schools across Metropolitan and Regional Victoria, including the three Foundation schools (Collingwood College, Nunawading Primary School, and Yarrunga Primary School) and, as of January 2007, in partnership with the Department of Education, an additional 24 schools. The additional 24 schools are spread across the State of Victoria, and are under the banner of 'Go for your life' Kitchen Garden Project with Stephanie Alexander. All schools are supported by a Foundation project officer.

Program Costs
A number of grants were secured by the Foundation and Collingwood College. The annual program cost is now approximately $60,000 per annum, of which the largest item is the cost of the part-time, specialist staff.
The Foundation seeks funding for and to oversee the development of Kitchen Garden projects in primary schools across Victoria. The Foundation is a charitable organisation that relies totally on the generosity, shared vision and commitment of schools, volunteers, foundations, government, business and individuals.
If you would like to get involved, make a donation, or find out more information, visit the website at www.kitchengardenfoundation.org.au

Book
The Foundation has produced a book, Kitchen Garden Cooking with Kids, which is available through the website at www.kitchengardenfoundation.org.au. It is the story of the Kitchen Garden at Collingwood College and the recipes the children cooked from the food they grew. All proceeds go towards supporting the implementation of kitchen garden programs in our primary schools.
All images are courtesy of the Stephanie Alexander Kitchen Garden Foundation.

Mites
Mites undergo incomplete metamorphosis. They hatch from eggs into six-legged larvae. They then molt and emerge as eight-legged nymphs, which molt again into an eight-legged adult.
The most familiar pest mite is the red spider mite (also called two-spotted mite) Tetranychus urticae.
It's a serious pest of a wide range of plants, including indoor plants. Both nymphs and adults suck plant sap, mainly on the under surface of leaves but when the infestation is heavy they will be found on the upper surfaces as well. The adults are only just large enough to be seen (the photograph left is magnified)

Damage to plants is seen as rust-like, mottling or speckling of leaves (as shown here). Severe infestation will cause yellowing of leaves and eventually leaves may die and fall off. Damage can be confused with other plant pests though, so correct identification is necessary. Webbing can often be seen on leaves.
Control of Mites
Mites spread by many methods. They can crawl from plant to plant; they can be windblown, transferred by moving pots around, and even on cutting material. High temperatures during dry or humid conditions will increase mite activity.
Pesticide (miticide) resistance can be a problem, so more than one miticide is usually required. And because mites tend to congregate on the under side of leaves, contact sprays are not very effective. Miticides can target specific life stages of mites too. Avoid non-selective pesticides as these will be toxic to useful predators as well.
Sanitation in the home garden is the most effective control. Be vigilant and take action before mites become a severe infestation, by removing and destroying affected plant parts, avoid handling infested material or touching affected plants with clothing. Keep weeds in check as these can harbour mites.
Predatory Mites
These mites actually consume other mites. They prey on eggs, nymphs and adults and their use in the horticultural industry is now common place.
Banner image: Aleksey Gnilenkov from Moscow, Russia - Tetranychus urticae (Koch, 1836), CC BY 2.0, https://commons.wikimedia.org/w/index.php?curid=25421455
Stormwater Runoff
Gardening practices have an important influence on the quality of water in our streams, creeks and bays. Australian soils and waterways are generally low in nutrient content, and consequently the organisms living in our waterways have adapted to low nutrient conditions. If nutrient levels increase above normal, Australian aquatic plants and animals can be affected in several ways.
Nutrients
Sources of nutrients in our waterways related to gardening can come from:
- Plant matter (cuttings, leaves, grass clippings)
- Garden fertilisers
- Ash from fires
When it rains a certain amount of water is absorbed into your garden, but a significant amount ends up in our drains and waterways as stormwater runoff. As it moves through your garden, runoff picks up fertilisers and ash and carries plant matter into our waterways. Anything that you sweep into the gutter: leaves, grass clippings etc. washes directly into our waterways via drains. The plant matter rots to release nutrients and utilises oxygen at the same time. Fertilisers sprayed and sprinkled around your garden are picked up in a dissolved state and are readily absorbed by aquatic plants, potentially leading to excess growth and algal blooms.
Too many nutrients in a waterway, particularly nitrogen and phosphorus, can lead to:
1) Excessive Plant Growth: which can lead to the choking of waterbodies. Fluctuations in dissolved oxygen levels can affect oxygen-consuming fish. Reduction of light penetration can affect other plants. If the plants die, this can threaten the survival of planteating fish and other organisms.
2) Blue-green Algal Blooms: although this type of algae (cyanobacteria) occurs naturally in our waterways, excessive nutrients can be a major contributing factor to an outbreak. Many blue-green algae release toxins that can be fatal to wildlife, stock and domestic animals and affect human health.
Toxins
Toxins are substances, which at certain concentrations are poisonous to living things. Some toxins can accumulate hundreds or thousands of times in fish, shellfish and fish-eating birds, even though the concentration in water is not directly toxic or detectable. Toxicants can kill organisms, weaken an organism’s ability to fight disease or interfere with life cycle development and reproduction.
Sources of toxicants in stormwater related to gardening can come from:
- Garden pesticides
- Garden insecticides
- Garden herbicides
- Garden fertilisers
- Treated timbers
Pathogens
Pathogens are microscopic organisms and include viruses, bacterium, fungi and parasites. They are common and widespread with some occurring naturally in soil and water. Pathogens can cause disease in plants, animals and humans. To gauge water quality we measure levels of the bacteria E.coli as an indicator of the presence of human gut pathogens in water.
Sources of E. coli relating to gardening include:
- Garden fertilisers
- Garden manure
Sustainable Gardening Australia asks you to consider chemical alternatives or use low environmental impact chemicals, slow release fertilisers and use only the amount recommended by the manufacturer. Try not to apply these chemicals before heavy rain or on windy days.
AVOID DISPOSING OF GARDEN WASTE IN GUTTERS OR DRAINS.

Watering Methods
There are many different ways to water your garden. The most important thing is not to over or underwater. It is easy to forget to turn off a sprinkler and this can result in thousands of litres of water being wasted. Consistently over-watering plants can be just as harmful as not giving them enough water.
How do I know when to water?
A simple test is to press your finger into the soil past your first knuckle to see if it is already damp. Hand watering can be efficient and relaxing. Try to avoid watering when it’s hot and windy. Aim to water the ground close to the base of the plants and avoid watering over the leaves. Water for longer & less often to encourage a deep root system that will make your plants more drought tolerant.
Trigger Nozzles are an easy way to switch off water as you walk between different parts of the garden when hand watering. Microsprays suit flowerbeds, ferneries and sandy soils. Be aware these sprays form a fine mist, which can evaporate before reaching the soil. This can waste a lot of water.
Drip Irrigation Systems release water slowly and efficiently. They work well for larger plants, fruit trees, shrubs, gardens on steep ground and pots. You can choose a dripper that releases 2, 4 or 8L of water per hour.
Tap timers will water your garden at a regular time and automatically switch off to avoid wastage from forgetting to turn off the sprinklers! These systems will even water your garden while you are away. A rain sensor can be added to these systems to stop it watering when it is raining.
Perforated and porous hoses allow water to be applied slowly and can be moved to hard to water places. Porous hose can be buried to supply water directly to the plants’ root zone. Great for narrow beds.
During periods of water restrictions some of these watering methods may not be allowed. Be sure to always check with your local water authority if you are unsure. Click here for a list of Australian Water Links.
