Albany Woolly Bush - A Home Grown Christmas Tree
Adenanthos sericeus
As the festive season approaches, many of you may be considering a Christmas tree for the occasion. Why not break from the traditional pine tree and embrace an Australian native shrub for that special day. It’s another step we can take to adopt more sustainable gardening practices. According to Wikipedia, in the US around 33 million trees are chopped down for Christmas celebrations. Loosely based on that ratio, that’s possibly about 2 million trees felled in Australia each year. So, why not make a more sustainable choice and purchase an Australian native instead. A plant that can be planted in a pot for Christmas and then replanted in the ground after the festive season.
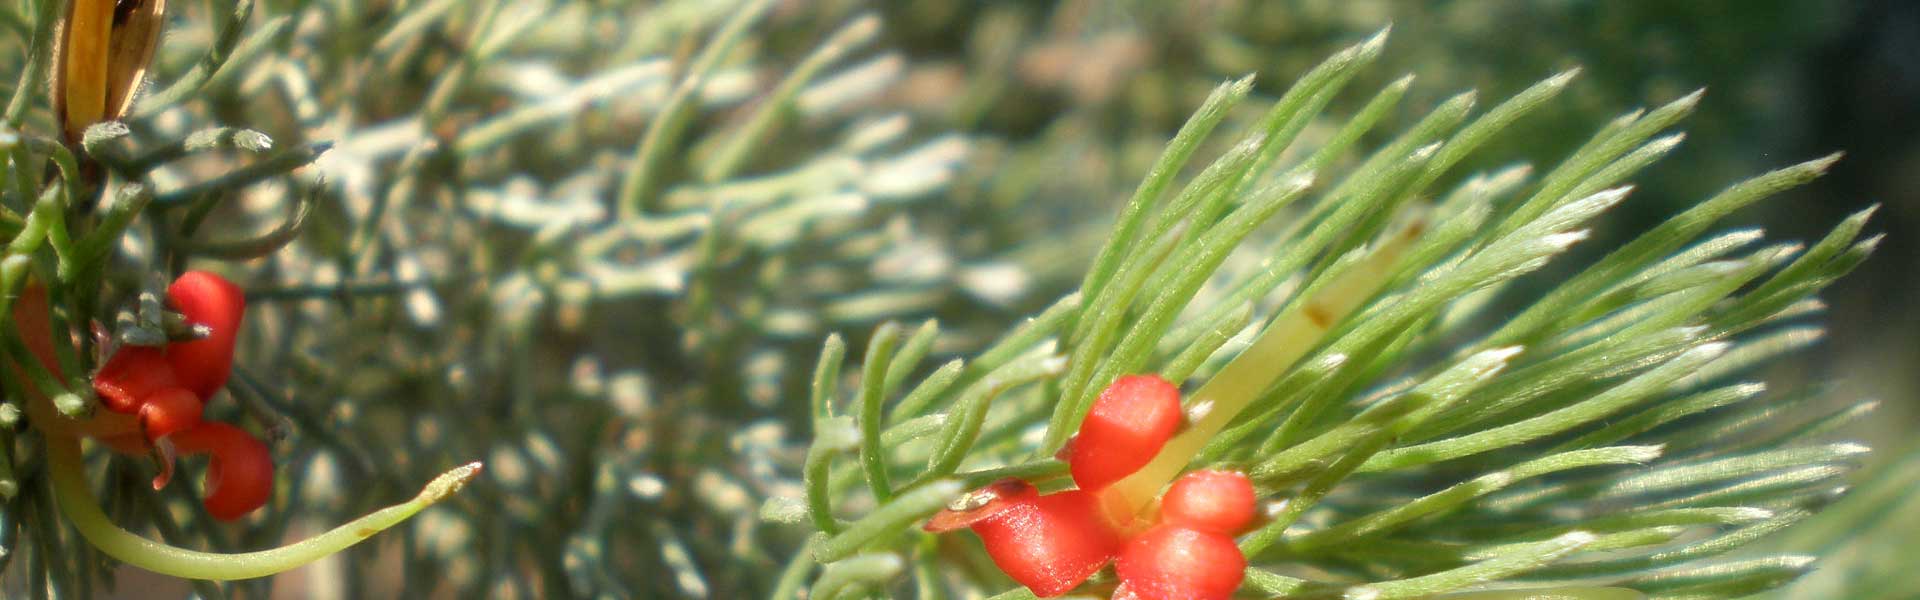
We’d like to suggest an Adenanthos sericeus, more commonly known as Albany Woolly Bush. This Western Australian native is known for its luminous silver green foliage which is soft to touch and its small but vivid red flowers. Woolly Bush has a compact habit, so it requires very little pruning except for general maintenance. This combination makes it a perfect choice for a Christmas tree. It can also be shaped into a more traditional form of Christmas tree.
A few tips on how to care for them if you keep them in a pot:

- Use good quality free draining potting mix - three parts of general purpose mix add two parts of washed sand, which will create a free-draining mix.
- When you plant, add about a teaspoon of controlled-release fertiliser, specially formulated for natives. Placing this at root level will be the most efficient for feeding the plants.
- It can stay indoors in a well lit room for a maximum of two weeks.
- Water it once or twice a week depending on the room. Test the moisture content in the soil with your finger.
- It should only stay in the pot for a maximum of one year. Repot to a larger pot or plant out after that.
- When replanting into the ground, give the plant a dose of seasol to help settle the roots.
Adenanthos sericeus can grow up to 5 metres in height and 2 metres in width in its optimum growing conditions, which is Western Australia. In other areas of Australia it may not grow to that size. It can be used as an informal screen, a large planter, cut foliage or a windbreak and its unique foliage and soft habit makes it a great addition to most gardens.
Vegetable Patch From Scratch: Part 3
Despite the few very hot days we experienced in Melbourne the vegetable garden survived. I used shade cloth during the day and by the evening the plants sprang back from their limpness during the hot day.
I mentioned in the last chapter the beans were looking yellow. As the weather warmed up, the beans turned green and thrived. So have the beetroot.
 I’ve been making many stir fries with Silverbeet and crunchy salads with the lettuce and tomatoes. It’s definitely been really rewarding being able to cook delicious dishes with the produce grown in vegetable garden.
I’m pleased to report that the vegetable garden performed really well without any major issues with pests (besides snails – which I remedied with iron based snail pellets).
As we’re approaching autumn, I’ll be preparing and rotating the beds for the autumn/winter crop. What I’ve also done the last week or so is removing plants in other areas of the garden to prepare the beds for fruit trees. At this stage, I’m planning to plant a couple of fig trees and a nectarine and peach tree. That would keep the birds happy. I do have an apricot tree that gave us plenty of fruit this year. We gave away many to friends, family and neighbours. We were left with about 4.5kg worth of apricot which we made into jam – delicious!
My aim this year is to transform the back garden into more of a produce based garden. Let’s see how I go.
Photos:
Mei Yin Cheong
Vegetable Patch From Scratch: Part 2
 Chapter 2: Growing quickly
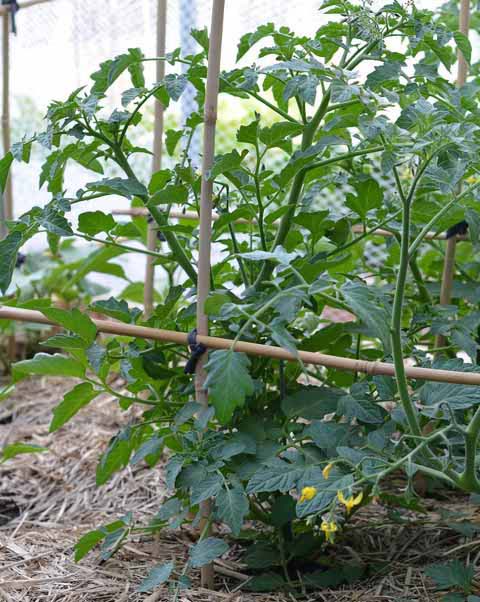
It’s pretty impressive how quickly the vegetables are growing. The lettuces have almost filled up the bed they’re in. The tomatoes are definitely reaching for the sky and beetroot leaves look sumptuously red and alive!
The leaves of beans though are looking a little yellow. I think it could be a combination of reasons – cool temperature and they’re not getting enough nutrients. I’ll be giving them some fertiliser and see whether that improves.
I noticed traces of snails. They manage to wriggle themselves through the netting I’ve put over the bed and enjoyed artichoke leaves for supper. I’m going to try pouring a few bowls of beer around the vegetable beds to steer them away from the vegetables. I’ve been told by a veteran vegetable gardener that bran is also an effective deterrent. Copper is another sustainable method to manage snail infestation in a vegetable garden.
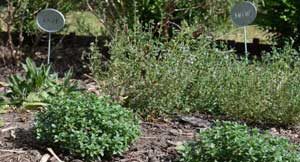
My herb garden around the corner is growing well too. Thyme, rosemary and sage are thriving. It’s immensely satisfying to cut a handful of these herbs to create a bouquet of garnish recently when I cooked Julia Child’s beef bourguignon. Not sure if she would have approved the herbs used. Nevertheless, the dish turned out splendidly.
Until the next chapter, have fun gardening and have a joyous Christmas.
Vegetable Patch from Scratch
This is the first in a series of 3 contributed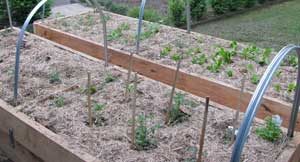 Mei Yin, when she was a novice vegie gardener, as she created her own productive patch and grew at home for the first time.
Chapter 1: How it all started
I've wanted to have a vegetable garden for a long time, but didn't quite have the right spot for it. One day my neighbour came around and told me that the original owner of the house (in the late 60s) had a very productive vegetable garden. We had an eight person spa in that location at the time.
The thought of being self sustaining, being able to introduce the joy of gardening to my young toddler daughter and sharing the produce with neighbours eventually won me over.
With my husband’s help we removed the spa, (he sold the spa on Ebay), filled in the hole with clean fill and placed two raised timber vegetable beds where the spa once sat. I partitioned each bed in the middle, which gave me four beds. Perfect for practicing crop rotation!.
Vegetables I chose to plant are:
- Tomatoes
- Beans
- Eggplant
- Beetroot
- Artichoke
- Mini pumpkin
- Silverbeet
- Lettuce
Around the edge of the vegetable beds, I included insect repellent herbs including Feverfew, Tansy and Pyrethrum. I’m hoping Rue will keep the friendly neighbourhood cats from being too comfortable in the vegetable beds.
It took us a day on the weekend to put the sleepers together and fill them up with vegetable garden soil mix. And another half a day to plant the seedlings.
Now that it’s all done…I can’t wait to see all the seedlings mature. I’ll update you in the next chapter.
There is so much information out there among gardeners. We can all learn from each other. I’ll be keen to hear from anyone about their vegetable and ornamental gardens. I think SGA is keen to hear from all subscribers around the country on what they've done in their garden – big and small. Let us start sharing our stories. I made a start. Look forward to reading other subscribers’ gardening stories.
If you would like to tell us your gardening story, go to https://www.sgaonline.org.au/?page_id=4859 for our submission guidelines and get writing.
