Yackandandah Community Garden is blooming marvellous
Yackandandah is an historic country town tucked away in foothills of the Stanley State Forest in north east Victoria. It is a warm place with a well-connected community and a ‘can-do’ attitude that sees this little town punching well above its weight in making things happen. So when this little town decided they wanted a community garden, you just knew it was going to happen….somehow.
In mid- 2012, SGA and the Helen Macpherson Smith Trust were 12 months from completing their Community Based Gardening Project in 2009 Bushfire areas of Victoria. Four gardens were already underway and the project was running to plan. Through good management, the project was also running significantly under budget. A decision was made to build another community garden if a community could be found who were ready, willing and passionate about taking this kind of project on. Building a full-size community garden from scratch is not for the faint hearted or the uncommitted. But when a community like Yackandandah puts their hands up and seizes the opportunity to fulfil a long held dream, the only way is forward. So in early 2013, Yackandandah, SGA and the Helen Macpherson Smith Trust started to work on the Yackandandah Community Garden project.
 In order to support the community and to be realistic about the time frames, the project closing date was extended by 6 months to 31st December 2013. A local facilitator, Lee-Anne Benson, was appointed; a working group was formed, led by the amazing people from the Yackandandah Community Education Network (YCEN) and members of the broader Yackandandah community put up their hands to be part of this wonderful opportunity for the town.
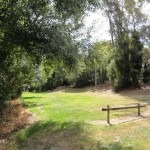 Faced with difficulties in locating a suitable site for the community garden, Indigo Shire stepped in and offered a narrow, disused section of town land, between Commissioners Creek and the Yackandandah swimming pool. It is a pretty area, close to the main street with enormous potential for a community garden. In fact the same site had been used as a market garden from the gold rush era right up to the early 20th century. The site itself presented some difficulties as it is steeply sloped on one side and the opposite side is prone to flooding when the creek is in full flow. However everyone involved felt that the risks could be lessened and managed and that the advantages of the site outweighed any difficulties it presented.
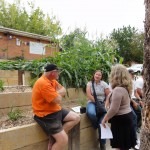
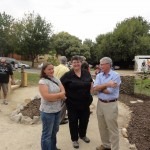 Tabitha Barclay a talented garden designer and land management expert from the Toolangi & Castella Community Garden worked with the community to devise a garden plan that made practical use of the site limitations. She is pictured here with Dr. Phil Moors, HMST Trust and Judy Davis, YCEN.
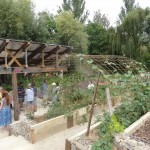
 Terracing of garden beds was included to reduce the negative impact of the sloping sections. Naturally elevated areas on the site provided opportunities to ensure garden infrastructure, such as the equipment shed and water tanks, could be placed on these plateaus to protect them from flooding. Wide paths were included and levelling planned so that less able members of the community could be sure of walking around the entire garden.
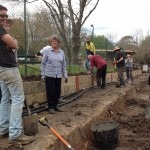
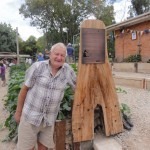
Of course, a plan’s a plan and all that, but the hard work starts when everyone gets out to build it. And this little community pulled out all the stops. Led by some amazing community members and with great assistance from the Beechworth Correctional Centre, for months on end, this little community, scraped and dug, weeded and pulled, built and formed, planted and watered, laughed and encouraged until finally their magnificent garden was built. Through the cold and rain of winter, followed by the searing heat of the summer months, this tight knit community pulled together and completed their project. Local businesses and traders pitched in to give a helping hand; goods were donated and found items recycled. No idea was a bad idea and if you didn’t feel like you could be part of the physical work, then a pot of soup, a platter of sandwiches, a plate of cake or a hot or cold drink was always welcome.
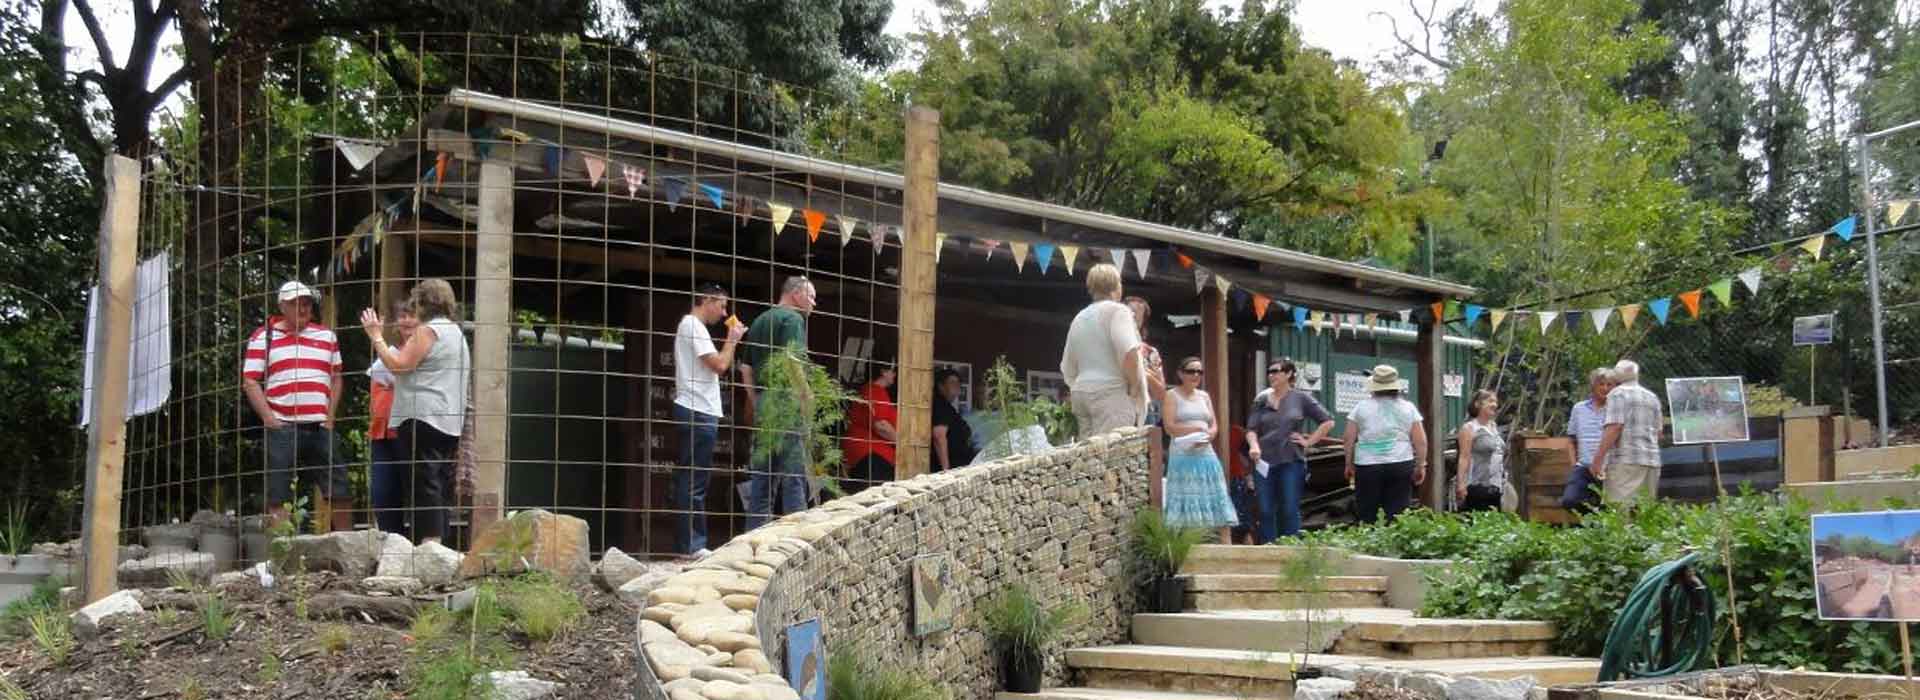
 And so in March this year, the Yackandandah Community Garden was officially launched with around 100 people turning out to be part of the event, including representatives from SGA and the Helen Macpherson Smith Trust. Community members and visitors from far and wide, including Canberra and Melbourne, travelled to be part of this lovely day. After the speeches, everyone was invited to share in a magnificent afternoon tea in the garden. And the party went on well into the afternoon.
Yackandandah is in Jiatmathang country, with the Aboriginal meaning of Yackandandah believed to be, “one boulder on top of another at the junction of two creeks”. The community garden included this image in the graphic used on the garden signage. The sign welcomes everyone to the community garden as they believe that this garden belongs to the whole community and not just the gardeners amongst them.
If you want to be part of this community garden, you can sign up by emailing YackandandahCG@gmail.com. You don’t even have to be a Yackandandah resident to join; occasional visitors to the town or just about anyone who would like to support this small community with big dreams can become a garden member.
Yackandandah community and gardeners, you can be proud of yourselves!
SGA Community Gardens Project successfully completed
 In February 2009, bushfires of unprecedented size and ferocity swept across regional Victoria. During the worst days of the firestorms, 173 people lost their lives and over 2,000 homes were destroyed. In all, more than 50 townships in remote rural and regional areas of Victoria were affected. Assistance of every kind came from across Australia as a nation sought to help those affected by the bushfires. Community leaders emerged who worked long and selflessly to assist in the rebuilding process. Neighbour helped neighbour, friendships were forged, acquaintances became connected and together the community started to recover. It was in this spirit of community renewal that the Community Based Gardening Project was conceived.Read more
Bee Alert and Bee Very Alarmed!
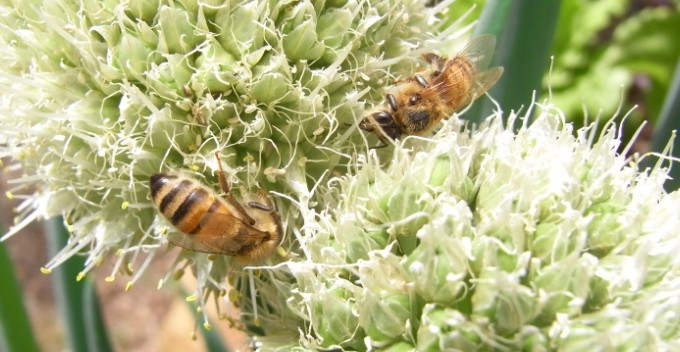
Some good news from the European Union this week where a two year restriction on the use of neonicotinoid chemicals, the world’s most used insecticide has been introduced to take effect from 1st December 2013. This decision is a result of strong community lobbying based on increasing scientific evidence that links the use of neonicotinoid chemicals to the serious decline in bee populations across North America and Europe.Read more
Toolangi & Castella Community Garden
 Amidst the towering Mountain Ash forests of the Kinglake Ranges in Victoria, sit the two small conjoined communities of Toolangi & Castella. In 2009, the Black Saturday Bush Fires swept unrelentingly across this mountainside, with many properties and lives lost. But amid this devastation and loss the resilience of a united community shone through. And so three years later, on a perfect late spring morning in November, locals and guests gathered to celebrate the opening of not one, but four separate community driven projects that are all testimony to the strength and passion of the people of this district for their mountain home. Read more
Jindivick Community Garden Open Day

Jindivick Community Garden, at Kydd Parke Reserve in Jindivick is participating in West Gippsland’s Festival of Gardens – Gardivalia, for the first time over the weekends of October 20th/21st and 27th/28th. The garden is open each day from 10am to 4pm.
This is a new and very picturesque community garden. It has been built entirely by the community and has been designed to be a shared community space for gardeners and non-gardeners alike. The majority of the plants in the garden are edible including fruit producing trees, scented shrubs and vegetables grown in raised garden beds. But this is also a memorial garden, with many local people choosing to donate a tree to the garden in honour of a loved family member or friend.
Read more
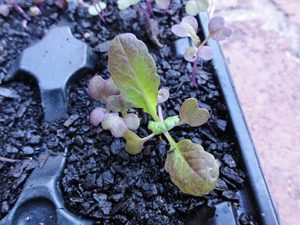
Growing Herbs, Vegetables & Flowering Annuals from Seed
Growing from seed is fun and rewarding as well as being very cost effective. You can access a much broader variety of plants than those that are generally available as seedlings in nurseries. Commercial growers simply cannot afford to produce small volumes of a wide range plants profitably and so concentrate on the mass production of familiar and ‘safe’ options. So if you want to grow heritage plants or rare and unusual varieties, particularly of vegetables, then you need to grow from seed. Nowadays it is relatively easy to obtain high quality seeds through nurseries or direct from seed companies through mail order. (Note that there are quarantine restrictions on seed coming into Australia from overseas).
Seed Provenance
One thing to consider when ordering seeds online is to identify the provenance or original source of those seeds. If say, you are purchasing seeds from a seed company in Queensland who produce their own seed, then potentially those seeds will have performed well in that environment. But will they necessarily perform as well in say, the foothills of the Victorian Alps? As a rule of thumb you should try to source seed from an area as close to your own growing conditions as possible. Some seed companies source seed from other growers so, if in doubt, check with the seed company.
An excellent way to source locally produced seed is to become part of the Seed Savers Network. This is an organisation that encourages members to grow, preserve, collect and exchange seed with other gardeners in the same area. For further information on the Seed Savers Network visit www.seedsavers.net
Seed Viability
When you are purchasing seed it is important to check the Use By date on the seed pack. Do not be tempted to buy cheap out-of-date seeds. Some of this older seed may germinate but it will probably give a disappointing result and the plants produced will be weak and not very good performers. Seed viability (its capacity to grow and develop) can be variable and, whilst some seed will germinate after being stored for hundreds of years, most seed will only last a season or two. In my experience, the smaller the seed the shorter its period of viability, so obtaining fresh seed is critical for a successful outcome.
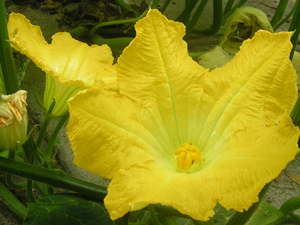 A good reference for this is the ‘Seedsaver’s Handbook’, by Michel & Jude Fanton, the founders of the Australian Seedsavers Network. It lists the viability of many edible plants as well as describing in great detail how you can save your own seed. Importantly it also teaches you how to preserve true-to-type varieties by avoiding cross pollination with different varieties of the same plant. Eg many plants in the cucurbit family (pumpkin, zucchini, marrow, cucumber, melons etc) must be prevented from cross pollinating with close varieties of their type. For example Pumpkin X will cross with a closely planted Pumpkin Y but their seeds will produce hybrids that may lack the desirable characteristics of either one or both of the parent plans.
A simple way to avoid this cross pollination is to only plant and grow one named variety of that plant each season. And check what your neighbour is growing on the other side of the garden fence as well.
Germination Rate
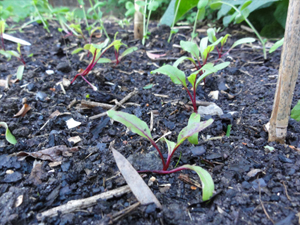
Some seed companies put a Germination Rate (GR) on the seed packet eg GR-85%. This means that for every 100 seeds, on average 85 will grow successfully. Seed packets generally contain a generous amount of seed, ample for any home gardener so the germination rate is probably not critical. But to avoid disappointment, it is a good idea to sow more than you want. For example, when sowing peas or beans you can put two seeds in every hole at the designated spacing. When the plants are about 15cm high, you can choose to remove the weaker of the plants where both seeds have germinated successfully. In other spots, only one seed may have germinated but the second seed will ensure that you won’t have any frustrating gaps.
Don’t give up on seeds too quickly. Most seeds start to pop up above soil level between 5 and 21 days after planting. But some seeds can take considerably longer so check the seed packet for accurate information.
Direct Sowing
 Whilst it can be advantageous to sow seed in seed trays, in order to control heat and water requirements for germination, some seed is best sown directly in garden beds. For example, legumes (peas and beans) as well as root vegetables do not transplant well and should always be sown where they are to grow.
One way to get around this is to use biodegradable pots eg toilet roll inserts, egg cartons or rolled up envelopes and sow individual seeds in these. Once conditions are right and the emergent seedlings are strong enough, soak the ‘pots’ well in water and then plant out in the garden. This method avoids disturbing the plant roots which is the reason so many seedlings fail at the transplant stage.
An early crop of summer beans, whether bush or climbing, can be produced by sowing seeds this way in a greenhouse, with the extra warmth tricking the seed into germinating. Once the seeds have germinated, they will grow on even when planted into cold weather.
Pre-Soaking of Seeds
One way to hasten germination, and also to see whether some particular seed is viable, is to pre-soak the seeds. Some sources recommend soaking seeds in water for a couple of hours before planting. Others recommend overnight soaking or even for a couple of days. In my experience, when germinating all types of beans, peas and zucchini (large seeds) seeds, soaking them in water or on moist kitchen paper for several days before planting is beneficial. For an extra ‘kick-along’ place the soaking seeds inside a clear sealed container and place on a warm windowsill. This will ensure that the germinating seedlings are supplied with moisture, light and heat.
Check seeds daily to make sure they are evenly moist and in case of any developing mould. If mould appears, wash seeds gently and returning seeds to the container with new, clean and moist paper will usually avert ongoing problems.
This method can also work well with carrot seed. Soak in tepid water for at least 2 days, changing water daily. Planting seed with a wooden skewer (a dibbler) can help – wet seed is difficult to place!
If any seeds fail to germinate when most others have, then they are not planted.
Planting Depth
When planting seeds they should be planted at a depth double their own size. Fine seed should be sprinkled lightly on the soil, or on the surface of the seedling mix, before a fine layer of soil or seed raising mix is cast across them. A sieve is handy to ensure no large soil particles inhibit germination of fine seed.
Mulch
Do not mulch newly sown seeds as weak seedlings may not be able to penetrate the mulch layer. In some cases a ‘scatter mulch’, eg fine straw, can be used to help retain soil surface moisture. A down side with any mulch is that it provides shelter for pests such as earwigs and millipedes that can decimate emerging seedlings over night.
Protection of Young Seedlings
As well as earwigs and millipedes, slugs and snails love tender young seedlings. To deter snails and slugs you could try sprinkling coffee grounds, collected from your friendly neighbourhood barista, around your seedlings. Or spread dried and crushed egg shells in the garden bed. Beer traps are reputedly delighted to drink themselves to death in beer traps. Or you could use environmentally friendly iron-based snail bait.
Recycled plastic milk or soft drink bottles can be used as guards for emerging seedlings. Earwigs are trickier – try enticing them with squeezed grapefruit halves as little houses that they will harbour in. They also like to hide in crushed newspaper drizzled with fishy oil, stuffed inside plastic plant pots. Empty the ‘traps daily’ by disposing of the contents in a manner of your choosing!
Conditions for Germination
 Seeds will generally germinate in response to a combination of natural stimuli. The most critical of these are moisture and temperature.
Moisture is generally easy for the home gardener to control with regular gentle watering (fine mist) and by choosing a free draining growing medium (in a seed tray or a garden bed) so that the seed does not become flooded. A simple soft-watering device can be made by using a heated metal skewer to poke holes in a soft drink bottle lid or a fine mist spray bottle.
Overwatering or water logged soil may lead to ‘damping off’, a fungal condition that leads to the collapse of young seedlings. Overcrowding of seedlings may also be a contributing factor, as can bad equipment hygiene. Always clean and sterilise containers before using, and always use fresh potting media (not recycled).
Temperature is a little harder to manage if you are not a commercial grower. The seeds of summer plants need night temperatures to be above 15°c for successful germination. A heat bed may be used to get summer seeds to germinate or they can be kept inside in a warm position until they have germinated. Other useful places to access heat are on top of an outdoor hot water system.
Winter vegetable seeds need night temperatures below 15°c to germinate. A prolonged summer will make it difficult to obtain these cold temperatures so any brief ‘cold snap’ should be taken advantage of. Once the germination process has started, a slight raise in temperature will not affect the plants growth.
Germination Period
Seeds generally germinate somewhere between 7 and 21 days after sowing. During this period it is important to keep the soil moist but not wet. If the soil dries out then the seeds will probably fail to germinate. The first two leaves of the seedling that appear are not ‘true’ leaves but are called cotyledons. They are most often different in appearance from the subsequent ‘true’ leaves. When the true leaves appear it is an indication that the seed has successfully germinated and post embryonic growth has commenced. If the true leaves take too long to appear the seed may become exhausted and fail to progress so it is vital to maintain the optimum germination conditions until this critical stage has passed.
Transplanting Seedlings
 If the seeds are sown in seed trays, they should be transplanted when they are approximately 15cm in height when they should be able to resist transplant shock. Be careful not to damage the fragile roots when transplanting as this may cause the seedling to fail. Space or thin out seedlings to the appropriate distance as suggested on the packet so that they have ample room to grow. Water in gently after transplanting with a diluted seaweed emulsion. As they grow continue to provide regular water and a liquid fertiliser as per the seedlings’ needs.
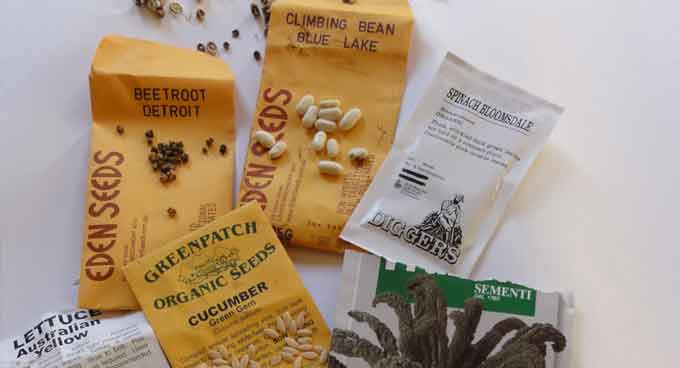
Mail Order Seed Companies
Mail Order Seed Companies that supply heritage, open-pollinated or non-hybrid seeds are listed below. Some seeds may be treated with a fungicide so please read the description carefully, or contact the seed companies directly, if you are looking for untreated and organic seeds.
The Diggers Club: www.diggers.com.au
The Lost Seed: www.thelostseed.com.au
Green Patch Seeds: www.greenpatchseeds.com.au
Goodman Seeds: www.goodmanseeds.com.au
Eden Seeds: www.edenseeds.com.au
The Italian Gardener: www.theitaliangardener.com.au
New Gippsland Seeds and Bulbs: www.newgipps.com.au
 Many new plant cultivars that have been developed over the past decade may be subject to Plant Breeders Rights (PBR). PBR is effectively a plant patent. You may propagate these plants for your own use but NOT for resale unless you pay a royalty to the PBR holder. If in doubt, check the original plant label or seed packet or look for the PBR symbol.
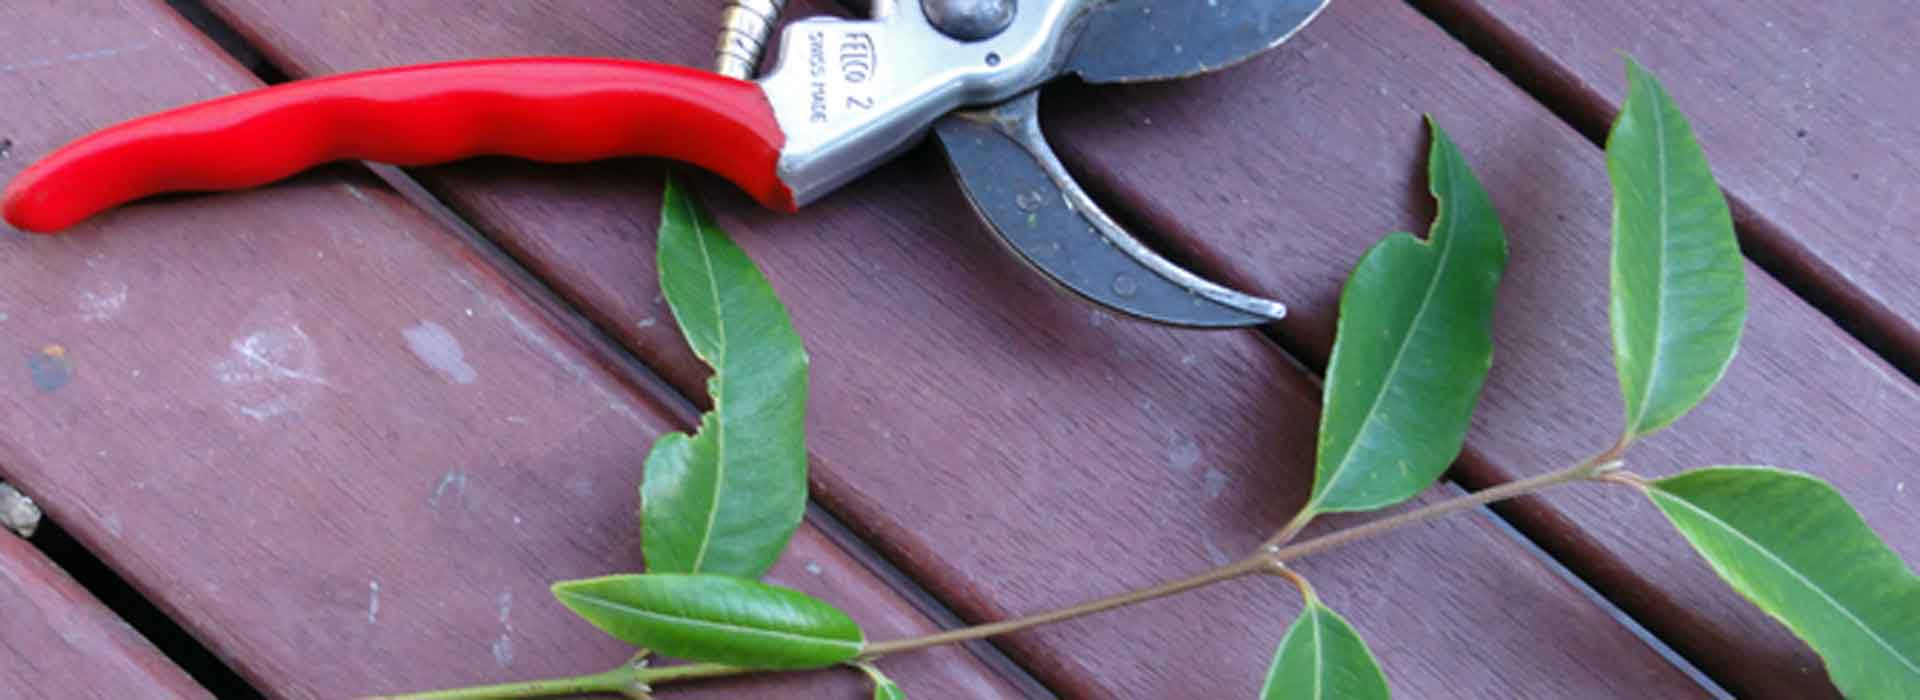
Plant Propagation from Cuttings
How often do we see a lovely shrub or perennial in a friend’s garden and just wish we had one like it? And with a little skill, ingenuity AND your friend’s permission, there’s no reason why you can’t have one or more the same. A word of caution here though, to avoid spreading weeds make sure that you don’t propagate anything you can’t identify, and ALWAYS ask permission. It is very frustrating for proud gardeners with attractive shrubs tumbling over their garden fence to find pieces constantly being ‘ripped’ off by passing walkers. The plant will suffer from needless brutalisation and the ‘cuttings’ may not actually survive the damage of being torn from the parent plant. So just ask!
Community Gardens - 12 months on, the journey continues!
 It is nice to reflect on the year that has been and to acknowledge with a sense of accomplishment a year of hard work and many milestones. And I’m not simply speaking of SGA where we lately celebrated our move into our enlarged, refurbished offices. Rather I am reflecting in a broader sense on one of our current projects - Community Gardens Victorian Bushfire Affected Areas.
To recap, SGA was fortunate in mid-2010 to secure funding from the Victorian based, philanthropic trust, the Helen Macpherson Smith Trust. Following the tragedy of the 2009 Victorian bushfires, the trust set up a $2m trust fund to assist in the restoration of community life in rural townships affected by the fires.
Jindivick Community Garden

In the words of that doggedly determined and ever quotable Sir Winston Churchill, THIS is ‘the end of the beginning’. It is the end of winter and, even more importantly, it is the end of the planning stage for the new Jindivick Community Garden.
Over the past 6 months, this small but energetic community have been working with Sustainable Gardening Australia, to develop the design for their community garden. And now, with the winter behind them, they are ready to build. And what a beautiful garden they will be building. It will reflect the identity and values of the people who live in this Gippsland idyll and who have brought to this project a wonderful sense of community, clarity of vision and a generosity of spirit that is reflected in the final the garden design.

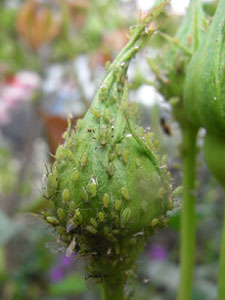
Aphids (Inside a Colony)
Being an enthusiastic gardener, I welcome spring with open arms and can't wait to get out into the garden to watch it come to life. And it's not just the plants I'm watching, it's the animals, birds, lizards and insects that are reappearing after their winter absence. They arrive slowly at first but as the days get warmer, they increase in numbers until I have my very own noisy, bustling, thriving little Garden of Eden. And then the crash! It went previously un-noticed but is now widely apparent... the APHIDS have arrived!
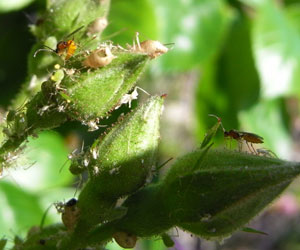
Aphids cause such distress to home gardeners, particularly to rose and vegetable growers. They lovingly watch their plants come into leaf and bud each spring when suddenly there's the tell tale signs of aphid activity. Aphid numbers start small and look manageable, initially appearing to be only one or two little green nymphs. But rapidly population numbers increase until all of a sudden the plants' buds and many young leaves, are covered in a mass of gyrating, green bodies in a frenzy of sap sucking as if their very lives depended on it. And littered around them are untidy white flecks and bizarre hollow creamy balls. And when you touch the buds they have an unpleasant stickiness that is repellent. It's an INFESTATION and can be incredibly distressing.
Here's where I out myself... over many years of gardening I've become a bit of a bug-ophile! It's not something I admit to often, and my family is concerned that I'm turning into 'one of those people', but insects have become a secret fascination of mine. Not in an unpleasant 'stick-pins-into-them-and-mount-them' way, but more in a 'stand-in-the-garden-and-observe-them' way. So over the years I've furtively managed to observe and get some real insights into the machinations of an aphid colony.
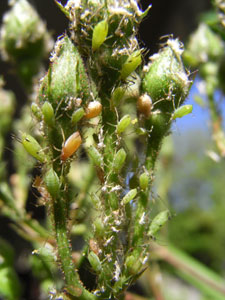
Firstly, green peach aphids (Myzus persicae) are incredibly efficient breeders. For most of the year the colony is predominantly female. These female aphids only give birth to aphid daughters and there's nary a male aphid in sight! (This is called parthenogenesis or asexual reproduction and is where most people's eyes start to glaze over and they shuffle off... silently!) The young female aphids are exact clones of their mothers and can start to reproduce within 5 days of birth. Effectively each aphid colony consists of a cloned population of daughters, mothers and grandmothers all reproducing and all drawing sap from the host plant. And that's about all they do - breed and feed! And as they grow from little nymphs to, eventually, grandmothers they moult or shed their skins, hence the white flecks seen dotted around the aphid colony. Hopeless cleaners, these girls!
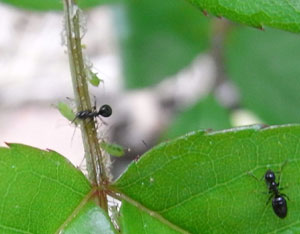
But not everything goes their way. There are plenty of garden predators stomping about (relatively speaking) just waiting to feed on succulent aphid flesh. (This is where the remainder of my audience leaves the building!) Ants are incredibly sophisticated and will 'herd', 'farm' and even 'milk' aphids in order to obtain the honeydew they secrete. This honeydew is the stickiness you feel on your plant when aphids abound. It's just amazing! But wait... there's more!
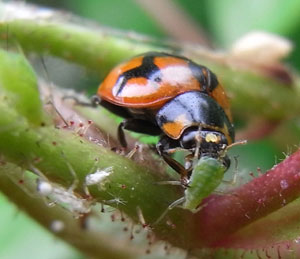
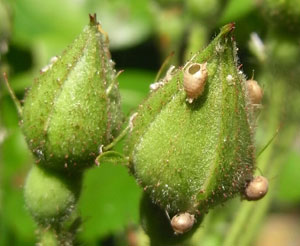
Ladybirds, praying mantis and lacewings just devour aphids. And as long as you have a chemical free garden, all of these voracious predators will thrive. Even more vicious are the parasitic wasps. Note, this bit here is 'R' rated and not suitable for little 'uns! Parasitic wasps fly in and lay their eggs into live aphids. Then emerging larvae eat the unfortunate aphid from the inside out effectively mummifying it. The mummified aphids are easily recognisable as the creamy balls you see in the midst of the aphid colony. Once the larvae are ready to pupate, they cut a neat little hole in the shell of the hollowed aphid and pop out to fly about and repeat the cycle on some other unfortunate aphid. (Makes you glad you weren't born an aphid!)
A final note about aphid colonies is that they are generally short lived. They reproduce so well and so fast that the colony soon becomes too big and the available space available for 'sap sucking' becomes limited. The resultant food shortages trigger the birth of winged aphids that fly off to establish new colonies on uninhabited and juicier plants nearby!
So next time you begin to despair when you see aphids on your precious roses... STOP, take a deep breath and have a look at what's going on. You'll be fascinated!
For information on how to control aphids check out the Aphids info page.
Photographs and article by Elaine Shallue
Pic 1 - Green Peach Aphid Colony
 Pic 2 - A Ladybird eating an Aphid
Pic 3 - Ants farming Aphids
Pic 4 - Mummified Aphids
Pic 5 - Parasitic Wasps on Roses
Pic 6 - Moults shed by nymphs
Community Gardens for Gippsland

An exciting community project has been bubbling away in two Gippsland communities since the beginning of this year. Both the Jindivick community in their picturesque corner of West Gippsland, and the Yinnar community in the beautiful Morwell River Valley, are each in the process of creating a Community Garden for their districts.
These community gardens are being made possible by both communities having successfully applied to participate in the Helen Macpherson Smith Trust Community Based Garden Project. This project aims to assist communities affected by the 2009 Victorian bushfires to rebuild and regenerate through gardening activities. The communities are working closely with Sustainable Gardening Australia (SGA), the project managers, to establish these gardens not just for residents of Jindivick and Yinnar but for all residents of the wider district.
Read more
